by
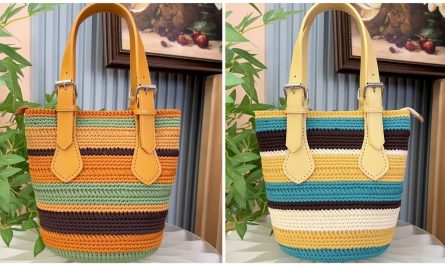
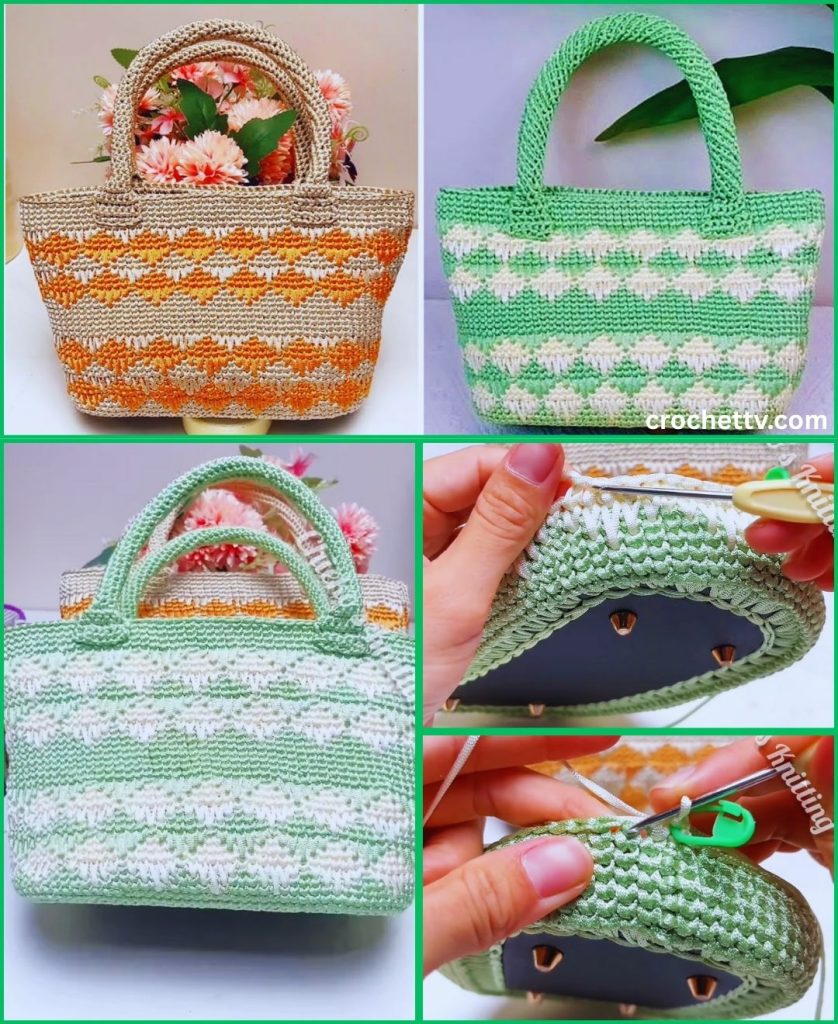
by There’s an undeniable charm to a classic tote bag. It’s the ultimate accessory—versatile enough for a trip to the farmer’s market, a day at the beach, or simply carrying your daily essentials. Now, imagine that perfect tote, but with the added warmth and personality of being handmade by you.
This comprehensive tutorial will guide you through every step of creating a beautifully designed, sturdy, and endlessly stylish striped crochet tote bag. We’ll focus not just on the pattern, but on the design principles that elevate a simple project into a cherished accessory. Using basic stitches and a straightforward construction, this project is incredibly rewarding and perfect for anyone looking to create a functional piece of art.
Part 1: The Design Philosophy – Crafting Your Classic Tote
The difference between a homemade-looking project and a handmade masterpiece often lies in the details of the design. Before we even touch a hook, let’s consider the elements that will make your tote bag truly beautiful.
Choosing a Sophisticated Color Palette
Color is the heart of this design. The right combination can evoke a feeling, match a wardrobe, or simply bring you joy. Instead of picking colors at random, consider a cohesive palette.
- Coastal Chic: Combine a sandy beige (Main Color) with a soft seafoam green and a classic navy blue.
- Urban Modern: Use a charcoal grey (Main Color) with stripes of crisp white and a bold mustard yellow.
- Monochromatic Elegance: Work with shades of a single color, such as cream, taupe, and deep espresso brown, for a subtle and luxurious feel.
- Sunset Ombre: Blend colors from a sunset, like a soft coral, a vibrant orange, and a deep magenta, against a neutral base.
For this tutorial, we will use a three-color “Coastal Chic” palette:
- Color A (Main Color): Sandy Beige (approx. 250 yards)
- Color B (Accent 1): Seafoam Green (approx. 100 yards)
- Color C (Accent 2): Navy Blue (approx. 100 yards)
The Power of the Half Double Crochet Stitch
While the single crochet creates a very dense fabric, we will be using the Half Double Crochet ($hdc$) for the body of this tote. Why?
- Speed: It’s taller than a single crochet, so your bag will work up faster.
- Texture & Drape: It creates a fabric that is still sturdy but has a little more flexibility and a lovely, subtle texture.
- Perfect for Totes: It strikes the perfect balance between density (so your keys don’t fall out) and drape (so the bag doesn’t feel stiff as a board).
Part 2: Gathering Your Supplies & Foundation Knowledge
Let’s get everything in order so you can have a smooth and enjoyable crochet experience.
Materials & Tools
- Yarn: Worsted weight (Category 4) cotton or a cotton-blend yarn. Cotton is the superior choice for bags due to its strength, durability, and minimal stretch.
- Crochet Hook: 5.0mm (H-8). Using a hook size that creates a tight fabric is key to a sturdy bag.
- Stitch Marker: Essential for keeping track of the beginning of your rounds, especially when working in a spiral.
- Tapestry Needle: For professionally weaving in your ends.
- Scissors: A sharp pair for clean cuts.
Essential Information
- Skill Level: Advanced Beginner
- Terminology: All instructions use standard US crochet terms.
- Gauge: Approximately 14 stitches and 10 rows in
$hdc$= 4×4 inches (10×10 cm). Gauge isn’t critical, but consistency is. - Finished Size: Approximately 15 inches (38 cm) wide and 13 inches (33 cm) tall, excluding the straps.
Abbreviations & Stitches
$ch$= chain$st(s)$= stitch(es)$sl\ st$= slip stitch$sc$= single crochet$hdc$= half double crochet (Yarn over, insert hook in stitch, yarn over, pull up a loop, yarn over, pull through all three loops on hook)$inc$= increase (work 2 stitches in the same stitch)$MR$= magic ring (or$ch$2, and work Round 1 in the 2nd$ch$from hook)
Crucial Technique: The Invisible Color Change
For crisp, clean stripes, you must change color on the very last step of the stitch before the new color begins.
- Work the final
$hdc$of the old color up to the very last step (when you have three loops on your hook). - Drop the old color. Yarn over with the new color.
- Pull the new color through all three loops on the hook.
- You have now completed the stitch with the old color and are ready to begin the next round with the new color.
Part 3: The Step-by-Step Crochet Tote Pattern
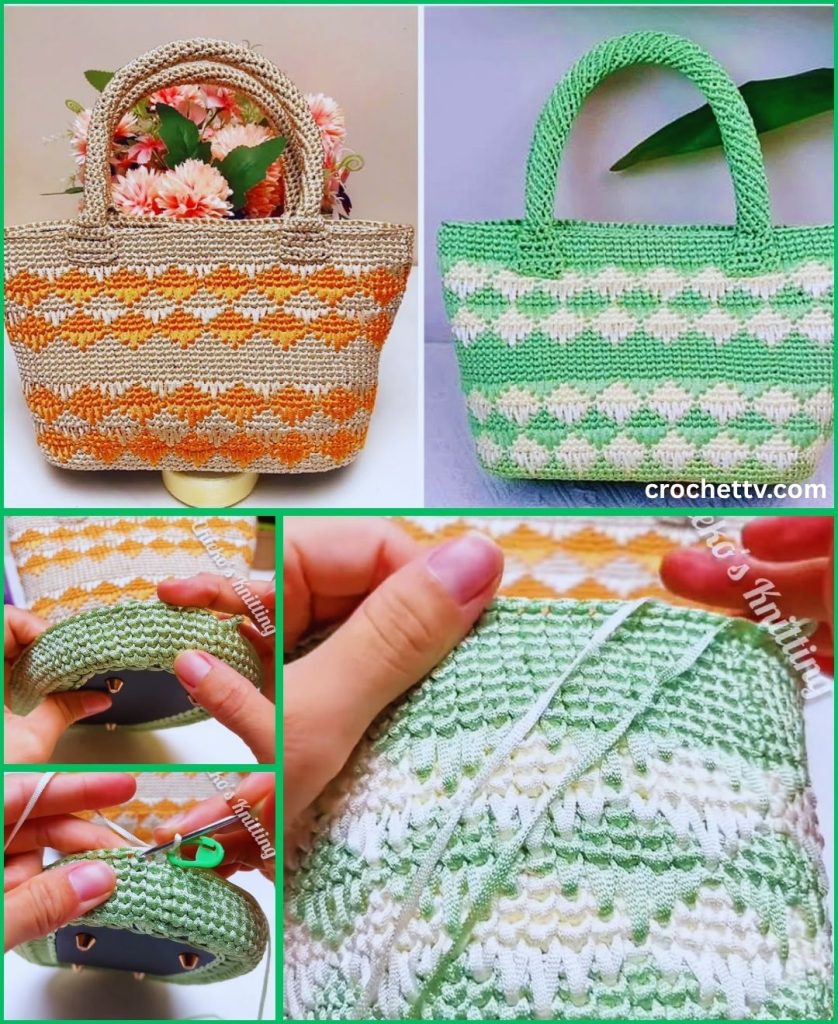
Let’s begin making! We will start with a flat circular base and build the walls of the tote directly from there.
Step 1: The Circular Base
With Color A (Sandy Beige):
- Round 1: Start with a
$MR$. Work 8$hdc$into the ring. Join with a$sl\ st$to the first$hdc$. (8 sts) - Round 2:
$ch$1 (does not count as a stitch). Work an$hdc\ inc$(2$hdc$) in each stitch around. Join with a$sl\ st$. (16 sts) - Round 3:
$ch$1.$hdc$in the next stitch,$hdc\ inc$in the next. Repeat from * to * around. Join. (24 sts) - Round 4:
$ch$1.$hdc$in the next 2 stitches,$hdc\ inc$in the next. Repeat from * to * around. Join. (32 sts) - Round 5:
$ch$1.$hdc$in the next 3 stitches,$hdc\ inc$in the next. Repeat from * to * around. Join. (40 sts) - Round 6:
$ch$1.$hdc$in the next 4 stitches,$hdc\ inc$in the next. Repeat from * to * around. Join. (48 sts) - Round 7:
$ch$1.$hdc$in the next 5 stitches,$hdc\ inc$in the next. Repeat from * to * around. Join. (56 sts) - Round 8:
$ch$1.$hdc$in the next 6 stitches,$hdc\ inc$in the next. Repeat from * to * around. Join. (64 sts) - Round 9:
$ch$1.$hdc$in the next 7 stitches,$hdc\ inc$in the next. Repeat from * to * around. Join. (72 sts) - Round 10:
$ch$1.$hdc$in the next 8 stitches,$hdc\ inc$in the next. Repeat from * to * around. Join. (80 sts) - Round 11:
$ch$1.$hdc$in the next 9 stitches,$hdc\ inc$in the next. Repeat from * to * around. Join. (88 sts) - Round 12:
$ch$1.$hdc$in the next 10 stitches,$hdc\ inc$in the next. Repeat from * to * around. Join. (96 sts)
You should now have a large, flat circle. This will be the base of your tote.
Step 2: The Body of the Bag
Now we stop increasing and start building the walls of the tote.
With Color A (Sandy Beige):
- Round 13:
$ch$1. Work 1$hdc$in the back loop only of each stitch around. Join. (96 sts) – This creates a defined edge between the base and the walls. - Rounds 14 – 20:
$ch$1. Work 1$hdc$in both loops of each stitch around. Join. (96 sts) *At the end of Round 20, change to Color B (Seafoam Green) using the invisible color change method.
Begin the Stripe Pattern:
With Color B (Seafoam Green):
- Rounds 21 – 23:
$ch$1. Work 1$hdc$in each stitch around. Join. (96 sts) *At the end of Round 23, change to Color C (Navy Blue).
With Color C (Navy Blue):
- Rounds 24 – 25:
$ch$1. Work 1$hdc$in each stitch around. Join. (96 sts) *At the end of Round 25, change to Color B (Seafoam Green).
With Color B (Seafoam Green):
- Rounds 26 – 28:
$ch$1. Work 1$hdc$in each stitch around. Join. (96 sts) *At the end of Round 28, change to Color A (Sandy Beige).
With Color A (Sandy Beige):
- Rounds 29 – 31:
$ch$1. Work 1$hdc$in each stitch around. Join. (96 sts) *At the end of Round 31, change to Color C (Navy Blue).
With Color C (Navy Blue):
- Rounds 32 – 33:
$ch$1. Work 1$hdc$in each stitch around. Join. (96 sts) *At the end of Round 33, change to Color A (Sandy Beige).
Create the Top Band:
With Color A (Sandy Beige):
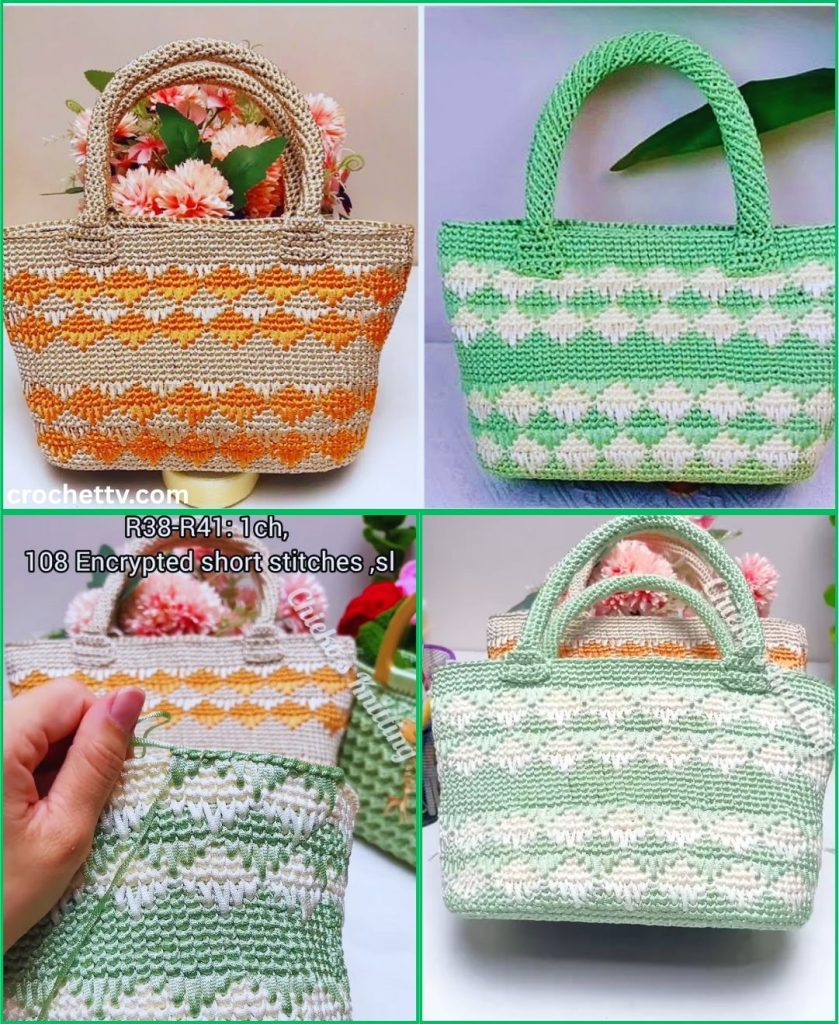
- Rounds 34 – 40:
$ch$1. Work 1$hdc$in each stitch around. Join. (96 sts) - Round 41: To create a sturdy, non-stretch opening, we will switch to single crochet.
$ch$1. Work 1$sc$in each stitch around. Join with a$sl\ st$. (96 sts) - Round 42: Repeat Round 41.
Fasten off and meticulously weave in all your ends on the inside of the bag.
Step 3: The Straps (Make 2)
We will create simple, flat, but very sturdy straps using single crochet.
With Color C (Navy Blue):
- Foundation:
$ch$7. - Row 1:
$sc$in the 2nd$ch$from the hook and in each$ch$across.$ch$1, turn. (6 sts) - Row 2 – 80 (or desired length):
$sc$in each stitch across.$ch$1, turn. (6 sts)
After your final row, do not $ch$ 1. Fasten off, leaving a very long tail (about 15 inches) for sewing. Repeat to make the second strap.
Step 4: Assembly and Final Touches
This final stage is what gives your tote a professional, finished look.
- Lay the Bag Flat: Press your bag flat so the sides are even.
- Position the Straps: Place the ends of the first strap on the outside of the bag. A good placement is to count 12 stitches in from each side seam and place the inner edge of the strap there. The bottom of the strap should sit about 2 inches down from the top rim of the bag.
- Pin Securely: Use stitch markers or pins to hold the strap ends firmly in place. Double-check that the strap is not twisted.
- Sew for Strength: Using the long yarn tail and a tapestry needle, sew the strap onto the bag. The most secure method is to sew a rectangle around the perimeter of the strap end, and then sew a large ‘X’ inside the rectangle for maximum reinforcement. This distributes the weight and ensures your strap will not fail.
- Repeat: Attach the second strap to the other side of the bag, making sure its placement is perfectly symmetrical with the first.
- Final Weave: Weave in the final ends from sewing on the straps.
Part 4: Customization & Care
- Add a Pocket: Before assembling, crochet a small square and sew it to the inside lining for your phone and keys.
- Add a Closure: Sew a magnetic snap closure to the inside top edges for more security.
- Care Instructions: If made with 100% cotton yarn, this tote is machine washable. Use a gentle cycle with cold water and lay it flat to air dry to maintain its shape and size.
You’ve done it! You have successfully created a gorgeous, durable, and classic striped tote bag. You have not only followed a pattern but have also engaged in the design process, making thoughtful choices about color, texture, and construction. Enjoy the compliments you’ll receive and the immense pride of using a beautiful accessory you made with your own two hands.