 by
by Here is a comprehensive, step-by-step guide to crocheting a beautiful and modern handbag using durable polyester cord and a stylish three-color design. This article is crafted to be detailed and guide you through every stage of the process, from creating the base to adding professional finishing touches.
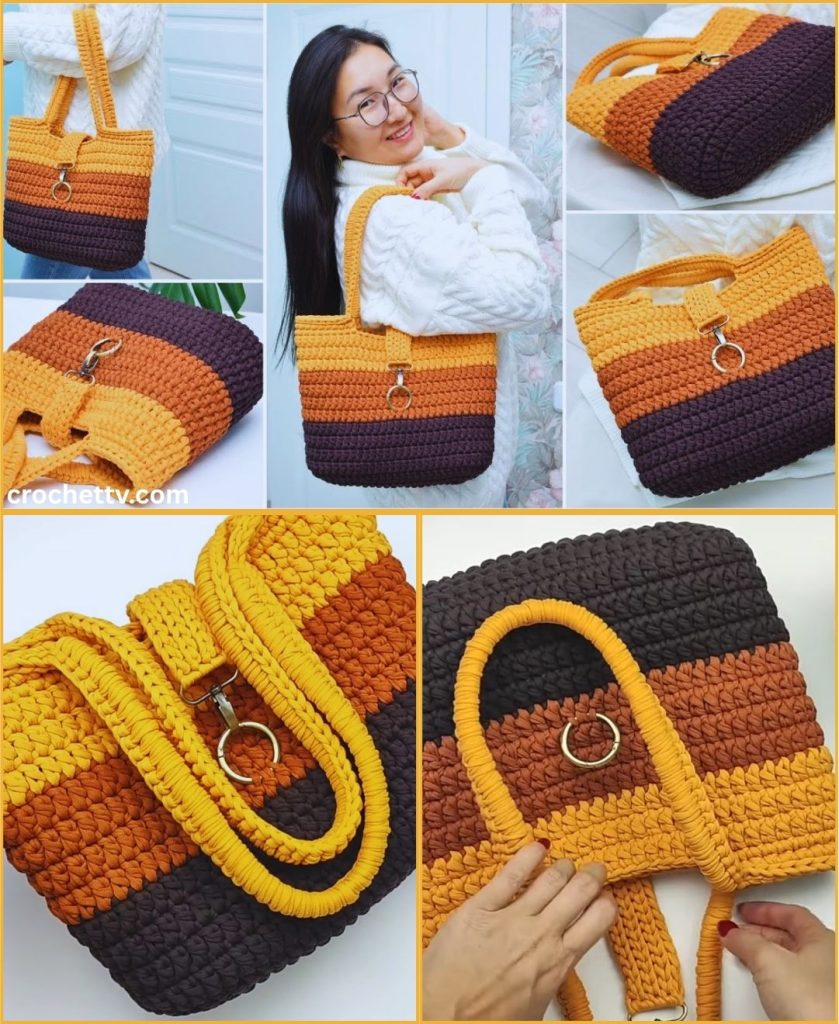
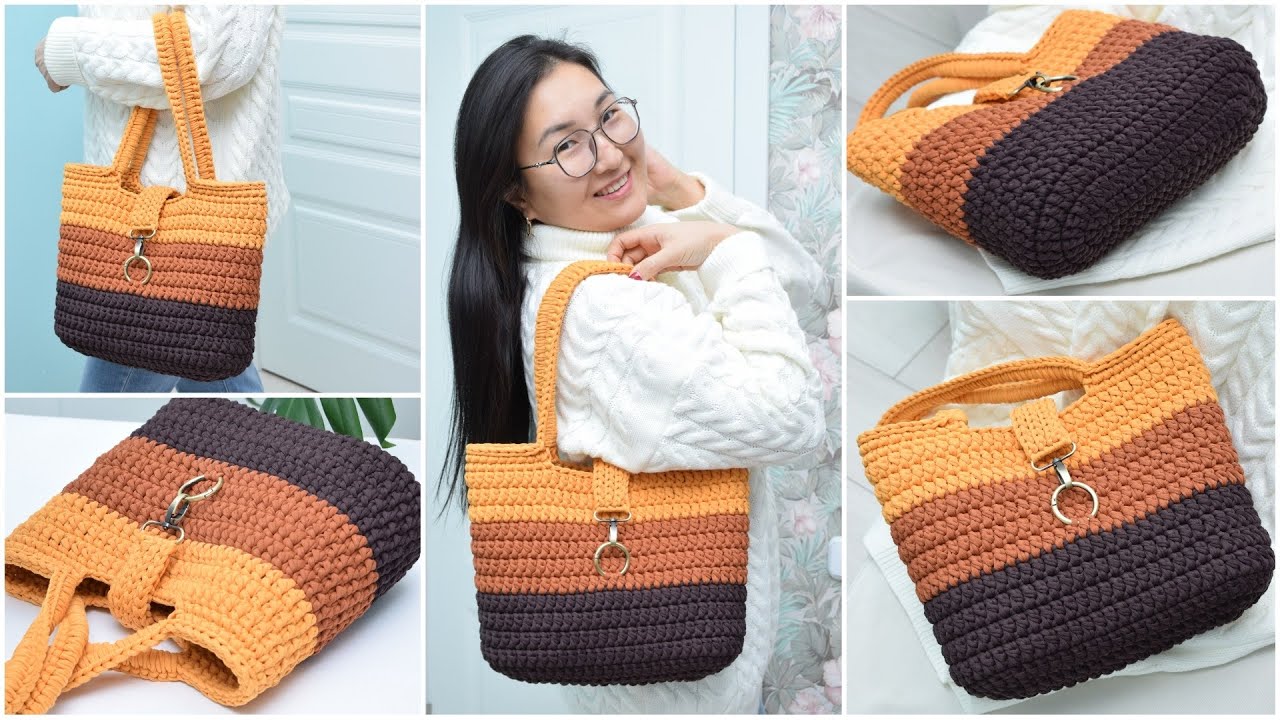
The Ultimate Guide to Crocheting a Chic Three-Color Handbag with Polyester Cord
Creating your own accessories is a deeply rewarding experience, and this crochet handbag project is the perfect place to start or to hone your skills. By using polyester cord, you’ll craft a bag that is not only visually stunning but also incredibly sturdy, structured, and practical for everyday use. The three-color design allows for endless creativity, enabling you to match your bag to your wardrobe or make a bold fashion statement.
This in-depth tutorial is designed for crocheters who are comfortable with the basic stitches (advanced beginner or intermediate level). We will cover the creation of a strong rectangular base, building the color-blocked body, forming seamless integrated handles, and finishing your bag to a professional standard.
Why is Polyester Cord the Perfect Material for This Bag?
Before we begin, it’s worth understanding why polyester cord is the ideal choice for a project like this, distinguishing it from traditional yarn.
- Exceptional Structure: Unlike soft yarns that can result in a floppy bag, polyester cord is stiff. This quality ensures your handbag will stand upright on its own, hold its shape beautifully, and have a high-end, store-bought appearance.
- Durability and Longevity: This material is built to last. It resists abrasion, pilling, and stretching, making it perfect for an item that will see regular use.
- Vibrant, Non-Fading Colors: Polyester holds dye exceptionally well, resulting in rich, saturated colors that are resistant to fading from sunlight.
- Ease of Care: The cord is water-resistant and easy to clean with a damp cloth, which is a major advantage for an everyday handbag.
- Modern Finish: The smooth texture and excellent stitch definition of polyester cord lend a clean, contemporary aesthetic to the finished product.
A Quick Tip: Working with cord can be more strenuous on the hands than working with yarn. Remember to maintain a comfortable grip, take regular breaks, and stretch your fingers and wrists.
Project Overview & Specifications
- Skill Level: Advanced Beginner / Intermediate
- Finished Dimensions (Approximate):
- Base: 13 inches (33 cm) long x 4 inches (10 cm) wide
- Height: 11 inches (28 cm) without handles
- Total Height with Handles: 15 inches (38 cm)
- Gauge: Approximately 9 single crochet stitches and 9 rows = 4 inches x 4 inches (10 cm x 10 cm). While exact gauge isn’t critical for a bag, staying close will ensure similar dimensions.
Materials & Tools
- Yarn: 4mm or 5mm Polyester Cord.
- Color A (Base & Top): Approx. 220 meters (e.g., Charcoal Grey)
- Color B (Middle Section): Approx. 150 meters (e.g., Cream)
- Color C (Accent Stripe): Approx. 50 meters (e.g., Mustard Yellow)
- Crochet Hook: 6.0mm (J−10) or 7.0mm. Choose a hook that creates a tight, dense fabric where you cannot easily see gaps between stitches.
- Stitch Markers: At least 4, for marking the corners of the base.
- Scissors: A sharp pair for a clean cut through the cord.
- Tapestry Needle: A large metal needle with a big eye is essential for weaving in the thick cord ends.
- Measuring Tape: For checking your progress and dimensions.
Stitches & Abbreviations (US Crochet Terms)
- ch: chain
- st(s): stitch(es)
- sl st: slip stitch
- sc: single crochet
- inc: increase (work 2 single crochet stitches in the same stitch)
- BLO: back loop only
- Rnd: round
- PM: place marker
The Pattern: A Detailed Step-by-Step Guide
Part 1: Crocheting the Rectangular Base
We will begin with Color A to create a sturdy, flat rectangular base. We’ll work in continuous rounds (a spiral) to avoid a seam line.
With Color A:
Foundation: Chain 26 (ch 26).
Rnd 1:
- Work 1 sc in the 2nd ch from the hook. PM in this stitch; this is your first corner.
- Sc in the next 23 chains.
- Work 3 sc in the last chain. PM in the second (middle) stitch of this 3-sc group; this is your second corner.
- Continue working on the opposite side of the foundation chain. Sc in the next 23 stitches.
- Work 2 sc in the final stitch (which already contains your first stitch).
- (Total: 52 sts)
Rnd 2:
- Work 3 sc in the marked stitch (your first corner). Move the marker to the middle stitch of this new 3-sc group.
- Sc in the next 24 sts.
- Work 3 sc in the marked stitch (your second corner). Move the marker to the middle stitch of this group.
- Sc in the next 24 sts.
- Work 3 sc in the last stitch of the round. PM in the middle stitch of this group. Note: You’ll now have 4 marked corners.
- (Total: 60 sts)
From now on, you will work 3 sc in each of the 4 marked corner stitches and 1 sc in all other stitches.
Rnd 3:
- Sc in each stitch until you reach the first marked corner.
- Work 3 sc in the marked stitch. Move the marker to the middle stitch of this group.
- Repeat this pattern for the remaining 3 corners.
- (Total: 68 sts)
Rnd 4:
- Repeat the process of Rnd 3.
- (Total: 76 sts)
Rnd 5:
- Repeat the process of Rnd 3.
- (Total: 84 sts)
Your base should now be a perfect, flat rectangle measuring approximately 13 inches by 4 inches. If it starts to curl up, you may need to go up a hook size. If the edges are wavy, your tension is too loose. Lay it flat before moving on.
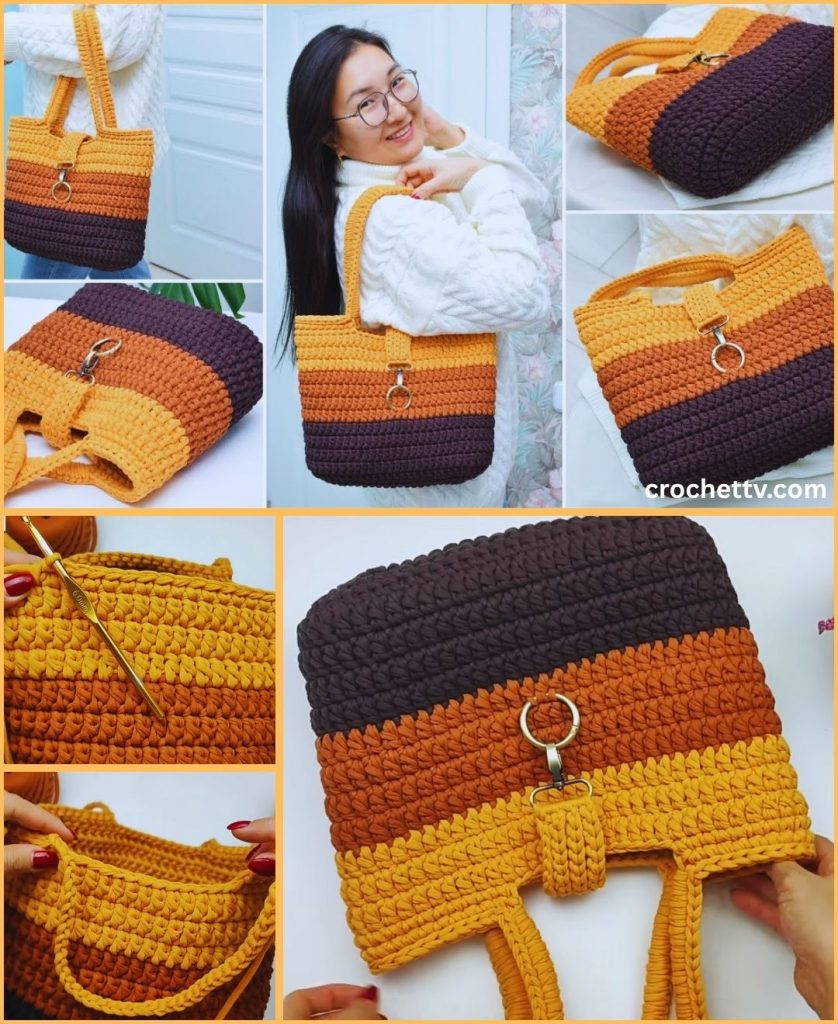
Part 2: Building the Body with Color Blocking
This is where your bag starts to take shape and the color pattern emerges.
Rnd 6 (Transition Round):
- To create a sharp, defined edge between the base and the walls, we will work this entire round in the back loop only (BLO).
- Sc in the BLO of every stitch around. Do not increase at the corners. Remove your stitch markers as you go.
- At the end of the round, join with a slst to the first sc. This is the first and only time you will join like this until the handles. Moving forward, we use joined rounds for clean color changes.
- (Total: 84 sts)
Rnd 7-14 (Color A – Bottom Section):
- Ch 1 (this does not count as a stitch).
- Sc in the same stitch and in every stitch around.
- At the end of the round, join with a slst to the first sc.
- Repeat for 8 rounds total in Color A.
How to Execute a Perfect Color Change: On the final slip stitch of Rnd 14, insert your hook into the first stitch of the round. Yarn over with the current color (Color A) and pull up a loop. You now have two loops on your hook. Drop Color A, pick up your new color (Color B), and pull the new color through both loops on the hook to complete the slip stitch. You have now changed colors seamlessly. Cut Color A, leaving a 6-inch tail to weave in later.
Rnd 15-26 (Color B – Middle Section):
- With Color B, ch 1.
- Sc in every stitch around. Join with a slst to the first sc.
- Repeat for 12 rounds total in Color B. On the final slip stitch of Rnd 26, change to Color C.
Rnd 27-30 (Color C – Accent Stripe):
- With Color C, ch 1.
- Sc in every stitch around. Join with a slst to the first sc.
- Repeat for 4 rounds total in Color C. On the final slip stitch of Rnd 30, change back to Color A.
Rnd 31-34 (Color A – Top Section):
- With Color A, ch 1.
- Sc in every stitch around. Join with a slst to the first sc.
- Repeat for 4 rounds total in Color A. Do not fasten off. We will now proceed directly to creating the handles.
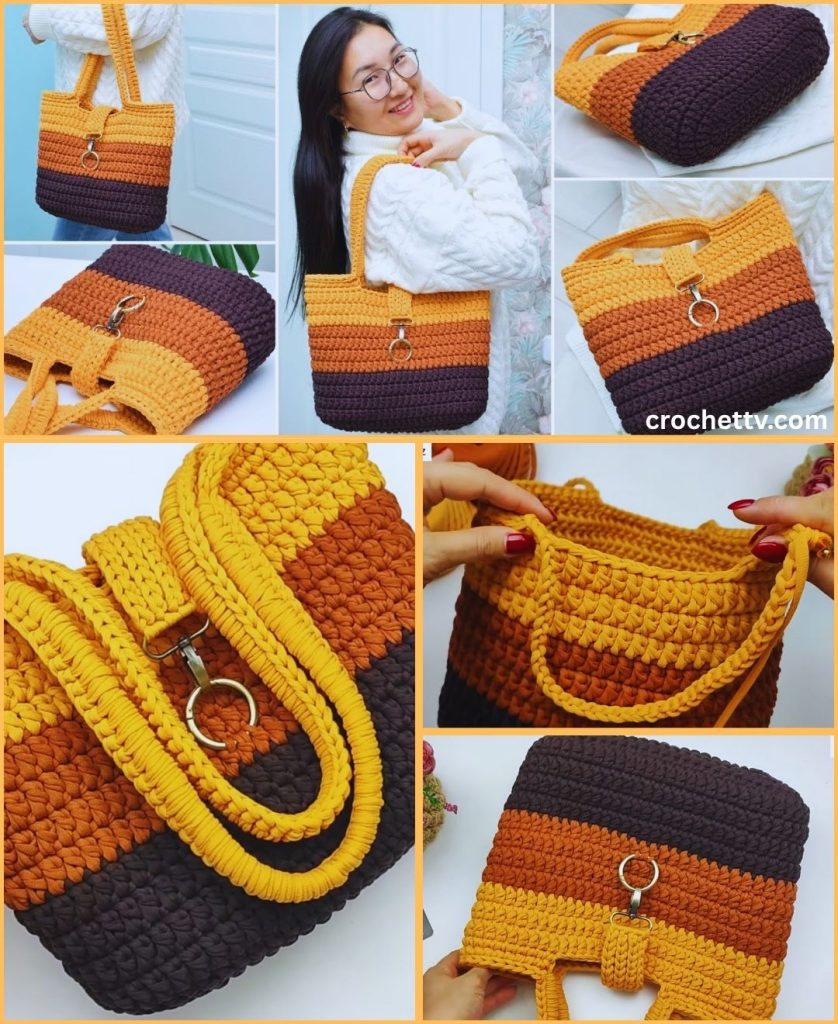
Part 3: Integrating the Handles
Creating handles directly from the body of the bag makes them exceptionally strong and provides a professional, seamless finish.
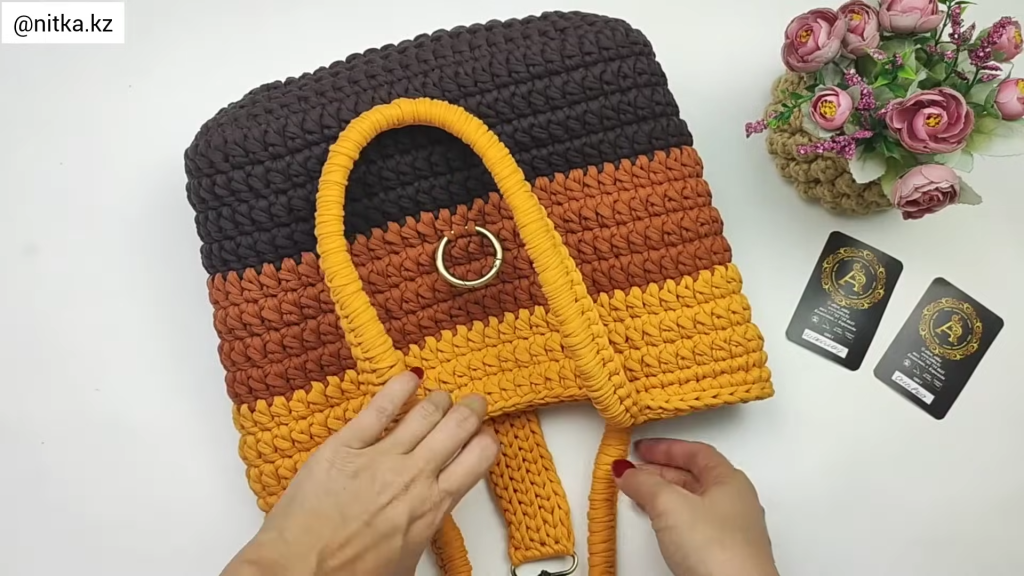
Step 1: Mark Your Handle Placements
- Lay your bag flat, with the joining seam positioned on one of the short sides. Your bag has 84 stitches in total. The long sides should have 34 stitches and the short sides should have 8 stitches.
- On one long side, count in 9 stitches from the edge and place a marker. Then, count 16 stitches from that marker and place a second marker. The 16 stitches between the markers are where your handle will be attached. You should have 9 stitches remaining on the other side.
- Flip the bag and repeat the exact same marking on the other long side. (9 stitches, PM, 16 stitches, PM, 9 stitches).
Rnd 35 (Handle Foundation):
- Continuing with Color A, ch 1.
- Sc in each stitch until you reach your first marker (this will include the 8 sts from the short side and the first 9 sts from the long side).
- Chain 30 (or adjust for a shorter/longer handle drop).
- Skip the 16 stitches between your markers.
- Sc into the stitch immediately following the second marker.
- Continue to sc all the way around to the next marker (this will include the remaining 9 sts on the long side, the 8 sts on the other short side, and the first 9 sts of the second long side).
- Chain 30.
- Skip the 16 stitches between your markers.
- Sc in the remaining stitches and join with a slst to the first sc of the round.
Rnd 36:
- Ch 1.
- Sc in each stitch on the body of the bag.
- When you reach the chain-30 handle, work 35 sc evenly around the chain space. (Working more stitches than chains creates a thicker, more comfortable handle).
- Continue to sc across the other side of the bag.
- Work 35 sc evenly around the second chain-30 space.
- Join with a slst to the first sc.
Rnd 37-38:
- Ch 1.
- Sc in every single stitch around, including all the new stitches you created over the handles. This builds up the handle area for strength and comfort.
- Join with a slst at the end of each round.
Rnd 39 (Final Finishing Round):
- To create a polished and non-stretchy top edge, work one final round of slip stitches in every stitch. Keep your tension for these slip stitches loose and even to avoid puckering the bag’s opening.
- When you have worked a slip stitch in every stitch, cut the cord, leaving an 8-inch tail. Fasten off.
Part 4: Finishing for a Professional Look
These final steps will elevate your handmade bag to a truly polished piece.
- Weave In All Ends: This is the most critical finishing step. With the thick, somewhat slippery polyester cord, you must be thorough. Use your tapestry needle to weave each end back and forth through the inside of the stitches for at least 3 inches, changing direction a couple of times to lock it securely.
- Add a Lining (Highly Recommended): A fabric lining prevents keys and pens from snagging your crochet work, adds another layer of durability, and gives the interior a clean finish. You can easily hand-sew a simple cotton or canvas lining inside.
- Install a Magnetic Closure: For added security, sew a magnetic snap to the top inside edges of the bag. It’s easiest to attach this to your fabric lining before you sew the lining into the bag.
- Accessorize! Consider adding a handmade tassel from Color C, a chic bag charm, or a custom leather tag to one of the handles to personalize your creation.
You have now completed your stunning, durable, and perfectly unique three-color crochet handbag. Wear it with pride, knowing that every stitch was made by you!