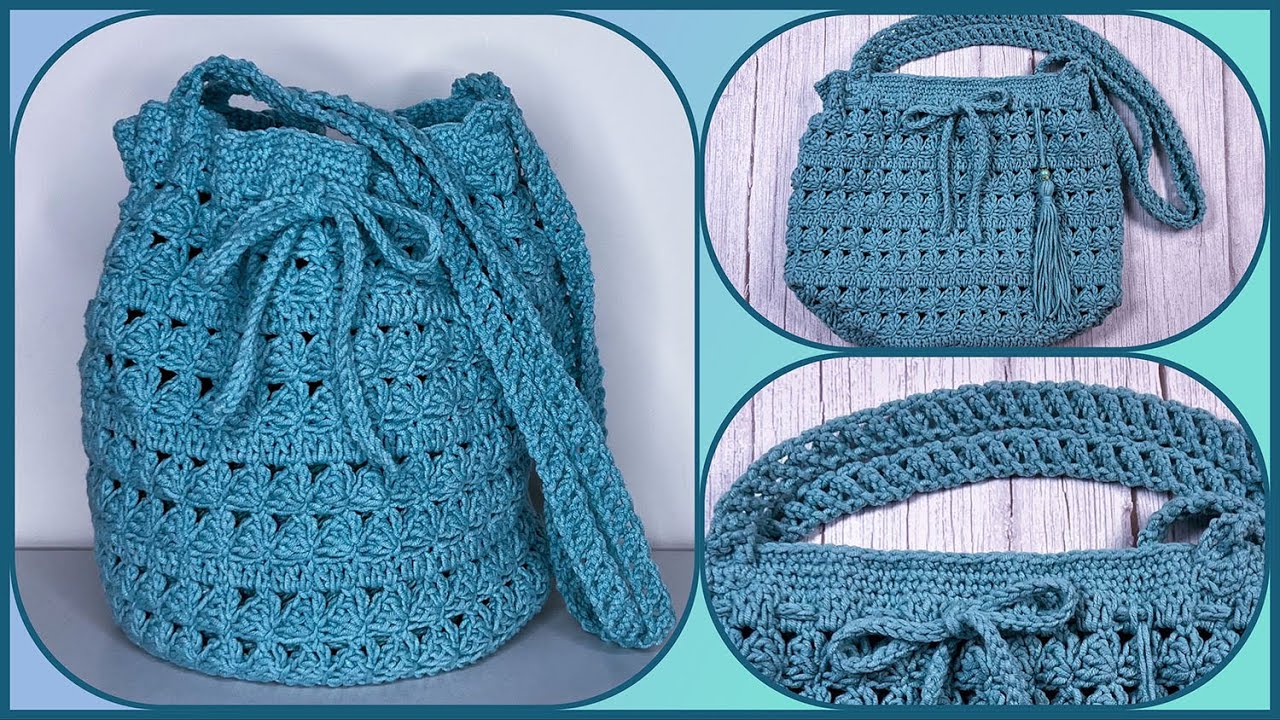
This detailed tutorial will guide you through creating a chic and elegant hollow crochet bag. The “hollow” design refers to a stitch pattern that creates a beautiful, airy, and open texture, perfect for a stylish summer accessory or a delicate project bag. The addition of a crocheted bow adds a touch of classic charm, making this project a fantastic gift or a lovely addition to your own collection. This pattern is very beginner-friendly, relying primarily on basic stitches.
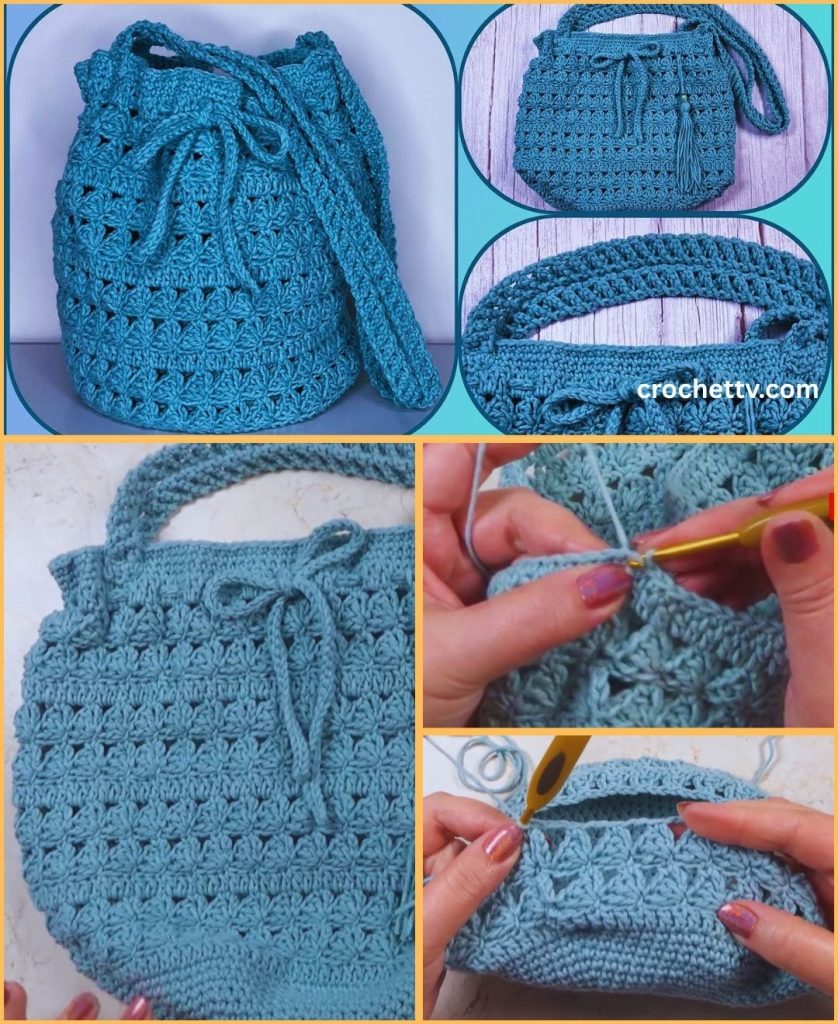
Materials You’ll Need
- Yarn: Approximately 100-150 grams of lightweight (DK/8-ply) or worsted weight (aran/10-ply) cotton or cotton-blend yarn. Cotton is highly recommended for bags as it provides excellent stitch definition and durability. Choose a solid color for a modern look or a variegated yarn for a more bohemian feel.
- Crochet Hook: A hook size appropriate for your chosen yarn. A 4.0mm (G/6) or 5.0mm (H/8) hook is typically a good choice. Always check the yarn label for the recommended hook size.
- Scissors
- Yarn Needle (Tapestry Needle): For weaving in ends and sewing on the bow.
- Stitch Marker: Extremely helpful for keeping track of the beginning of your rounds.
Key Crochet Stitches and Techniques
- Chain (ch): The foundation of most crochet projects.
- Slip Stitch (sl st): Used to join rounds and finish off.
- Single Crochet (sc): A short, sturdy stitch.
- Double Crochet (dc): A taller stitch that works up quickly.
- The Hollow Stitch Pattern: This pattern is a combination of double crochets and chain stitches that creates the airy, open-work fabric. It is also known as a
dc, ch 1, sk 1pattern. - Working in the Round: The entire bag is worked in a continuous spiral or joined rounds, depending on your preference.
Part 1: Crocheting the Base of the Bag
A solid, sturdy base is essential for any bag to give it shape and to prevent items from falling through. We will work an oval-shaped base in rows.
- Foundation Chain: Ch 21 (or any odd number to adjust the bag’s width).
- Row 1: Sc in the second ch from the hook and in each ch across until you reach the last chain. Work 3 sc into the last chain. Now, pivot your work and continue working down the other side of the foundation chain. Work 1 sc into each chain stitch across until you reach the very last one. Sl st to the first sc to join and form the oval. (42 stitches total).
- Round 2: Ch 1 (does not count as a stitch). Work 2 sc into the first stitch. Sc in each sc across to the 3 stitches you made in the end. Work 2 sc into each of those 3 stitches. Continue with 1 sc in each sc across to the end. Work 2 sc in the last stitch. Sl st to the first sc to join.
- Round 3: Repeat the pattern of increasing at the ends to create a flat, oval base. Work 2 sc in the first and last two stitches of each end curve. Sl st to join.
Continue increasing in this manner until your base is the desired size for your bag (usually 2-3 rounds is sufficient for a small bag).
Part 2: Creating the Hollow Body of the Bag
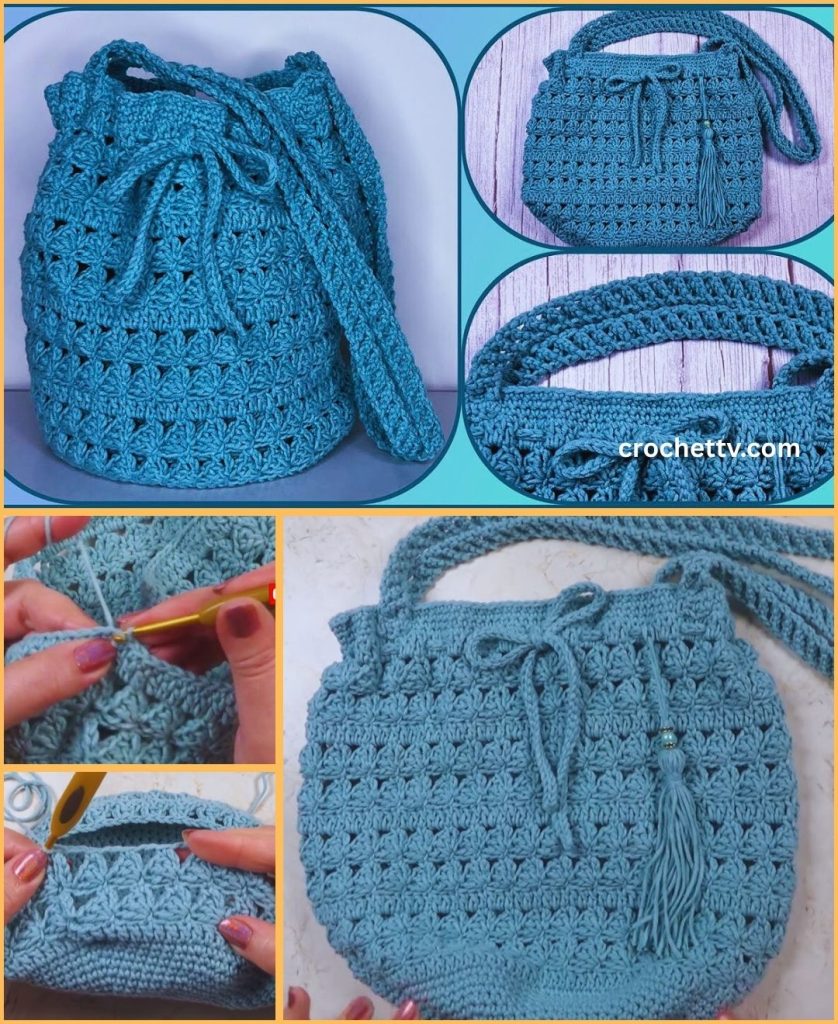
This section is where the magic happens and the beautiful, airy pattern is created. We will work in joined rounds.
- Establish the Pattern:
- Round 1: Ch 3 (counts as your first dc). Ch 1, skip 1 stitch, dc in the next stitch. Repeat from * to * all the way around. Sl st into the 2nd chain of the starting ch-3 to join.
- Continue the Pattern:
- Round 2: Ch 3 (counts as a dc). Ch 1, skip the ch-1 space from the previous round, dc into the dc stitch from the previous round. Repeat from * to * all the way around. Sl st into the 2nd chain of the starting ch-3 to join.
Continue repeating Round 2 until the body of your bag reaches your desired height. The number of rounds will vary based on your yarn and personal preference, but approximately 15-20 rounds will create a nice, medium-sized bag.
Part 3: The Handles and Finishing the Bag
Once the body of the bag is the desired height, it’s time to create a sturdy rim and add the handles.
- Solid Rim: To give the top of the bag structure, we will work a few rounds of solid stitches.
- Round 1: Ch 1. Sc in each dc and ch-1 space around. Sl st to join.
- Round 2: Ch 1. Sc in each sc around. Sl st to join.
- Round 3: Repeat Round 2.
- Creating the Handles:
- Round 4 (Handle Round): Ch 1. Sc in the first 10-15 stitches (this will be one side of the bag). Ch 40-50 (or your desired handle length). Skip 20-25 stitches on the bag (the opening for the handle). Sc in the next 20-30 stitches. Ch 40-50. Skip the remaining stitches. Sl st to the first sc to join.
- Round 5: Ch 1. Sc in each sc and in each chain stitch of your handles all the way around the bag. Sl st to join.
- Round 6: Ch 1. Sl st in each sc around. This creates a neat, clean top edge.
Cut your yarn, leaving a 6-inch tail, and fasten off. Weave in all loose ends securely with your yarn needle.
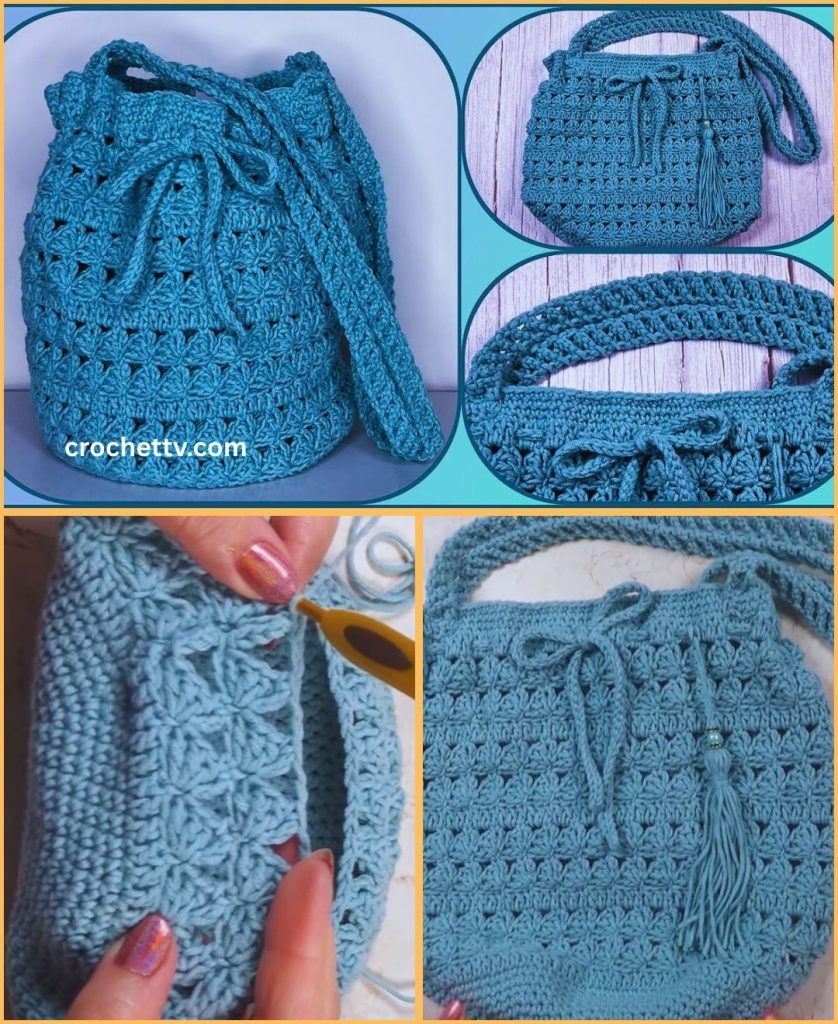
Part 4: Crocheting and Attaching the Bow
The bow is a simple but elegant addition that elevates the bag from simple to stylish.
- Crocheting the Bow:
- The Bow Loops: Ch 16. Hdc in the second ch from the hook and in each ch across. (15 hdc). Ch 1, turn. Work 5-6 rows of hdc to create a rectangle. Fasten off, leaving a long tail for sewing.
- The Center Wrap: Ch 5. Sc in the second ch from the hook and in each ch across. Ch 1, turn. Work 4-5 rows of sc to create a small rectangle. Fasten off, leaving a long tail.
- Assembling the Bow:
- Pinch the large hdc rectangle in the middle, folding it like an accordion.
- Wrap the smaller sc rectangle around the pinched center, sewing the ends together on the back with your yarn needle.
- Attaching the Bow:
- Position your finished bow on the front of the bag, usually centered just below the handles.
- Use the long tail from the bow and your yarn needle to sew the bow securely onto the bag. Stitch through the back of the bow and into the stitches of the bag to ensure it is firmly attached. Weave in the loose end on the inside of the bag.
Tips for a Perfect Finish
- Blocking: For a professional, crisp finish, you can gently block your bag. Simply get the bag damp, shape it, and let it air dry. This will help the hollow stitches open up and lie flat.
- Stitch Count: Keeping a consistent stitch count is key. The
dc, ch 1, sk 1pattern requires an even number of stitches in your base. If you use a different foundation chain, make sure your total stitch count at the end of the base rounds is an even number. - Customization: Feel free to experiment with different sizes, colors, or even different stitch patterns for the handles. You can also add a tassel or a charm for an extra personal touch.
Congratulations! You have successfully created a beautiful and unique Hollow Crochet Bag with a Bow. This project is a testament to how simple stitches can be combined to create an elegant and functional accessory.

