 by
by Sure! Here’s a detailed, long-form article about how to crochet the cutest baby shoes from the square stitch — perfect for beginners and made with pink and white yarn. This tutorial includes step-by-step guidance, materials, tips, and design ideas.
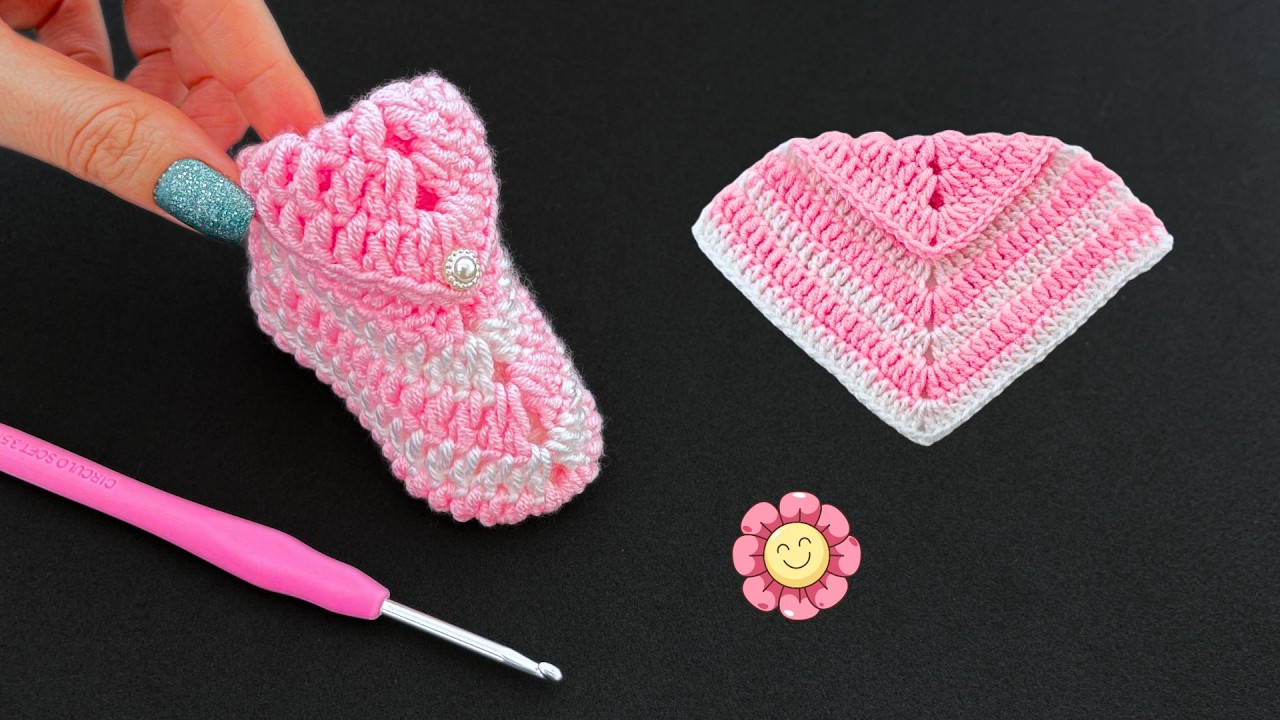
🧶 How to Crochet the Cutest Baby Shoes from the Square Stitch for Beginners (Pink & White)
Crocheting baby shoes is one of the most heartwarming and satisfying projects you can make — especially when they’re tiny, soft, and made with love. Among the many designs, square stitch baby shoes stand out for their simple construction and charming shape. Whether you’re new to crochet or an experienced crafter looking for a quick and adorable project, this tutorial will walk you through how to crochet the cutest baby shoes using pink and white yarn.
Let’s get started!
🌸 Why Choose the Square Stitch?
The square stitch is an excellent pattern for beginners. It produces a neat, structured fabric that’s still flexible and comfortable for baby feet. Its even texture makes shaping easy and gives the shoes a modern, handcrafted look.
- Beginner-friendly: Uses only basic crochet stitches.
- Quick to make: You can finish a pair in a couple of hours.
- Cute and customizable: Perfect for baby showers, gifts, or your own little one.
🧺 Materials You’ll Need
Before you begin, gather your supplies:
Yarn:
- Pink yarn: Medium weight (Category 3 or 4) — about 50 grams
- White yarn: Medium weight (same type) — about 30 grams
(Use soft, baby-safe yarn such as cotton or acrylic blend. Avoid wool blends that may irritate delicate skin.)
Hook:
- 3.5 mm or 4 mm crochet hook (check your yarn label for best results)
Other Tools:
- Yarn needle (for weaving in ends)
- Scissors
- Stitch markers (optional, to mark rounds)
- Measuring tape
🧵 Crochet Stitches and Abbreviations
Before diving in, familiarize yourself with the stitches used in this pattern:
| Abbreviation | Stitch Name | How to Do It (Brief) |
|---|---|---|
| ch | Chain | Yarn over, pull through loop. |
| sc | Single crochet | Insert hook, yarn over, pull through, yarn over, pull through both loops. |
| dc | Double crochet | Yarn over, insert hook, yarn over, pull through, yarn over, pull through two loops twice. |
| sl st | Slip stitch | Insert hook, yarn over, pull through both loops. |
| st(s) | Stitch(es) | Refers to individual stitches. |
👣 Step-by-Step Instructions
We’ll crochet these baby shoes in three main parts:
- Sole
- Upper body (shoe sides)
- Finishing and decorating
1. Crocheting the Sole (White Yarn)
The sole forms the base of your baby shoe. We’ll use white yarn for a soft, classic look.
- Start with a magic ring (or ch 10 if you prefer not to use a ring).
- Round 1:
- Work 2 sc in the 2nd ch from hook,
- sc in the next 7 ch,
- 5 sc in the last ch,
- Now continue on the other side of the chain: sc in next 7 ch, 2 sc in last ch.
- Join with sl st to first sc.
- (24 sts total)
- Round 2:
- ch 1, 2 sc in same st, 2 sc in next st, sc in next 7 sts,
- 2 sc in next 5 sts,
- sc in next 7 sts, 2 sc in last 2 sts, join with sl st.
- (34 sts)
- Round 3:
- ch 1, sc in next st, 2 sc in next, repeat around evenly to expand the sole.
- Join with sl st.
Check the length — for a newborn size, the sole should measure about 3.5–4 inches (9–10 cm). Adjust the number of rounds for larger or smaller shoes.

2. Crocheting the Upper Body (Switch to Pink Yarn)
Now we’ll build up the sides of the shoe with the square stitch pattern using pink yarn.
- Round 4:
- Attach pink yarn to any stitch, ch 1.
- Work one sc in each st around (this forms the edge of the sole).
- Join with sl st.
- Round 5 (Square Stitch Row):
- Ch 3 (counts as dc), dc in next st, ch 1, skip next st, dc in next 2 sts.
- Repeat pattern around: (2 dc, ch 1, skip 1).
- Join with sl st to top of ch 3.
- You’ll start seeing the “square” texture forming.
- Round 6:
- ch 3, dc in next dc, dc in ch-1 space, ch 1, skip next dc, repeat around.
- Join with sl st.
Continue this square stitch pattern for 2–3 more rounds, depending on how tall you want the shoe sides to be. This gives the shoe its body.
3. Shaping the Toe
Now, we’ll close the front of the shoe slightly to shape the toe area.
- Round 9 (toe shaping):
- Work square stitch around until you reach the middle 10 sts at the front.
- Skip those 10 sts (this creates the curve of the toe).
- Continue pattern around to join.
- Round 10:
- sc evenly around, including over skipped stitches, to smooth the edge.
- Join with sl st and fasten off.
You now have a cute shoe shape forming!
4. Adding the Cuff or Strap (White Yarn)
To finish, we’ll add a little cuff or strap using white yarn for a sweet contrast.
Option A: Simple Cuff
- Join white yarn at the back of the shoe.
- ch 1, sc in each st around.
- Repeat 2 more rounds.
- Fasten off and weave in ends.
Option B: Mary Jane Strap
- Join white yarn at the inner side of the shoe.
- ch 20 (for strap), skip 2 sts, sl st to the opposite side.
- Turn, sc along the chain, sl st back into the shoe edge.
- Add a small white or pink button for decoration.
🎀 Finishing Touches
- Weave in all yarn ends using a yarn needle.
- You can add embellishments like tiny bows, crocheted flowers, or pearls.
- For a polished look, edge the top with a final round of reverse single crochet (crab stitch) in white.
👶 Sizing Tips
| Baby Age | Approx. Foot Length | Notes |
|---|---|---|
| 0–3 months | 3.5–3.75 in (9–9.5 cm) | Follow pattern as written |
| 3–6 months | 4–4.25 in (10–10.5 cm) | Add one round to the sole |
| 6–9 months | 4.5–4.75 in (11–12 cm) | Add two rounds to the sole and one round to the upper |
🪡 Pro Tips for Beginners
- Always check your gauge — tighter stitches make smaller shoes.
- Use soft yarn with a little stretch for comfort.
- Mark rounds with stitch markers to keep track of the start point.
- Don’t worry if the first shoe looks uneven — the second one will be perfect!
- Steam block gently (optional) to even out the stitches.
💕 Final Thoughts
Crocheting baby shoes from the square stitch is a delightful way to create something handmade, personal, and irresistibly cute. The combination of pink and white gives a timeless, classic look that works for any baby occasion.
Whether you’re making these for your little one, a baby shower, or to sell at craft fairs, this pattern will surely bring smiles. The best part? Once you master this, you can experiment with colors, ribbons, or even tiny pom-poms for endless variations!
Happy Crocheting! 🧶
With just a hook, two colors of yarn, and a little patience, you’ll have the cutest baby shoes made with love and creativity.