 by
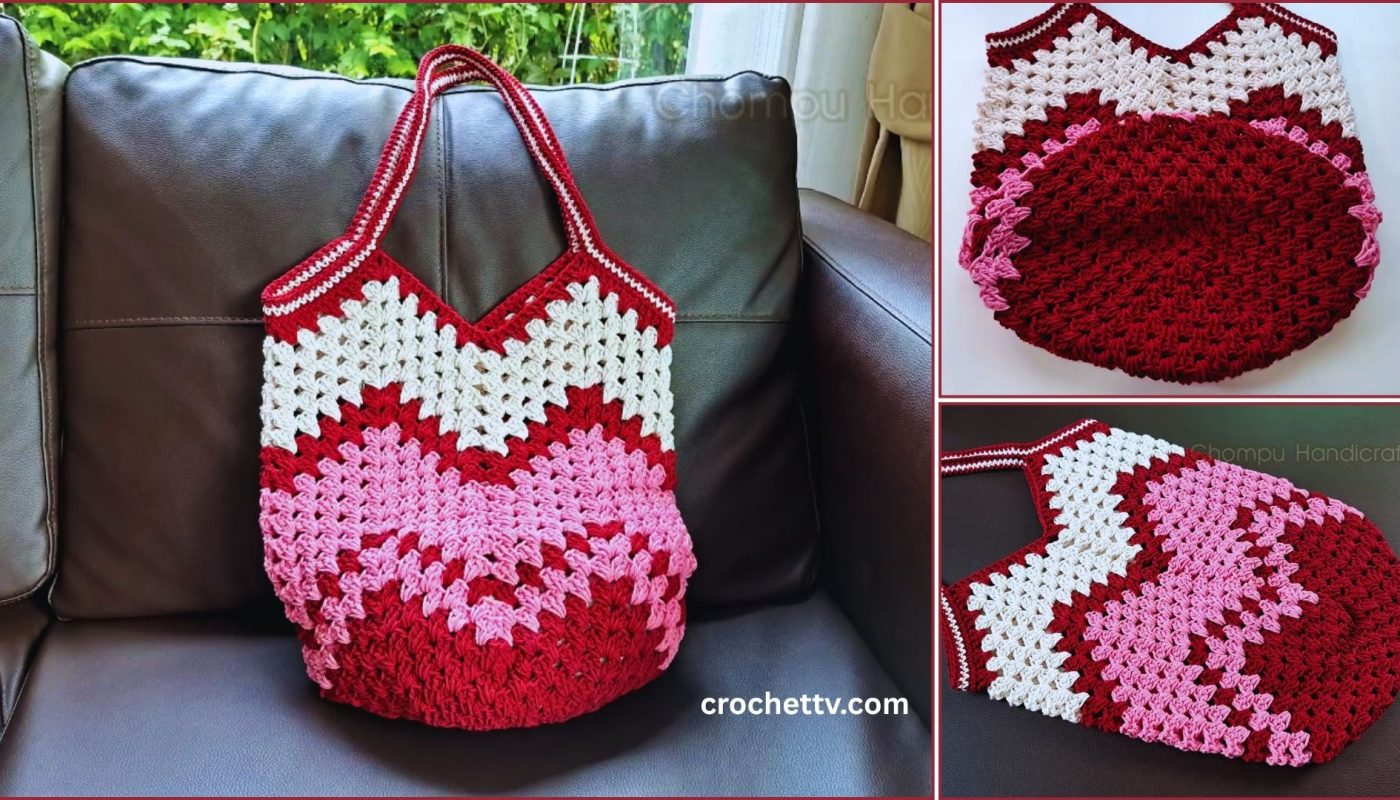
by Welcome! The “Matalada bag,” popularized by a character in a Thai drama, is a vibrant and joyful take on the classic granny square tote. Its charm lies in its colorful, patchwork style and handmade appeal. This detailed guide will walk you through creating your own version from the very first stitch to the final assembly.
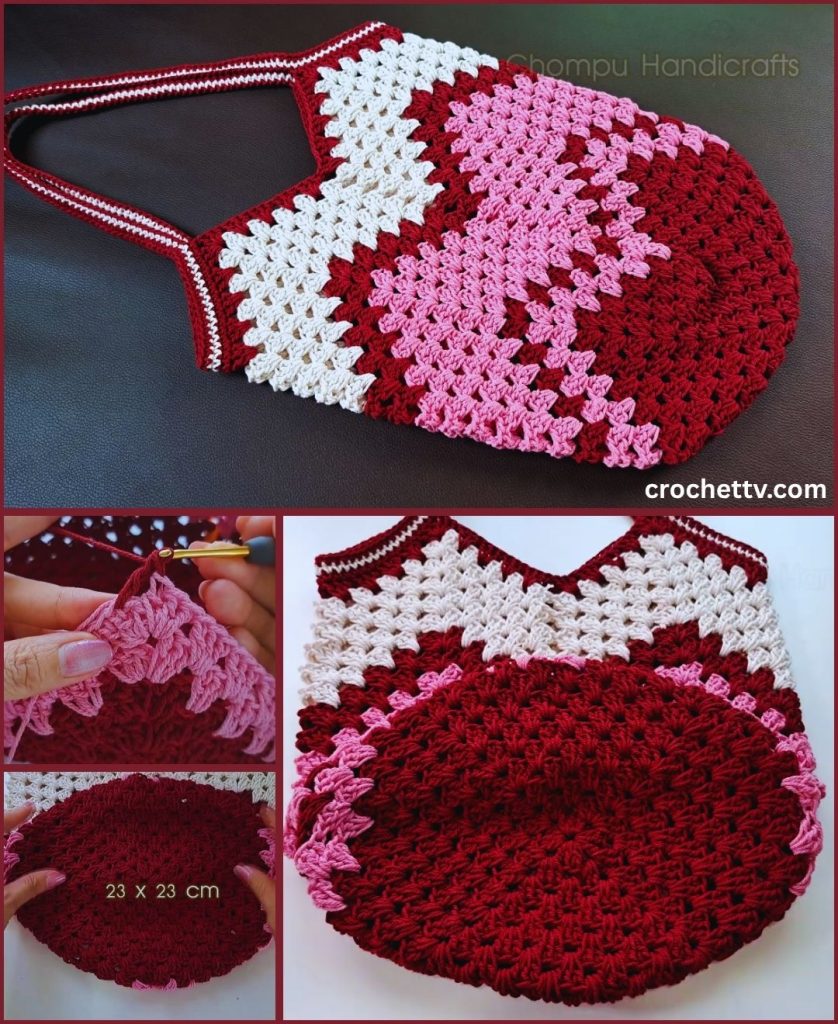
The Ultimate Guide to Crocheting a “Matalada Style” Granny Square Bag
The granny square is one of the most iconic motifs in crochet, and for good reason. It’s simple to learn, quick to make, and endlessly versatile. By combining these small, colorful squares, you can create a stunning and sturdy tote bag, often called a “Matalada Bag,” that is both a fashion statement and a testament to your craft.
This comprehensive pattern will cover:
- Making the classic, colorful granny squares.
- Joining the squares to form the bag’s body.
- Assembling the bag and creating the straps.
- Adding finishing touches for a professional look.
Before You Begin: Gathering Your Supplies & Skills
Preparation is the key to a fun and successful project. Let’s get your tools and materials ready.
Materials You’ll Need:
- Yarn: DK (Category 3) or Worsted Weight (Category 4) yarn. Cotton or a cotton-acrylic blend is highly recommended because it’s strong, holds its shape well, and has minimal stretch.
- Colors: This is where the Matalada style shines! You can use scrap yarn for a truly eclectic look, or choose a curated palette of 5-7 colors that work well together. You’ll also need one main color for joining and the top border if you want a cohesive look.
- Quantity: For a medium-sized bag (approx. 12×12 inches), you will need about 400-600 yards of yarn in total.
- Crochet Hook: A hook size appropriate for your yarn.
- For DK yarn: 3.5mm (E-4) or 4.0mm (G-6) hook.
- For Worsted Weight yarn: 5.0mm (H-8) or 5.5mm (I-9) hook.
- Scissors: A sharp pair for clean cuts.
- Yarn Needle (Tapestry Needle): This is absolutely essential for weaving in all the ends from your color changes and for joining the squares.
- Stitch Markers (Optional): Can be helpful for marking corners or stitches.
Essential Stitches & Abbreviations (US Terms)
This pattern uses fundamental crochet stitches.
- ch: chain
- sl st: slip stitch
- sc: single crochet
- dc: double crochet
- sp: space
- st(s): stitch(es)
- (…): stitches worked in the same space
- * … ;: repeat the instructions between the asterisks
A Note on Consistency
The most important factor in a granny square project is making sure all your squares are the same size. Even if your gauge is slightly off from the pattern, as long as your squares are consistent, your bag will assemble beautifully. Make one test square first to check its size and your tension.
Part 1: Crocheting the Granny Squares (The Building Blocks)
For a medium-sized bag, you will need a total of 29 squares.
- 13 squares for the front panel.
- 13 squares for the back panel.
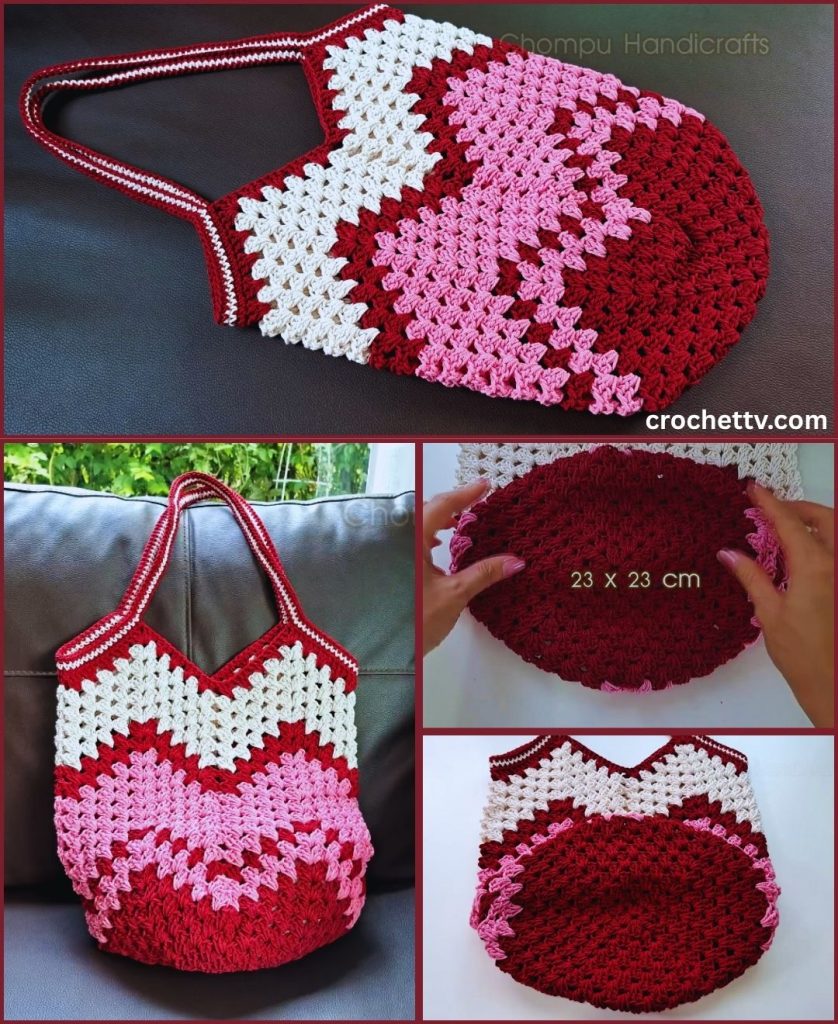
- 3 squares for the bottom.
Wait, why 13? We will arrange them in a specific shape to create the bag’s structure.
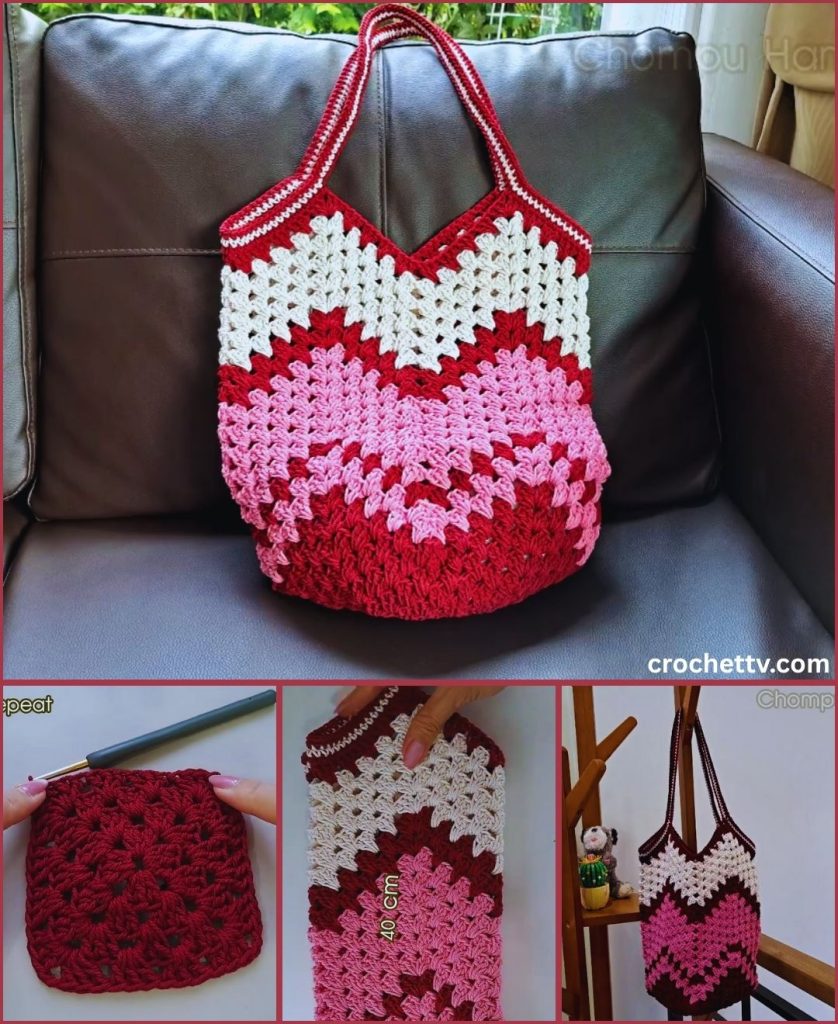
Classic 3-Round Granny Square Pattern
Each square is worked in the round. You can change colors every round for maximum vibrancy or use just two colors.
To Start: Create a slip knot and ch 4. Sl st into the first ch to form a ring. (Alternatively, you can start with a magic ring).
Round 1: Ch 3 (counts as your first dc). Work 2 dc into the center of the ring. Ch 2. *Work 3 dc into the ring, ch 2; rep from * two more times. Sl st to the top of the beginning ch-3 to join. (You should have 4 clusters of 3-dc, and 4 ch-2 corner spaces. Fasten off and weave in ends if changing colors).
Round 2: Join your new color in any ch-2 corner space. Ch 3 (counts as first dc). In the same corner space, work (2 dc, ch 2, 3 dc) — this is your first corner. *Ch 1. In the next ch-2 corner space, work (3 dc, ch 2, 3 dc); rep from * two more times. Ch 1. Sl st to the top of the beginning ch-3 to join. (You now have 8 clusters of 3-dc and 4 ch-1 side spaces).
Round 3: Join your new color in any ch-2 corner space. Ch 3 (counts as first dc). In the same corner space, work (2 dc, ch 2, 3 dc). *Ch 1. Work 3 dc in the next ch-1 space. Ch 1. In the next corner space, work (3 dc, ch 2, 3 dc); rep from * two more times. Ch 1. Work 3 dc in the last ch-1 space. Ch 1. Sl st to the top of the beginning ch-3 to join. (You have 12 clusters of 3-dc).
Finishing a Square: Fasten off, leaving a 6-inch tail. Use your yarn needle to meticulously weave in all starting and ending tails. This is a crucial step! Weaving in ends as you go will save you a massive headache later.
Now, repeat this process until you have 29 squares. Mix and match your colors to create a beautiful, random-looking assortment.
Part 2: Assembly – The Magic of Joining
This is where your pile of squares transforms into a bag. We will use a “join-as-you-go” method in theory, but by first laying out our pieces.
Step 1: The Layout
The bag is constructed from two main panels (front and back) and a bottom strip.
- Front & Back Panels (Make 2): Arrange 13 squares for each panel in the following shape:
- Row 1: 3 squares
- Row 2: 4 squares
- Row 3: 3 squares
- Row 4: 3 squares This creates a panel that is 3 squares wide and 4 squares tall, with one row extended for width.
- Bottom Panel (Make 1): Arrange 3 squares in a single line.
Lay your squares out on a flat surface to decide on a color arrangement you love before you start joining.
Step 2: Joining Method
There are many ways to join granny squares. For a sturdy bag, a visible and strong join is often best. The Single Crochet Join is perfect for this.
How to do the Single Crochet Join:
- Hold two squares with the wrong sides together.
- Insert your hook through the ch-2 corner space of both squares.
- Join your joining-color yarn with a slip stitch, then ch 1.
- Work 1 sc in that same corner space, going through both squares.
- Now, work your way down the side, inserting your hook through the back loop only of each stitch on the square facing you, and the front loop only of each stitch on the square behind it. Work 1 sc in each corresponding pair of loops.
- When you reach the stitches that make up the ch-1 space between clusters, work 1 sc through both chain spaces.
- Continue until you reach the next corner, placing 1 sc in the ch-2 corner space of both squares.
Join your squares into the panels as you laid them out. You will first create strips, then join the strips together.
Step 3: Assembling the Bag Body
Once you have your two large panels and your bottom strip, it’s time to create the 3D shape.
- Lay the front panel flat, right side up.
- Place the 3-square bottom strip along the bottom edge of the front panel and join them using the same single crochet method.
- Take the back panel and lay it on top, joining it to the other side of the bottom strip.
- You should now have one long, joined piece of fabric: [Front Panel] – [Bottom Panel] – [Back Panel].
- Fold the piece at the bottom seams so the front and back panels are aligned with right sides facing out.
- Using your single crochet join method, seam up the sides of the bag.
You now have the main body of your tote bag!
Part 3: Straps and Top Edging
A bag isn’t complete without its straps and a clean top edge.
Creating the Straps
There are two popular methods for Matalada-style straps.
- Method 1: Simple Crocheted Straps (Sturdy & Fast)
- Decide on the width of your strap (e.g., 6-8 stitches wide).
- Ch 7-9.
- Row 1: Sc in the 2nd ch from the hook and in each ch across. Ch 1, turn.
- Row 2: Sc in each st across. Ch 1, turn.
- Repeat Row 2 until your strap reaches the desired length (typically 20-25 inches for a shoulder bag). Make two identical straps.
- Method 2: Granny Square Straps (Decorative)
- Make an additional 10-14 granny squares (5-7 per strap).
- Join them end-to-end to create two long, narrow strips.
- This method is beautiful but can be stretchy. It is highly recommended to back the straps with a non-stretch ribbon or fabric to prevent them from stretching out with use.
Attaching the Straps
- Position the straps on the inside of the bag’s top edge. A good placement is to align the outer edge of the strap with the second square in from the side.
- Pin them securely in place.
- Using your yarn needle and a length of the joining yarn, sew the straps firmly to the bag. Use a reinforcing stitch, like sewing a square with an “X” through it, to ensure they are very secure.
Finishing the Top Edge
Adding a few rounds of crochet around the top opening gives the bag a professional finish and adds stability.
- Join your main color yarn at one of the side seams.
- Round 1: Ch 1. Work 1 sc evenly around the entire top opening of the bag. Aim to place about 1 sc in each stitch and 2 sc for every ch-2 space you encounter. The key is to keep the edge from puckering or ruffling. Sl st to join.
- Rounds 2-4: Ch 1. Work 1 sc in each st around. Sl st to join.
- After your final round, fasten off and weave in the last end.
Part 4: Final Touches & Customization
- Lining the Bag: This is a highly recommended final step. A fabric lining prevents the crochet from stretching under weight and stops small items like keys or pens from poking through. You can hand-sew or machine-sew a simple cotton lining to fit inside the bag.
- Add a Tassel: A large, colorful tassel attached to a strap base adds a fun, bohemian flair.
- Add a Closure: Sew a magnetic snap or a button with a crocheted loop to the inside top edge if you’d like to be able to close your bag.
You have now created your very own Matalada-style granny square bag! This vibrant, unique piece is a celebration of color and craft, perfect for carrying a bit of handmade joy with you wherever you go.