 by
by Here is a detailed, long-form tutorial on how to crochet a classic bucket hat. This guide is designed to be easy to follow for beginners, breaking down every step of the process from sizing to the final stitch.
Crochet Your Own Cool: The Ultimate Beginner’s Bucket Hat Tutorial
The bucket hat is more than just a trend; it’s a timeless accessory that blends style, comfort, and practicality. It’s the perfect companion for sunny days, music festivals, or just adding a touch of laid-back cool to any outfit. And the best part? You can create a custom, high-quality bucket hat yourself with just a hook and some yarn.
This comprehensive tutorial will guide you through every step of creating a classic crochet bucket hat. We’ll cover how to get the perfect size, how to form the distinct shape, and how to add a stylish brim. This project is built on simple stitches and a straightforward construction, making it perfect for confident beginners who are ready to tackle their first wearable piece.
Let’s get started and crochet a hat that you’ll be proud to wear everywhere.
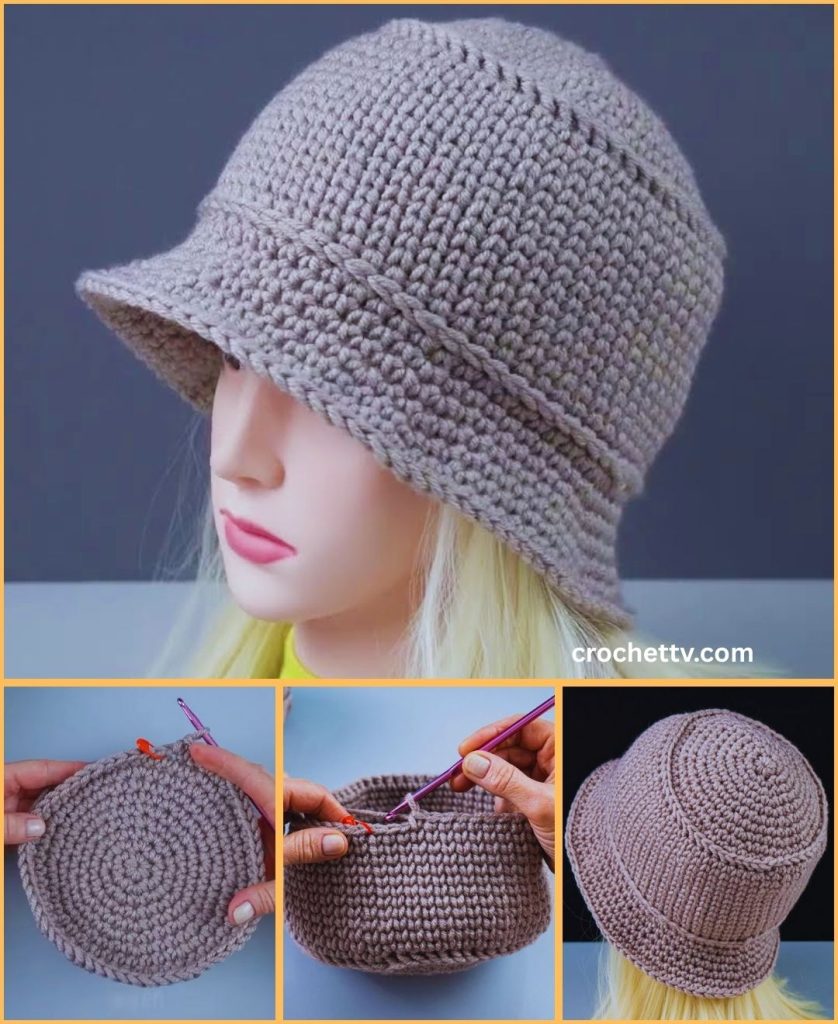
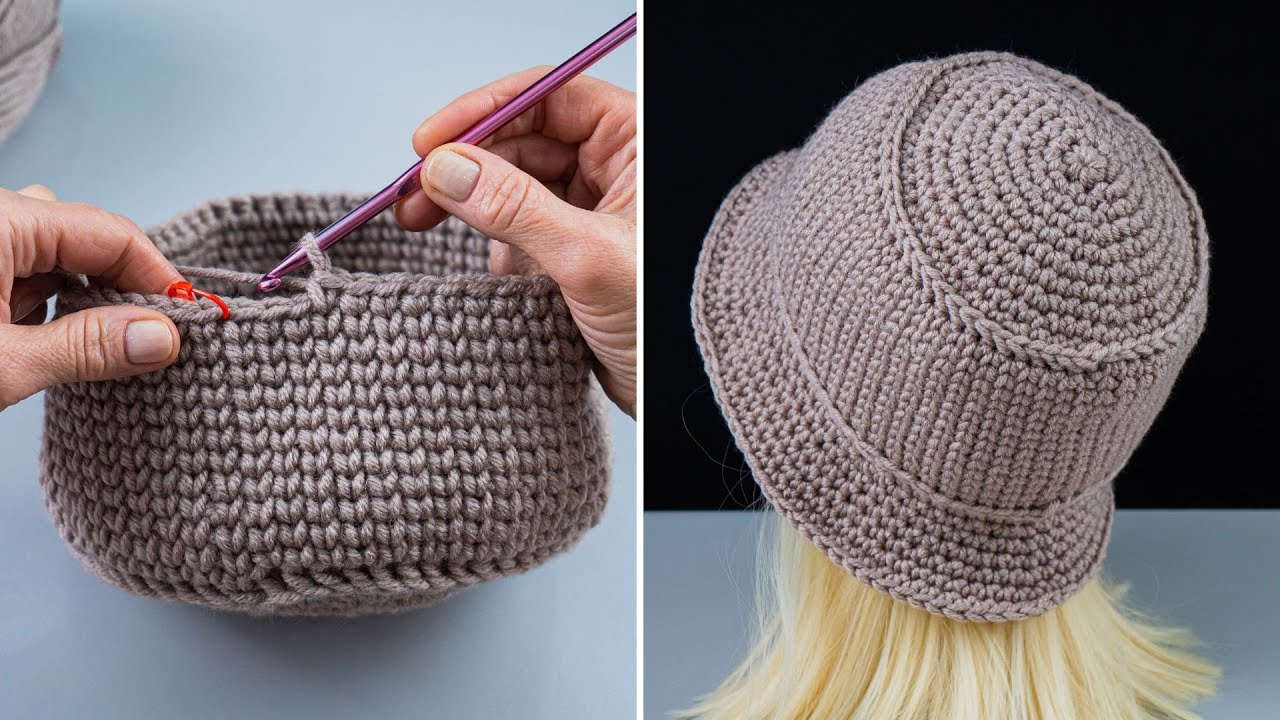
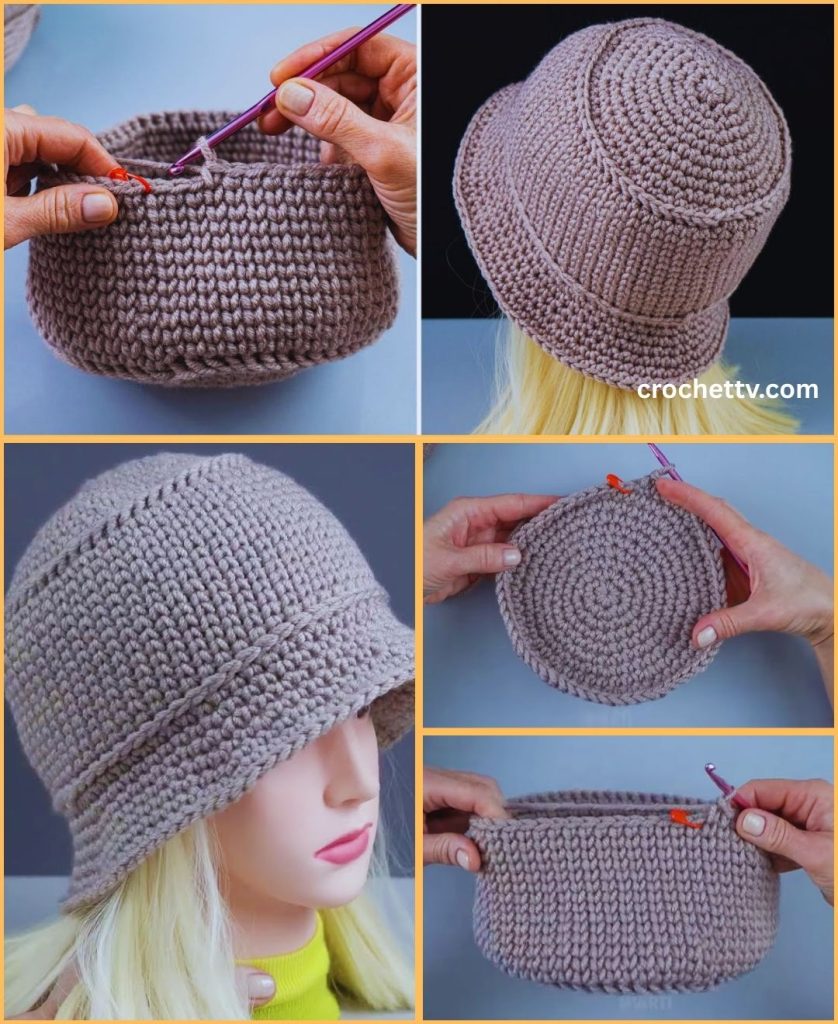
Part 1: The Anatomy of a Bucket Hat
Understanding the simple construction of a bucket hat makes the whole process much less intimidating. We’ll be creating it from the top down in three distinct sections:
- The Crown: This is the flat circle that sits on the very top of your head. We create this by crocheting in the round and increasing our stitches evenly in each round.
- The Body: These are the straight, vertical sides of the hat. We achieve this by simply stopping the increases and working even rounds, building the height of the hat.
- The Brim: This is the flared edge that provides shade. We create this by starting to increase our stitches again, causing the fabric to fan out.
Part 2: Choosing Your Materials
The yarn you choose will have a big impact on the final look and feel of your hat.
- Yarn: The best choice for a classic bucket hat is 100% Cotton yarn in a worsted weight (Category 4).
- Why Cotton? Cotton is breathable (perfect for warm weather), holds its shape beautifully for a crisp structure, and is very durable.
- Alternatives: Raffia or paper yarn can create a trendy “straw” look. An acrylic yarn will result in a softer, more slouchy hat.
- Quantity: You will need approximately 150 – 200 yards (140 – 185 meters). One skein is usually enough.
- Crochet Hook: A 4.5mm (G-7) or 5.0mm (H-8) hook will work well. Using a hook that is slightly smaller than the yarn label recommends can create a tighter, denser fabric, which is great for a structured hat.
- Essential Tools:
- Stitch Marker: This is non-negotiable for this project. Since we’ll be working in a continuous spiral, this little clip will mark the beginning of each round so you don’t lose your place.
- Scissors: For cutting yarn.
- Yarn Needle / Tapestry Needle: To weave in your ends for a clean, professional finish.
- Flexible Measuring Tape: Crucial for getting the sizing just right.
Part 3: Sizing is Key!
To ensure your hat fits perfectly, you need to get the first part—the crown—to the correct size.
- Measure Your Head: Use a flexible measuring tape to measure the circumference of your head where the hat will sit (usually across the mid-forehead, just above the ears).
- Calculate Crown Diameter: To get the right fit, you need to crochet a flat circle that is the correct diameter. Use this simple formula: Your Head Circumference / 3.14 (π) = Required Crown Diameter
Here’s a handy chart for standard sizes (but measuring is always best!):
| Size | Head Circumference | Crown Diameter |
| Adult Small | 21 – 21.5 inches (53-55 cm) | ~6.75 inches (~17 cm) |
| Adult Medium | 22 – 22.5 inches (56-57 cm) | ~7 inches (~18 cm) |
| Adult Large | 23 – 23.5 inches (58-60 cm) | ~7.5 inches (~19 cm) |
Export to Sheets
You will stop increasing your crown once it measures your required diameter when laid flat.
Part 4: Stitches & Abbreviations (US Terms)
This pattern uses basic stitches, making it very beginner-friendly.
- MR: Magic Ring (or Magic Circle)
- ch: Chain
- sl st: Slip Stitch
- hdc: Half Double Crochet
- inc: Increase (work 2 stitches into the same space)
- BLO: Back Loop Only
Working in a Continuous Spiral: Instead of joining each round with a slip stitch, we will work continuously. This creates a seamless look. Your stitch marker will be placed in the first stitch of each round to mark your starting point.
Part 5: The Step-by-Step Crochet Pattern
Let’s begin making your hat! This pattern will use Half Double Crochet (hdc) stitches, which work up a little faster than single crochet and provide a great texture.
Part A: The Crown (The Flat Top Circle)
Remember to place your stitch marker in the first stitch of every round!
- Round 1: Create a Magic Ring, ch 1, and work 8 hdc into the ring. (8 stitches)
- Round 2: Work an hdc increase in every stitch around. (16 stitches)
- Round 3:
[1 hdc in the next stitch, hdc inc in the next]Repeat this pattern 8 times around. (24 stitches) - Round 4:
[1 hdc in the next 2 stitches, hdc inc in the next]Repeat 8 times around. (32 stitches) - Round 5:
[1 hdc in the next 3 stitches, hdc inc in the next]Repeat 8 times around. (40 stitches) - Round 6:
[1 hdc in the next 4 stitches, hdc inc in the next]Repeat 8 times around. (48 stitches) - Continue this pattern, adding one more hdc between each increase for every new round.
STOP AND MEASURE! After each round, lay your circle flat and measure its diameter. Stop increasing when your circle’s diameter matches the measurement you calculated in the sizing section.
Part B: The Body (The Straight Sides)
Once your crown is the right size, we will stop increasing to build the height of the hat.
- Transition Round: To create a sharp, defined edge between the crown and the body, we will work this next round in the Back Loop Only (BLO). Work 1 hdc in the BLO of every single stitch around. Do not increase. You will have the same number of stitches as your last crown round.
- Body Rounds: Now, working through both loops as normal, simply work 1 hdc in every stitch around.
- Continue working these even rounds of hdc until the body of your hat measures about 3.5 – 4 inches (9-10 cm) from the transition round, or until the hat reaches the top of your ears when you try it on.
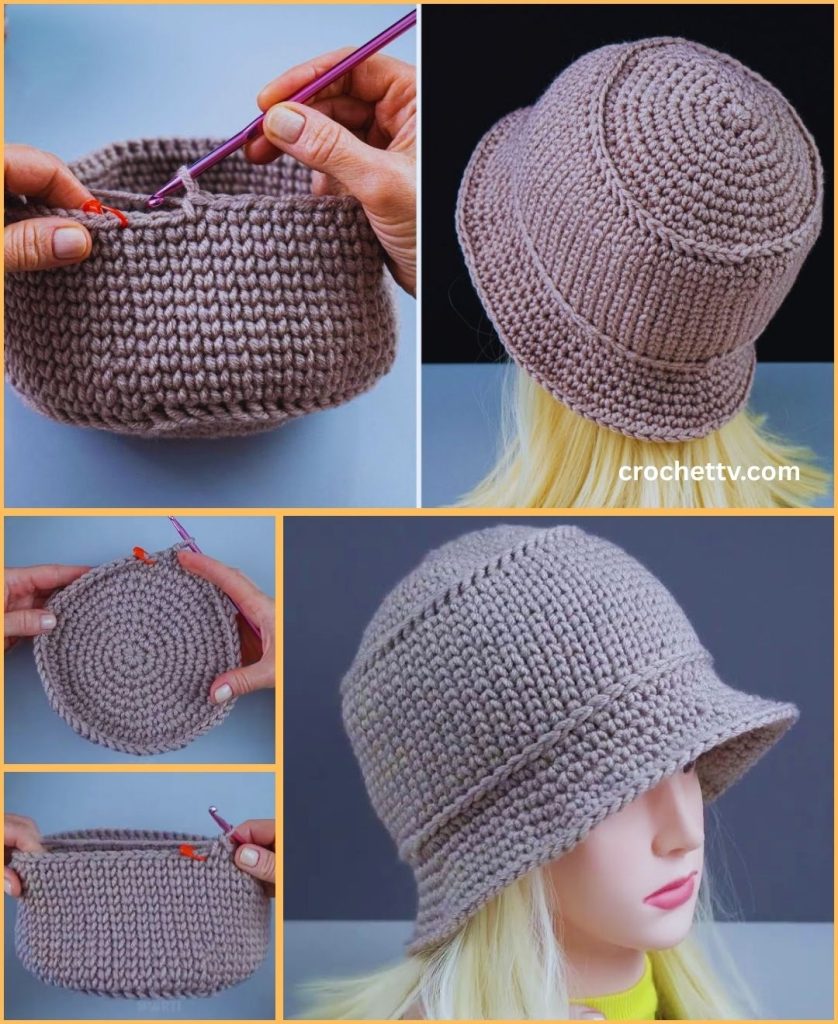
Part C: The Brim (The Floppy Edge)
Now we’ll start increasing again to make the brim flare out.
- Brim Round 1 (Increase):
[1 hdc in the next 5 stitches, hdc inc in the next]Repeat this pattern all the way around. - Brim Round 2 (Even): Work 1 hdc in every stitch around.
- Brim Round 3 (Increase):
[1 hdc in the next 6 stitches, hdc inc in the next]Repeat all the way around. - Brim Round 4 (Even): Work 1 hdc in every stitch around.
- Brim Round 5 (Increase):
[1 hdc in the next 7 stitches, hdc inc in the next]Repeat all the way around.
You can continue this pattern of an increase round followed by an even round to make your brim as wide as you like. A brim of about 2-3 inches (5-7.5 cm) is standard.
Finishing: Once your brim is the desired width, slip stitch into the next stitch to even off the edge. Cut your yarn, leaving a 6-inch tail. Pull the tail through the loop on your hook to fasten off.
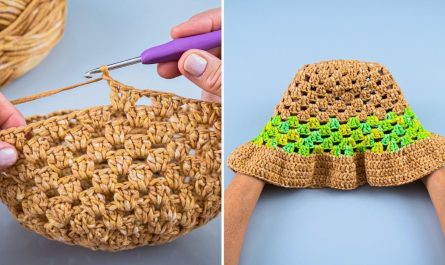
Part 6: Finishing Touches & Customization
The final details make all the difference!
- Weave in Your Ends: Use your yarn needle to meticulously weave the starting and ending tails into the inside of your hat. This is crucial for a durable, professional finish.
- Stiffen the Brim (Optional): If you’d like a less floppy, more structured brim, you can work a final round of tight slip stitches all the way around the edge. This creates a firm, clean finish.
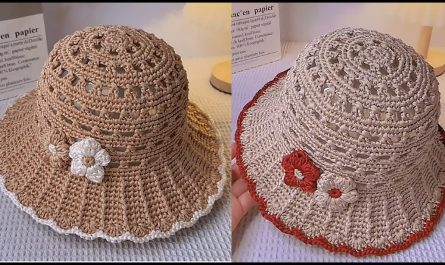
- Customization Ideas:
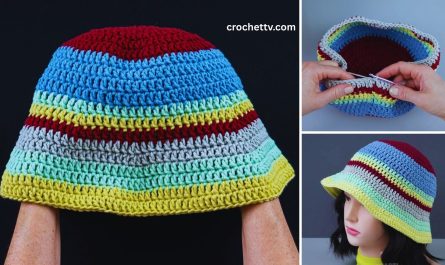
- Stripes: Simply change your yarn color at the beginning of a new round to create fun stripes on the body or brim.
- Contrasting Brim: Make the entire brim in a different color.
- Add a Ribbon: Weave a ribbon or a crocheted cord through the stitches at the base of the crown for a decorative touch.
- Embroidery: Add a small embroidered flower or initial to the front of the hat.
Congratulations! You have successfully crocheted a stylish and perfectly fitted bucket hat. Wear it with confidence, knowing you created it with your own two hands.