 by
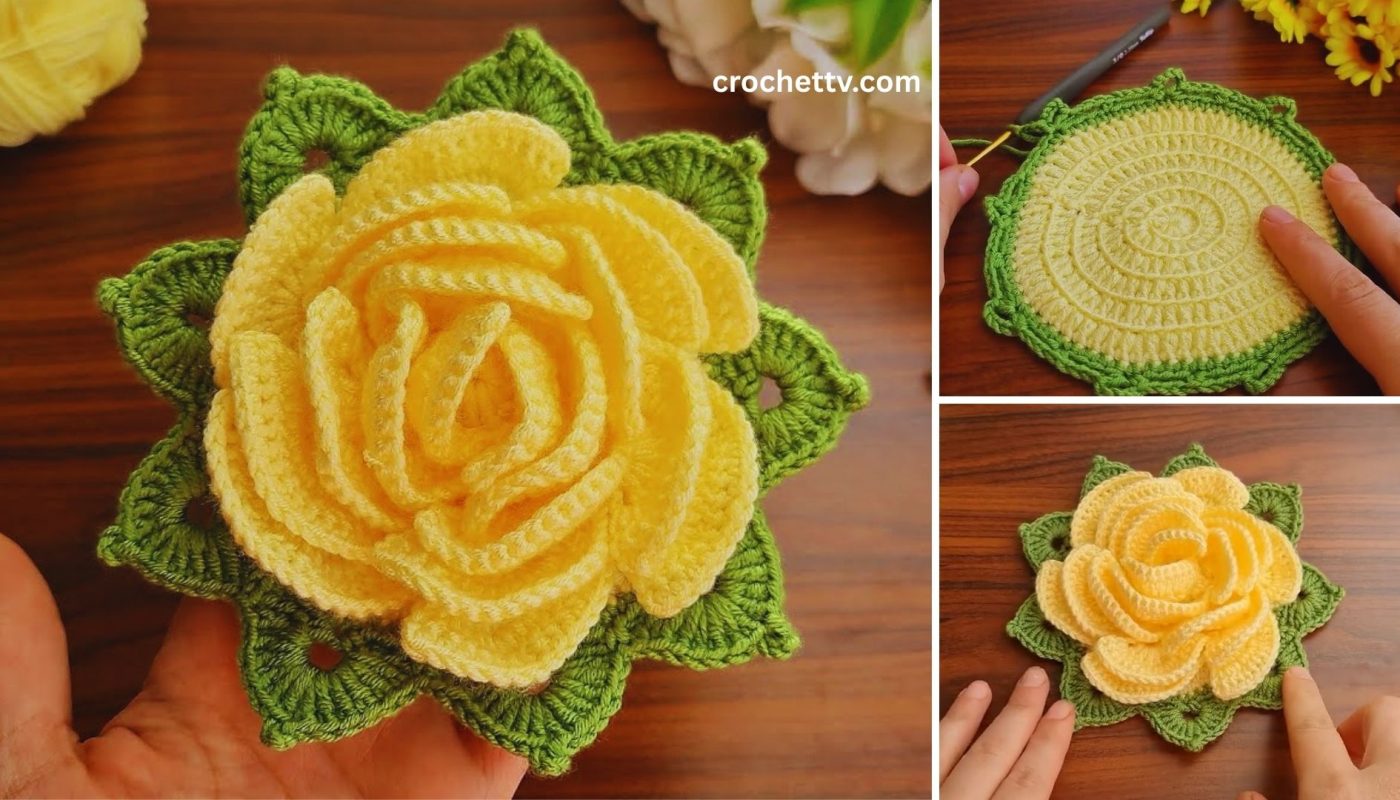
by Crochet flowers never go out of style, and among them, the rose remains the queen. A large crochet rose in two contrasting or gradient colors offers striking visual appeal — perfect for home décor, hair accessories, brooches, wedding bouquets, and more.
In this article, you’ll learn how to crochet a two-tone large rose flower with detailed petal layering and natural shaping, creating a 3D bloom that looks impressive and holds its form.
🧶 What is a Two-Color Large Crochet Rose?
A two-color crochet rose features petals that alternate or transition between two yarn colors. You can use:
- Gradient style: One color for inner petals and another for outer ones.
- Layered contrast: Alternating colors in each petal layer (e.g., red and white or pink and cream).
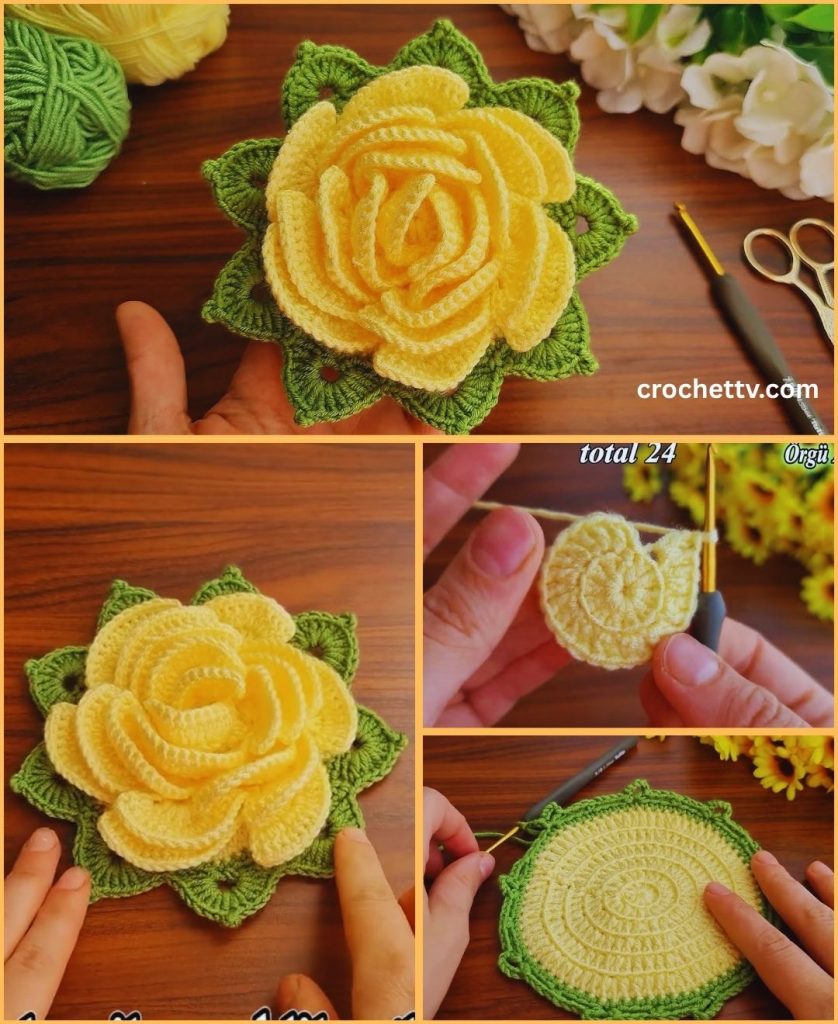
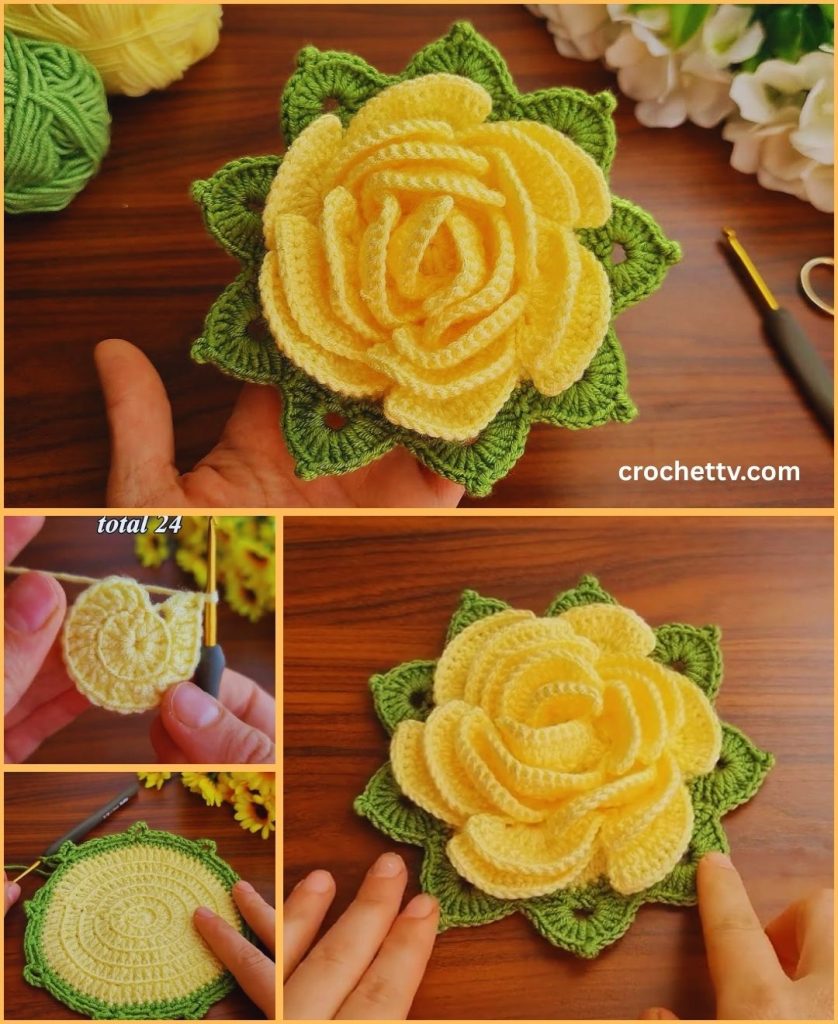
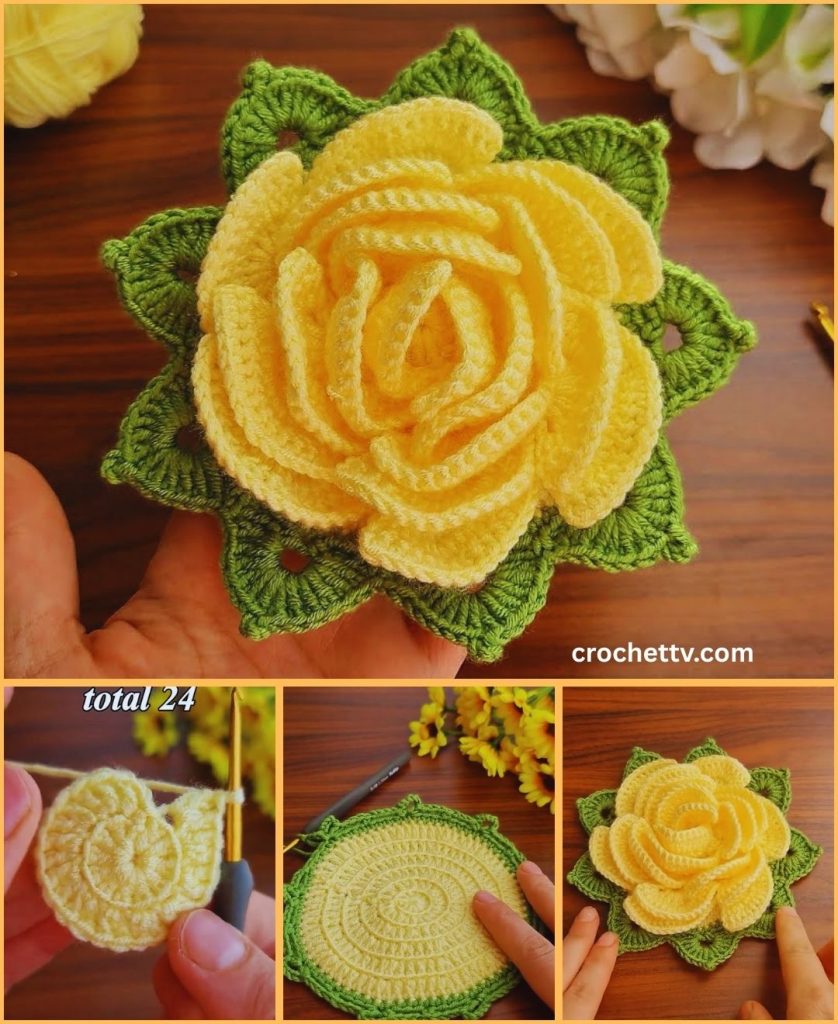
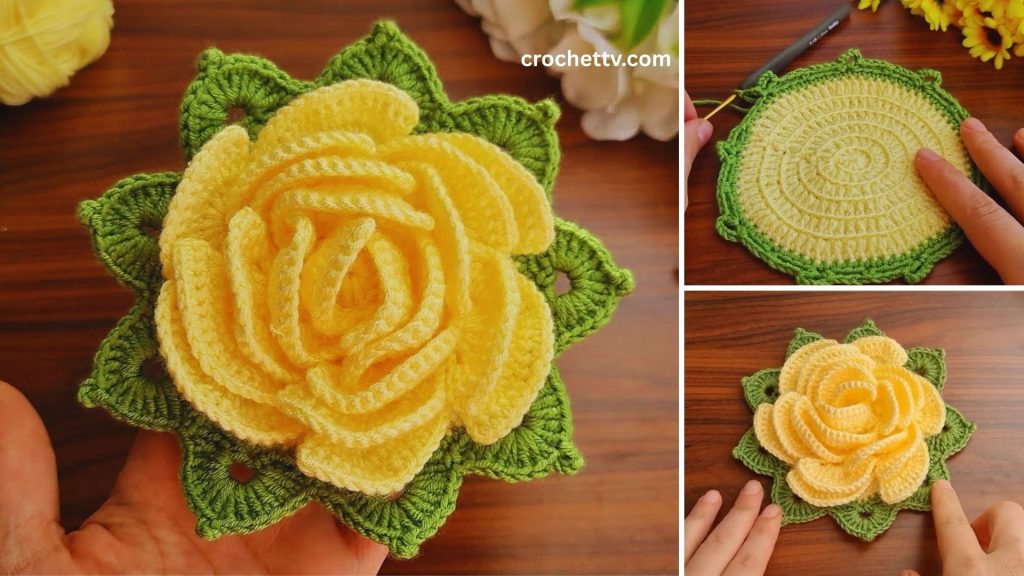
The rose is created by crocheting a long strip of petal shapes that are then rolled and sewn into a flower shape.
🧵 Materials You’ll Need
- Yarn:
- Color A (e.g., light pink) – for inner petals
- Color B (e.g., dark pink or red) – for outer petals
- Choose DK weight or light worsted cotton/acrylic
- Crochet hook: 3.5 mm to 4.0 mm
- Yarn needle: for sewing the rose together
- Scissors
- Optional: stitch markers, floral wire, or glue (for accessories)
✅ Tip: Use cotton yarn if you want a stiff, structured rose, or acrylic yarn for a softer finish.
✨ Crochet Stitches Used (US Terms)
- ch – chain
- sc – single crochet
- hdc – half double crochet
- dc – double crochet
- tr – treble crochet
- sl st – slip stitch
This pattern only uses basic stitches, making it suitable even for newer crocheters with some experience.
📏 Size
When completed, your rose will measure approximately 4–6 inches (10–15 cm) in diameter, depending on yarn and tension.
🪻 Structure Overview
We will:
- Create a long strip of petals, changing colors partway through.
- Shape the petals with a mix of stitches.
- Roll and sew the strip to form a large rose.
- (Optional) Add a leaf or backing if needed.
🌼 Step-by-Step Pattern: Two-Color Large Crochet Rose
🔸 Step 1: Start the Foundation Strip
Use Color A (inner petals)
- Chain 81 (must be a multiple of 6 + 3 for best results; adjust for larger/smaller rose)
- Row 1: In 3rd ch from hook, dc in next ch, skip 2, [2 dc, ch 2, 2 dc] in next ch, repeat to end
- You should now have 13 petal base segments formed with the [2 dc, ch 2, 2 dc] cluster.
🔸 Step 2: Inner Petals (Color A)
- Row 2 (Right Side):
- Turn your work
- In each ch-2 space, work:
(sc, hdc, 3 dc, hdc, sc) - Sl st into the space between clusters before working the next petal
This forms rounded petals — 13 total.
🔸 Step 3: Switch to Color B (Outer Petals)
You’ll now make larger outer petals in a different color.
- Change to Color B by joining new yarn after Row 2 is complete.
- Row 3 (Back of Work):
- From the back of the flower, insert your hook into the base behind the petals (or skipped chain stitches if any).
- Ch 3, sl st into the space between petals – repeat across (12 ch-3 loops)
These loops form the base for the larger outer petals.
🔸 Step 4: Crochet Larger Outer Petals (Color B)
- Row 4 (Outer Petals):
In each ch-3 loop, work:
(sc, hdc, dc, tr, dc, hdc, sc)- Sl st to the next ch-3 loop and repeat across
Now you have a second, larger petal layer in a different color, creating a two-toned rose!
✅ Pro Tip: You can vary the size of outer petals by adding more tr or dc stitches in the middle.
🌹 Step 5: Roll and Shape the Rose
Now we form the rose by rolling the strip.
- Start rolling the strip from the Color A (inner petals) end. This forms the bud.
- Continue rolling looser as you go outward, letting the outer (Color B) petals fan out.
- As you roll, use your yarn needle and matching yarn to sew through the base of the flower, securing the layers.
🧷 Optional: Pin the rose as you roll to adjust placement before sewing.
🍃 Optional: Add a Leaf (Green Yarn)
To enhance realism and make it suitable for brooches or hairpieces, you can add a leaf or two.
🟢 Simple Leaf Pattern:
- Ch 10
- Work the following along the chain:
- sc, hdc, dc, dc, tr, tr, dc, hdc, sc
- Turn and repeat on the other side of the chain.
- Sl st at the base and fasten off, leaving a long tail for sewing.
Sew the leaf under the rose, or add it to a floral arrangement.
✂️ Finishing Touches
- Weave in all ends using a yarn needle
- Shape the rose with your fingers
- Optional: Lightly steam block the rose for shaping (do not flatten!)
- Attach a pin back, hair clip, or brooch base for accessories
- Sew it onto bags, hats, shawls, pillows, or garments
🎨 Customization Ideas
- 🌈 Use gradient yarn for ombré petals
- ✨ Add a pearl bead or button center
- 🎀 Make a matching bouquet of large and mini roses
- 🧵 Create a corsage, flower crown, or home centerpiece
- 🪻 Vary petal height with taller stitches for more dimension
🧼 Care Instructions
- Hand wash gently
- Lay flat to dry
- Store in a cool, dry place
- Avoid direct ironing or high heat
🧵 Troubleshooting
| Problem | Solution |
|---|---|
| Rose won’t hold shape | Use tighter stitches, smaller hook, or cotton yarn |
| Rose looks flat | Roll tighter at center and adjust petal placement |
| Uneven petals | Make sure each petal cluster is built on the center of the ch-space |
| Color transition looks messy | Use invisible color change or carry yarn neatly at the back |
📸 Share Your Crochet Rose!
Once you complete your masterpiece, show it off online! Share photos with hashtags like:
- #CrochetRose
- #TwoToneFlower
- #HandmadeBlooms
- #CrochetArt
- #YarnFlowers
You’ll be joining a global community of floral crafters.
🧶 Final Thoughts
Creating a large crochet rose with two colors is a beautiful way to combine elegance and texture. This project not only strengthens your skills in shaping and layering, but also opens up endless possibilities for creative expression.
Whether it becomes a part of a wearable, a keepsake gift, or simply an artistic display, your handmade crochet rose is a lasting bloom of creativity.
Congratulations! You have now successfully created a beautiful, large two-color crochet rose. This project is a wonderful way to add a touch of handmade elegance to any occasion.