 by
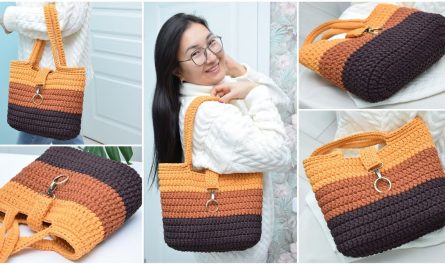
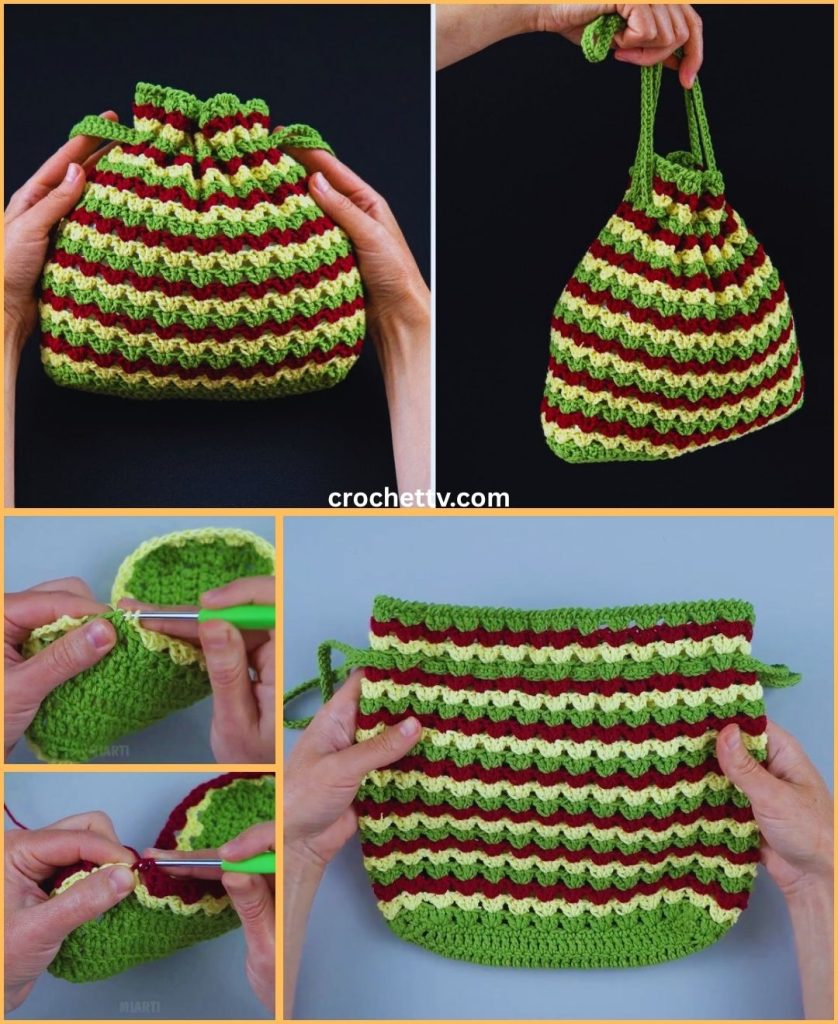
by Crocheting a mini backpack is a fantastic beginner-friendly project that results in a super cute and functional accessory! This tutorial will guide you through creating a sturdy, colorful mini backpack using simple stitches and easy construction, perfect for carrying essentials like your phone, keys, and wallet. We’ll focus on a round base and a simple striped body for a pop of color, making it an achievable and rewarding project for anyone new to bag making.
Skill Level: Confident Beginner
This project is perfect if you’re comfortable with:
- Magic Ring (MR) / Adjustable Ring: For a neat, closed base.
- Chain (ch): The fundamental foundation stitch.
- Slip Stitch (sl st): For joining rounds neatly.
- Single Crochet (sc): A dense, sturdy stitch, ideal for bags.
- Half Double Crochet (hdc): A slightly taller stitch for quicker work.
- Working in Rounds: Crocheting in continuous or joined circles.
- Increasing: Making your work wider for the base.
- Changing Colors: Seamlessly switching yarns for stripes.
- Fastening Off: Securely ending your yarn.
- Weaving in Ends: The crucial final step for a polished and durable bag.
Finished Mini Backpack Dimensions (Approximate):
Using worsted weight yarn (Medium #4) and the suggested hook, your finished mini backpack will typically be:
- Base Diameter: 4-5 inches (10-12.5 cm)
- Height: 6-7 inches (15-18 cm) (excluding drawstring closure)
- Straps Length: 20-24 inches (50-60 cm) (adjustable)
These dimensions are easily adjustable! Want a larger backpack? Increase the number of stitches in your base rounds and add more body rounds. For a smaller one, do the opposite.
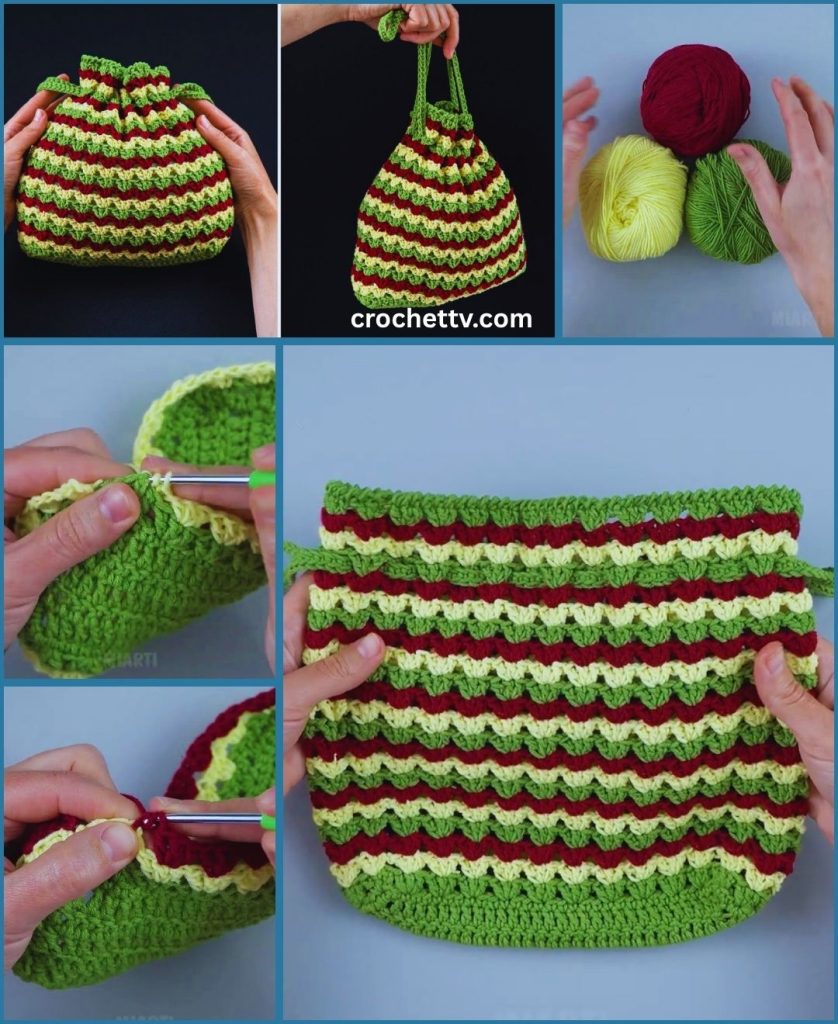
Materials You’ll Need:
Gathering your supplies beforehand ensures a smooth and enjoyable crocheting session!
- Yarn: Approximately 150-200 yards (135-180 meters) of Worsted Weight (Medium #4) Cotton or Cotton Blend Yarn.
- Why Cotton? Cotton yarn is highly recommended for bags and backpacks because it’s strong, durable, holds its shape well, and has minimal stretch. This is crucial for a bag that will hold items without deforming.
- Colors: Choose a main color for the base and top, and 2-3 contrasting colors for stripes. For example:
- Main Color (e.g., White): For the base, top border, and possibly straps.
- Stripe Color 1 (e.g., Pink):
- Stripe Color 2 (e.g., Blue):
- Stripe Color 3 (e.g., Yellow):
- Crochet Hook: Size H/5.0mm. This hook size pairs well with worsted weight yarn to create a dense fabric that will help your backpack maintain its shape.
- Yarn Needle (Tapestry Needle): Essential for weaving in all your loose yarn tails for a clean finish, and for attaching straps.
- Scissors: Any sharp pair for cutting your yarn.
- Stitch Marker (Optional but Recommended): Very helpful for marking the first stitch of each round, especially when working in continuous spirals.
- Optional: Two small D-rings or plastic buckles (for adjustable straps), a button (for a flap closure if desired).
Let’s Crochet Your Colorful Mini Backpack!
We’ll build this mini backpack from the bottom up:
- Round Base: Creating a flat, sturdy circle.
- Backpack Body: Working straight up in single crochet with color stripes.
- Top Edge & Drawstring: Finishing the opening.
- Straps: Making and attaching the shoulder straps.
Part 1: The Round Base (Main Color)
We’ll start with a classic circular base using single crochet. This creates a solid foundation for your backpack.
Use your Main Color (e.g., White)
- Round 1 (Magic Ring):
- Create a Magic Ring (MR).
- Chain 1 (ch 1) (does NOT count as a stitch).
- Work 8 single crochet (sc) stitches into the Magic Ring.
- Pull the Magic Ring tail tightly to close the hole in the center.
- Join with a slip stitch (sl st) to the first sc you made. (8 sc)
- Alternative Start (if MR is tricky): Chain 3, sl st to first ch to form a ring. Ch 1, work 8 sc into the ring. Sl st to first sc.
- Round 2 (Increase Round):
- Chain 1 (ch 1) (does NOT count as a stitch).
- Work 2 sc into each stitch around the round. (16 sc)
- Join with a sl st to the first sc.
- Round 3 (Increase Round):
- Chain 1 (ch 1).
- *Work 1 sc into the first stitch. Work 2 sc into the next stitch.*
- Repeat from * to * around the round. (24 sc)
- Join with a sl st to the first sc.
- Round 4 (Increase Round):
- Chain 1 (ch 1).
- *Work 1 sc into each of the first 2 stitches. Work 2 sc into the next stitch.*
- Repeat from * to * around the round. (32 sc)
- Join with a sl st to the first sc.
- Round 5 (Increase Round):
- Chain 1 (ch 1).
- *Work 1 sc into each of the first 3 stitches. Work 2 sc into the next stitch.*
- Repeat from * to * around the round. (40 sc)
- Join with a sl st to the first sc.
- Round 6 (Increase Round – Final Base Size):
- Chain 1 (ch 1).
- *Work 1 sc into each of the first 4 stitches. Work 2 sc into the next stitch.*
- Repeat from * to * around the round. (48 sc)
- Join with a sl st to the first sc.
- Do NOT Fasten Off yet, unless you want your base to be a different color than the first stripe. If changing color, Fasten Off and leave a 4-inch tail.
- Self-Correction Tip: Your base should be flat. If it’s ruffling, you have too many increases; if it’s cupping, you have too few. Adjust the number of stitches in your increase rounds accordingly.
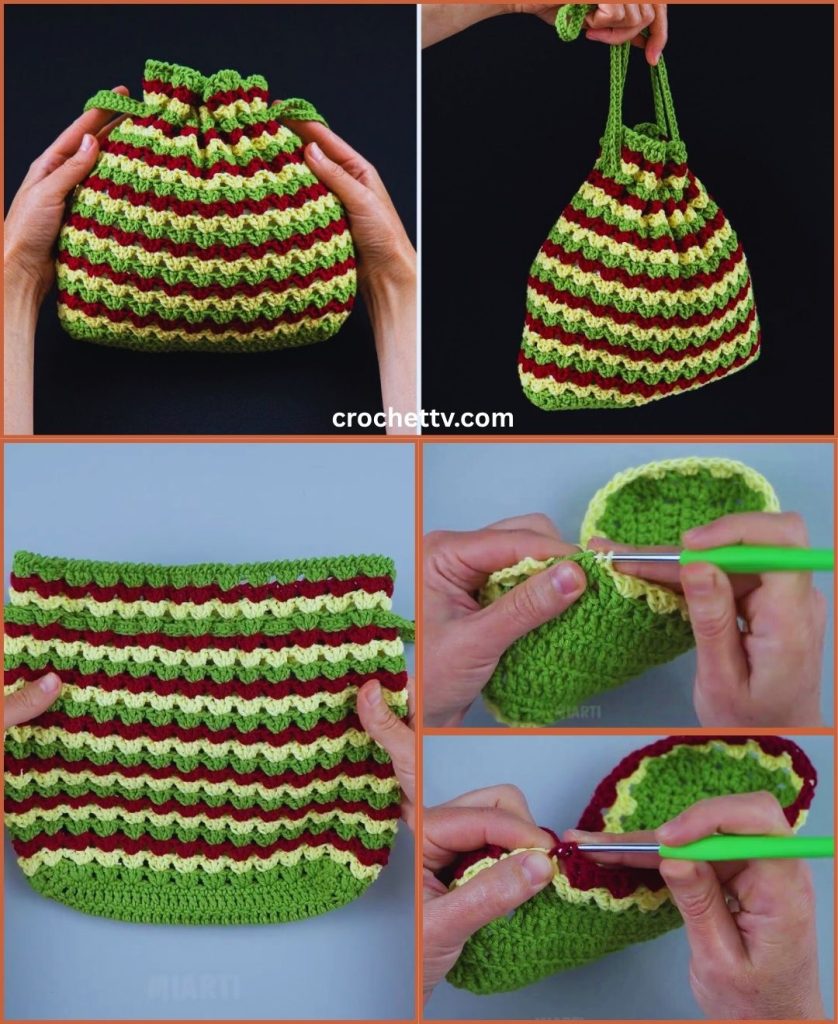
Part 2: The Backpack Body (Stripes!)
Now, we’ll build the vertical sides of the backpack. We’ll work in single crochet stitches and introduce color changes to create vibrant stripes.
- Round 7 (Defining the Side Wall – Main Color):
- Chain 1 (ch 1).
- Work 1 single crochet (sc) into the back loop only (BLO) of each stitch around the entire round. (48 sc)
- Why BLO? This creates a distinct ridge on the outside of your backpack, where the base transitions to the side wall. It helps the bag stand up straight and gives it a crisp bottom edge.
- Join with a sl st to the first sc.
- Change to your first Stripe Color (e.g., Pink). To change color neatly, on the last sl st of this round, work the sl st until you have two loops on your hook. Drop the current color, pick up the new color, yarn over with the new color, and pull through the two loops on your hook.
- Round 8 (First Stripe Round – Stripe Color 1):
- With your new color (Pink), Chain 1 (ch 1).
- Work 1 sc into both loops of each stitch around the round. (48 sc)
- Join with a sl st to the first sc.
- Change to your second Stripe Color (e.g., Blue).
- Rounds 9-16 (Continue Striping):
- Repeat Round 8, changing colors every round or every two rounds, depending on your desired stripe thickness. A simple pattern could be:
- Round 9: Blue (48 sc) – Change to Yellow
- Round 10: Yellow (48 sc) – Change to Pink
- Round 11: Pink (48 sc) – Change to Blue
- Round 12: Blue (48 sc) – Change to Yellow
- Round 13: Yellow (48 sc) – Change to Pink
- Round 14: Pink (48 sc) – Change to Blue
- Round 15: Blue (48 sc) – Change to Main Color (White)
- Round 16: Main Color (White) (48 sc) – Change to Main Color (White)
- You can make your bag taller by adding more stripe rounds. Make sure to end on your Main Color, as this will form the top border of the backpack.
- After your last body round, join with a sl st to the first sc.
- Self-Correction Tip for Color Changes: Carry your inactive yarn up the inside of the bag if your stripes are close together to avoid many ends to weave in. Simply drop the color when not in use and pick it up when needed in the next round. Don’t pull too tightly.
- Repeat Round 8, changing colors every round or every two rounds, depending on your desired stripe thickness. A simple pattern could be:

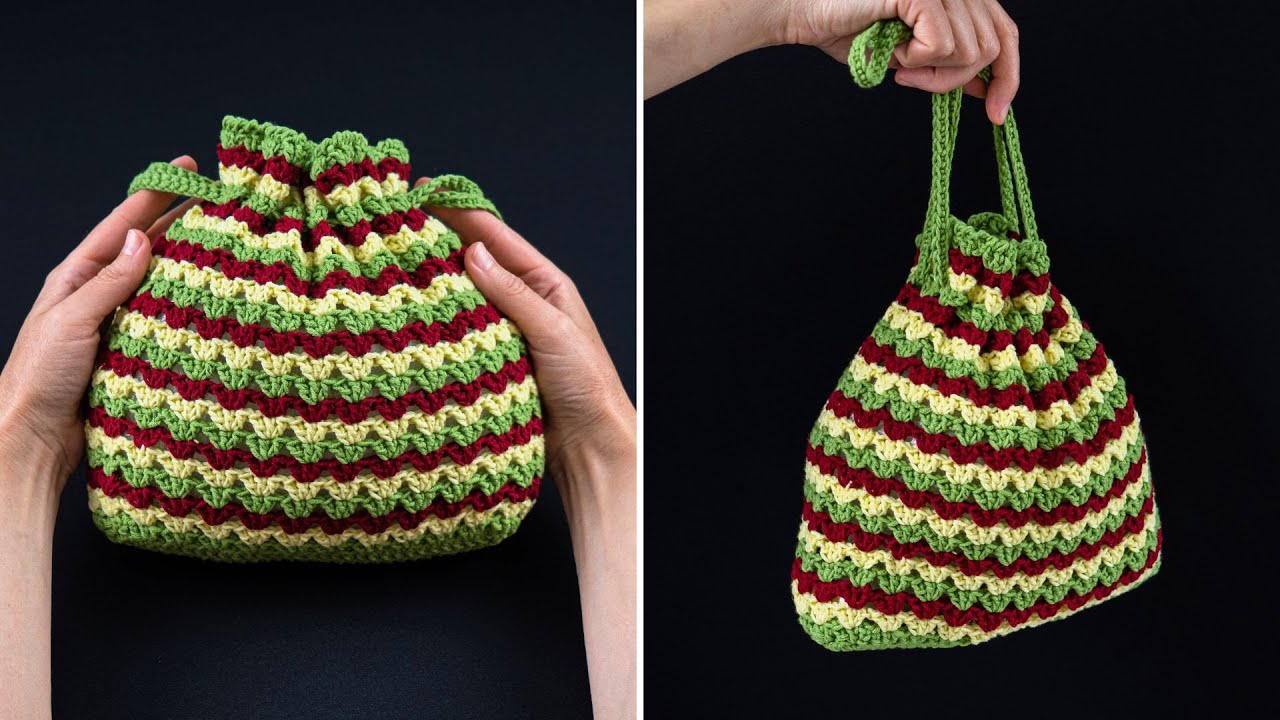
Part 3: Top Edge & Drawstring Opening (Main Color)
This section creates a neat top border and a space for your drawstring.
Continue with your Main Color (White)
- Round 17 (Drawstring Holes):
- Chain 2 (ch 2) (counts as your first hdc).
- Work 1 hdc into the next 2 stitches.
- * Chain 1 (ch 1) (this creates a hole for the drawstring). Skip 1 stitch.
- Work 1 hdc into each of the next 3 stitches.*
- Repeat from * to * around the round.
- Join with a sl st to the top of the beginning ch 2. (You should have 12 ch-1 spaces).
- Round 18 (Drawstring Casing):
- Chain 1 (ch 1).
- Work 1 sc into each hdc stitch and 1 sc into each ch-1 space around the round. (48 sc)
- Join with a sl st to the first sc.
- Round 19 (Final Top Border):
- Chain 1 (ch 1).
- Work 1 sc into each stitch around the round. (48 sc)
- Join with a sl st to the first sc.
- Fasten Off (FO), leaving a 6-inch tail.
Part 4: Straps & Drawstring
Now for the essential finishing touches: the shoulder straps and the functional drawstring.
- Making the Straps (Make 2 – Main Color):
- Using your Main Color, Chain 60-70 (ch 60-70). This length will be for a single shoulder strap. Adjust based on your desired backpack position.
- Row 1: Work 1 sc into the 2nd chain from hook and into each chain across. (59-69 sc)
- Row 2: Chain 1, turn. Work 1 sc into each sc across.
- Fasten Off (FO), leaving a long tail (at least 12 inches / 30 cm) at both ends of the strap for attaching.
- Repeat for the second strap.
- Tip: For a sturdier strap, you can make it wider by adding more rows of sc (e.g., 3-4 rows total).
- Making the Drawstring (Main Color or contrasting color):
- Chain approximately 100-120 stitches. This will be long enough to thread through the casing and tie.
- Fasten Off (FO), leaving short tails.
- Optional: For a thicker drawstring, make two chains and twist them together, or make a thin sc cord (Chain your desired length, then sl st back down the chain).
- Attaching the Straps:
- Lay your backpack flat. Decide which side will be the back.
- Using your yarn needle, attach one end of a strap firmly to the bottom edge of the backpack (on the back side of the base). Weave the long tail through several stitches, ensuring it’s very secure.
- Take the other end of the same strap. Attach it to the top edge of the backpack, on the back side, roughly centered over where the bottom of the strap is attached. Sew securely.
- Repeat for the second strap, ensuring it’s symmetrical to the first. Make sure the straps are not twisted.
- Inserting the Drawstring:
- Using your yarn needle, thread the long drawstring chain through the chain-1 spaces created in Round 17.
- Start from the middle of the front of the bag, go all the way around, and come out the middle of the front again.
- Tie the two ends of the drawstring together in a secure knot. You can add beads to the ends for decoration.
Part 5: Final Finishing Touches (The Polishing Touches!)
These last steps are crucial for making your mini backpack look professional, neat, and durable.
- Weave in All Ends (Meticulously!):
- You’ll have yarn tails from starting each color, fastening off, and attaching straps. This is arguably the most important step for a professional look.
- Thread each yarn tail onto your yarn needle.
- How to Weave Neatly: On the inside of your backpack, insert the needle into existing stitches of the same color as the tail. Weave the tail through the fabric for at least 3-4 inches (7.5-10 cm). To make it extra secure and prevent unraveling, subtly change direction within the stitches (e.g., weave along a stitch, then turn and weave back through some of the same stitches diagonally or perpendicularly) to “lock” the tail in place.
- Once secured, trim any excess yarn very close to the fabric, being careful not to snip any of your actual crocheted stitches.
- Blocking (Optional but Recommended):
- Blocking can significantly improve the shape, evenness of stitches, and overall appearance of your finished backpack. It helps it to stand up better and defines the shape.
- Method for Cotton Yarn (Wet Blocking):
- Gently mist your entire backpack evenly with cool water using a spray bottle until it’s damp, but not soaking wet.
- Carefully stuff the backpack lightly with clean towels, plastic bags, or even a small balloon to help it hold its intended shape.
- Allow the backpack to air dry completely and thoroughly in a well-ventilated area. This might take a day or two, depending on humidity. Do not move or use the backpack until it’s bone dry.
Congratulations! You’ve successfully crocheted a super cute and colorful Mini Backpack! This is a fantastic accomplishment for a beginner, and you now have a unique, handmade accessory that’s both functional and stylish.
What fun treasures will you carry in your new mini backpack?