 by
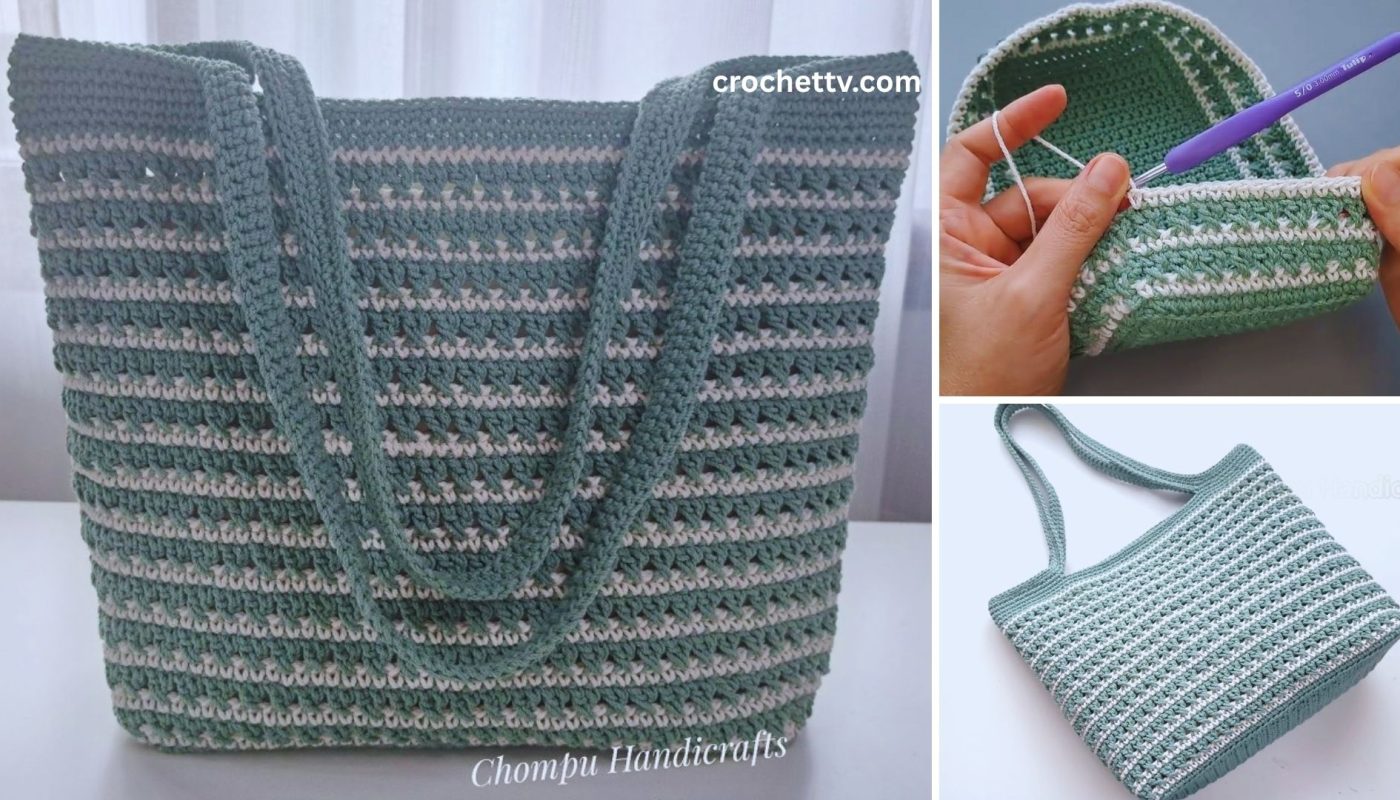
by There’s a special kind of pride that comes from using something you made with your own two hands. A crocheted bag isn’t just a practical accessory; it’s a statement piece, a testament to your creativity, and a cozy home for your everyday essentials. If you’ve ever admired a beautiful handmade tote and thought, “I wish I could make that,” then this is the perfect project for you.
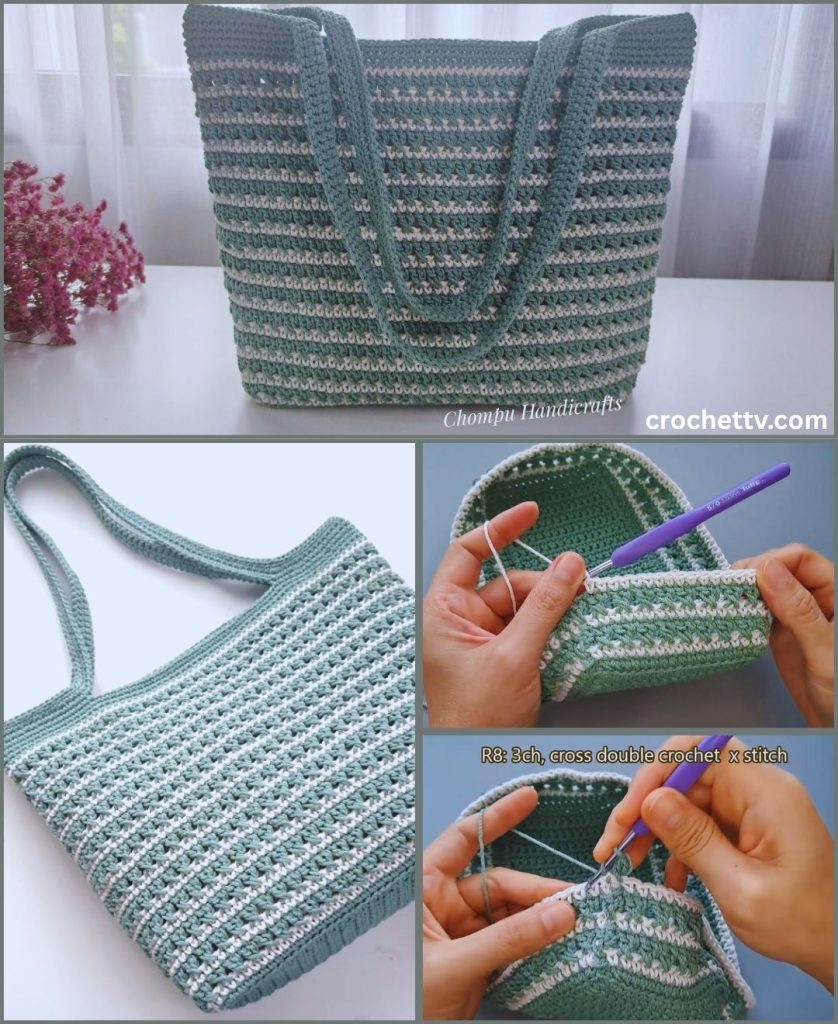
This pattern is designed with the beginner in mind. We will use basic stitches to create a chic and sturdy circular-base tote bag. The two-toned design adds a touch of modern elegance, making it look far more complex than it actually is. We will walk through every step in detail, from gathering your materials to weaving in the final end.
So, grab your favorite yarn colors, put on a comfy playlist, and let’s get started on your new favorite bag!

1. Gather Your Materials
Choosing the right materials is key to a successful project. For a bag, you want yarn that is durable and won’t stretch out too much with use.
- Yarn: Worsted weight (Category 4) or Aran weight (a slightly thicker Category 4) cotton or a cotton-blend yarn is highly recommended. Cotton is strong, holds its shape well, and is easy to wash.
- Color A (Bottom & Straps): Approximately 220 yards (200 meters). This will be the main color for the base and top of the bag.
- Color B (Middle Section): Approximately 150 yards (137 meters). This will be your contrasting accent color.
- Crochet Hook: A
5.0 mm(H-8) crochet hook. Match your hook to your yarn’s recommendation, but this size works well for worsted weight yarn to create a dense fabric. - Stitch Marker: This is essential for keeping track of the beginning of your rounds, as we will be working in a continuous spiral. A simple safety pin or a scrap piece of contrasting yarn works perfectly.
- Tapestry Needle: For weaving in your yarn ends for a clean, professional finish.
- Scissors: For cutting your yarn.
- Optional Supplies:
- Pre-made Bag Handles (Leather or Canvas): If you prefer not to crochet your own straps.
- Fabric for Lining: About half a yard of cotton fabric if you wish to line your bag for extra durability.
- Magnetic Snap or Button: For a secure closure.
2. Stitches & Abbreviations (US Terms)
This pattern uses standard US crochet terminology.
- ch: Chain
- st(s): Stitch(es)
- sl st: Slip Stitch
- sc: Single Crochet
- inc: Increase (work 2 single crochet stitches in the same stitch)
- MR: Magic Ring (also known as Magic Circle)
- sc-blo: Single Crochet in the Back Loop Only
- […] : Repeat instructions within the brackets as directed.
Quick Stitch Refresher:
- Magic Ring (MR): This creates a tightly closed starting point for projects worked in the round. If you’re unfamiliar with it, you can search for a quick video tutorial online. Alternatively, you can
ch 2, and then work your first round of6 scinto the second chain from the hook. - Single Crochet (sc): Insert your hook into the stitch, yarn over, pull up a loop (2 loops on hook), yarn over again, and pull through both loops.
- Single Crochet in the Back Loop Only (sc-blo): Instead of inserting your hook under both top loops of the stitch, insert it only into the loop that is furthest away from you (the “back loop”). This creates a lovely ribbed texture.
3. Gauge and Final Size
- Gauge: While gauge isn’t as critical for a bag as it is for a fitted garment, it’s good practice. Approximately 4 rounds of the base pattern should measure 4 inches (10 cm) in diameter.
- Finished Size: The finished bag will be approximately 11 inches (28 cm) in diameter at the base and 12 inches (30 cm) tall, not including the straps.
The Pattern: Let’s Begin!
Note: The bag is worked from the bottom up in a continuous spiral. Do not join rounds with a slip stitch unless instructed. Use your stitch marker to mark the first stitch of every round and move it up as you go.
Part 1: The Base of the Bag (Color A)
This flat circle will form the sturdy bottom of your tote.
- Round 1: Start with a
MRand work6 scinto the ring. (6 sts) - Round 2: Work an
incin each stitch around. (2 scin each st). (12 sts) - Round 3: [
1 scin the next st,incin the next st]. Repeat […] 6 times. (18 sts) - Round 4: [
2 scin the next 2 sts,incin the next st]. Repeat […] 6 times. (24 sts) - Round 5: [
3 scin the next 3 sts,incin the next st]. Repeat […] 6 times. (30 sts) - Round 6: [
4 scin the next 4 sts,incin the next st]. Repeat […] 6 times. (36 sts) - Round 7: [
5 scin the next 5 sts,incin the next st]. Repeat […] 6 times. (42 sts) - Round 8: [
6 scin the next 6 sts,incin the next st]. Repeat […] 6 times. (48 sts) - Round 9: [
7 scin the next 7 sts,incin the next st]. Repeat […] 6 times. (54 sts) - Round 10: [
8 scin the next 8 sts,incin the next st]. Repeat […] 6 times. (60 sts) - Round 11: [
9 scin the next 9 sts,incin the next st]. Repeat […] 6 times. (66 sts) - Round 12: [
10 scin the next 10 sts,incin the next st]. Repeat […] 6 times. (72 sts) - Round 13: [
11 scin the next 11 sts,incin the next st]. Repeat […] 6 times. (78 sts) - Round 14: [
12 scin the next 12 sts,incin the next st]. Repeat […] 6 times. (84 sts) - Round 15: [
13 scin the next 13 sts,incin the next st]. Repeat […] 6 times. (90 sts)
Your base should now be a flat circle measuring approximately 11 inches in diameter. If you want a wider bag, simply continue the pattern of increasing by one sc between each inc on every round.
Part 2: The Body of the Bag (Building the Walls)
Now we will stop increasing and start working upwards to create the sides of the bag.
- Round 16 (Transition Round): Work
1 sc-bloin each stitch around. (90 sts)- Designer’s Tip: Working this single round in the back loops only creates a defined, crisp edge between the base and the body of the bag, giving it a more structured look.
- Rounds 17 – 30 (Lower Body): Work
1 scin each stitch around. (90 sts)- Continue working in a spiral for 14 rounds with Color A. Your bag should start to take shape and have significant height.
Part 3: The Color Change & Middle Section (Color B)
This is where we introduce our second color for that beautiful two-toned effect.
- How to Change Color Seamlessly: On the very last
scof Round 30 with Color A, do the following:- Insert your hook into the stitch, yarn over, and pull up a loop. You will have two loops of Color A on your hook.
- Drop Color A. Pick up your new yarn, Color B.
- Yarn over with Color B and pull it through the two loops on your hook to complete the stitch.
- Cut Color A, leaving a 6-inch tail. You can tie a gentle knot with the tail of Color B to secure it, and we will weave these ends in later.
- Continue crocheting with Color B.
- Rounds 31 – 45 (Middle Body): With Color B, work
1 sc-bloin each stitch around. (90 sts)- Designer’s Tip: Using the
sc-blostitch for this middle section creates a beautiful horizontal ribbed texture that contrasts wonderfully with the smooth single crochet of the bottom section. - Continue for 15 rounds, or until this colored section is your desired height.
- Designer’s Tip: Using the
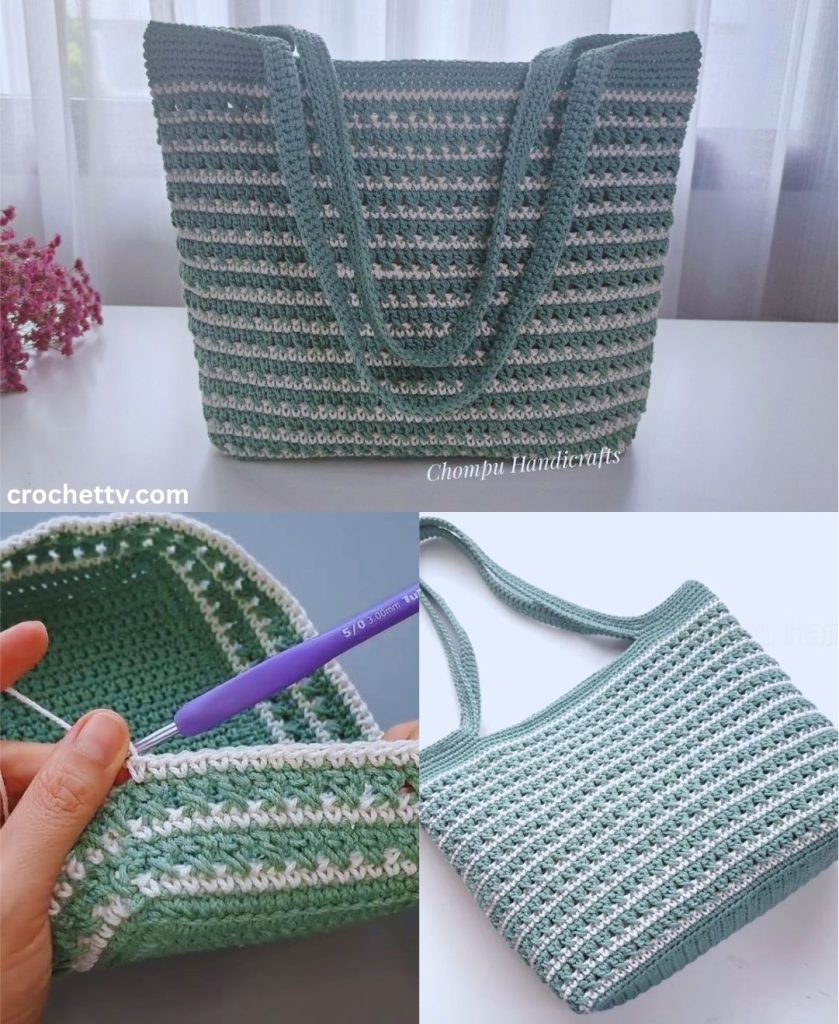
Part 4: The Top Section & Straps (Color A)
Time to switch back to our main color to finish the top and create the handles.
- Changing back to Color A: Use the same seamless color change method described above on the last stitch of Round 45.
- Rounds 46 – 50: With Color A, work
1 scin each stitch around. (90 sts)- We are switching back to the standard single crochet to create a sturdy top edge.
- Round 51 (Strap Foundation): This is where we create the spaces and foundation chains for the handles.
scin the next 15 sts.ch 60(or your desired strap length). Be careful not to twist the chain.- Skip the next 15 sts on the bag body.
scin the next 30 sts.ch 60.- Skip the next 15 sts on the bag body.
scin the remaining 15 sts to reach your stitch marker.
- Rounds 52 – 54 (Reinforcing the Straps):
- Work
1 scin each stitch and in each chain around. This means you will single crochet across the bag body and then work one single crochet into each of the 60 chains of the strap. - Continue this for 3 full rounds. This will create a wide, comfortable, and very sturdy strap.
- Work
- Final Round: Work
1 sl stin each stitch around. This creates a neat, non-stretchy, and professional-looking top edge. - Once you complete the round, cut your yarn, leaving a 6-inch tail. Pull the tail through the last loop on your hook to fasten off.
5. Finishing Touches
The final steps are what elevate a project from “homemade” to “handmade.”
- Weave in Your Ends: Take your tapestry needle and meticulously weave in all the yarn tails (from the start, the color changes, and the end). Weave them in multiple directions on the inside of the bag to ensure they are secure.
- Optional – Add a Lining: If you plan to carry heavy items or small things like keys and pens, a fabric lining is a great idea. Cut a circle of fabric the size of your base and a rectangle that is the height of your bag and the circumference (
pix diameter) of the opening. Sew them together and hand-stitch the lining into the inside top edge of your bag. - Optional – Add a Closure: Sew a magnetic snap or a large button and a crocheted loop to the inside top center of the bag for a secure closure.
And there you have it! Stand back and admire your beautiful, functional, and completely unique two-toned crochet bag. It’s perfect for a trip to the farmer’s market, a day at the beach, or as your everyday carry-all. Wear it with pride—you made it!