by
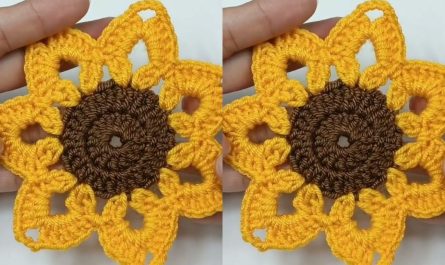
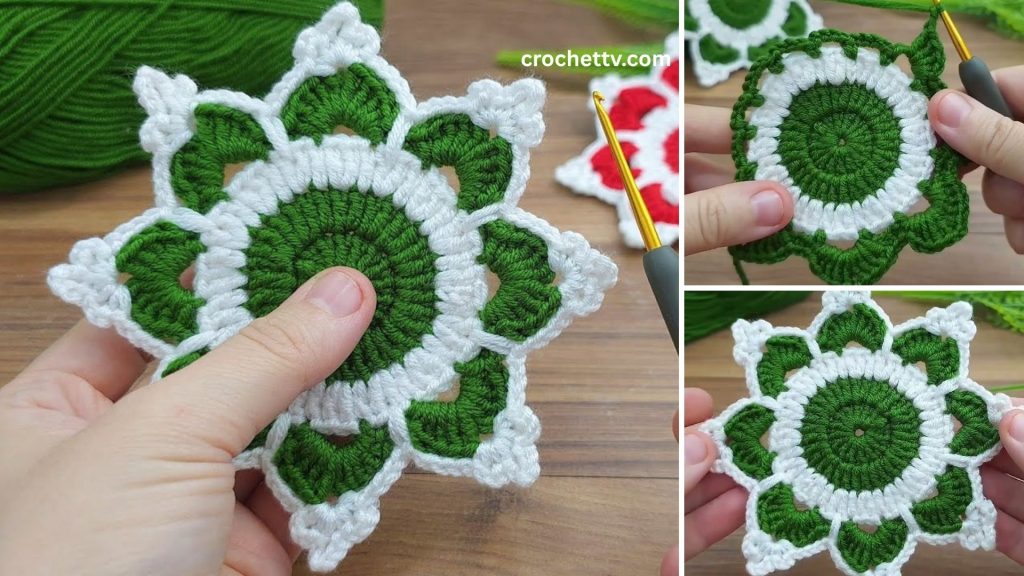
by Let’s get into the festive spirit and crochet some beautiful snowflake coasters and Christmas motifs! These delicate designs are perfect for decorating your home, adorning gifts, or using as actual coasters during the holiday season. They’re surprisingly simple to make once you get the hang of the basic stitches and can be adapted to various sizes.
How to Crochet a Snowflake Coaster / Christmas Motif
This detailed tutorial will guide you step-by-step through creating a lovely snowflake design. We’ll focus on a beginner-friendly pattern that uses common stitches to achieve an intricate look.
Skill Level: Advanced Beginner
This project is ideal if you’re comfortable with (or ready to learn!):
- Chain (ch): The most fundamental crochet stitch.
- Slip Stitch (sl st): For joining and moving across stitches.
- Single Crochet (sc): A compact stitch.
- Half Double Crochet (hdc): A medium-height stitch.
- Double Crochet (dc): A taller stitch, common in motifs.
- Treble Crochet (tr) / Triple Crochet: An even taller stitch for creating points.
- Magic Ring (MR) / Chain-2 Start: For a neat center hole.
- Working in rounds: Crocheting in a circular fashion.
- Fastening off: Securing your yarn.
- Weaving in ends: The essential finishing touch.
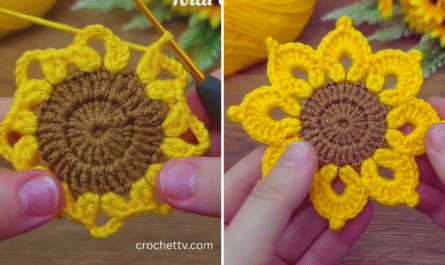
Finished Snowflake Dimensions (Approximate):
Using DK (Light #3) or Worsted Weight (Medium #4) yarn and the suggested hook, your finished snowflake will typically measure around 4-6 inches (10-15 cm) in diameter. The size can vary based on your yarn thickness and hook size.
Materials You’ll Need:
Gathering your materials beforehand ensures a smooth and enjoyable crocheting session.
- Yarn:
- Small amount of DK (Light #3) or Worsted Weight (Medium #4) yarn. Cotton or acrylic yarn works best as it holds shape well and blocks nicely.
- Color: White, off-white, silver, light blue, or even glittering yarn are popular choices for a classic snowflake look. You’ll only need about 10-20 yards per snowflake.
- Crochet Hook:
- Size G/4.0mm for Worsted Weight yarn.
- Size E/3.5mm or F/3.75mm for DK weight yarn.
- (Choose a hook that creates a firm, rather than loose, fabric for your chosen yarn, to help the snowflake hold its shape).
- Yarn Needle (Tapestry Needle): Essential for seamlessly weaving in your loose yarn tails. It has a blunt tip and a large eye.
- Scissors: Any sharp pair of scissors.
- Stitch Marker (Optional): Helpful for marking the first stitch of each round if you’re new to working in the round.
- Stiffening/Blocking Supplies (Highly Recommended for Snowflakes!):
- Blocking Mats or Foam Board: For pinning your snowflake into shape.
- Rust-proof Pins: To hold the snowflake in place.
- Starch or Fabric Stiffener (Optional but recommended): For a stiff, durable snowflake that holds its shape. You can use spray starch, liquid fabric stiffener (like Mod Podge diluted with water), or even a sugar-water solution.
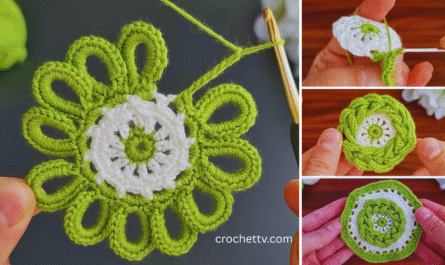
Let’s Crochet Your Snowflake!
We’ll build this snowflake from the center outwards, adding layers to create its intricate points.
Part 1: The Center of the Snowflake
- Starting Ring (Magic Ring method – Recommended for neat center):
- Make a Magic Ring (MR).
- (Alternative start): Chain 4, then slip stitch (sl st) into the first chain to form a ring.
- Round 1:
- Chain 1 (ch 1 – does NOT count as a stitch).
- Work 12 single crochet (sc) stitches into the magic ring.
- Gently pull the tail of the magic ring tight to close the center hole.
- Slip stitch (sl st) into the first sc to join the round. (12 sc)
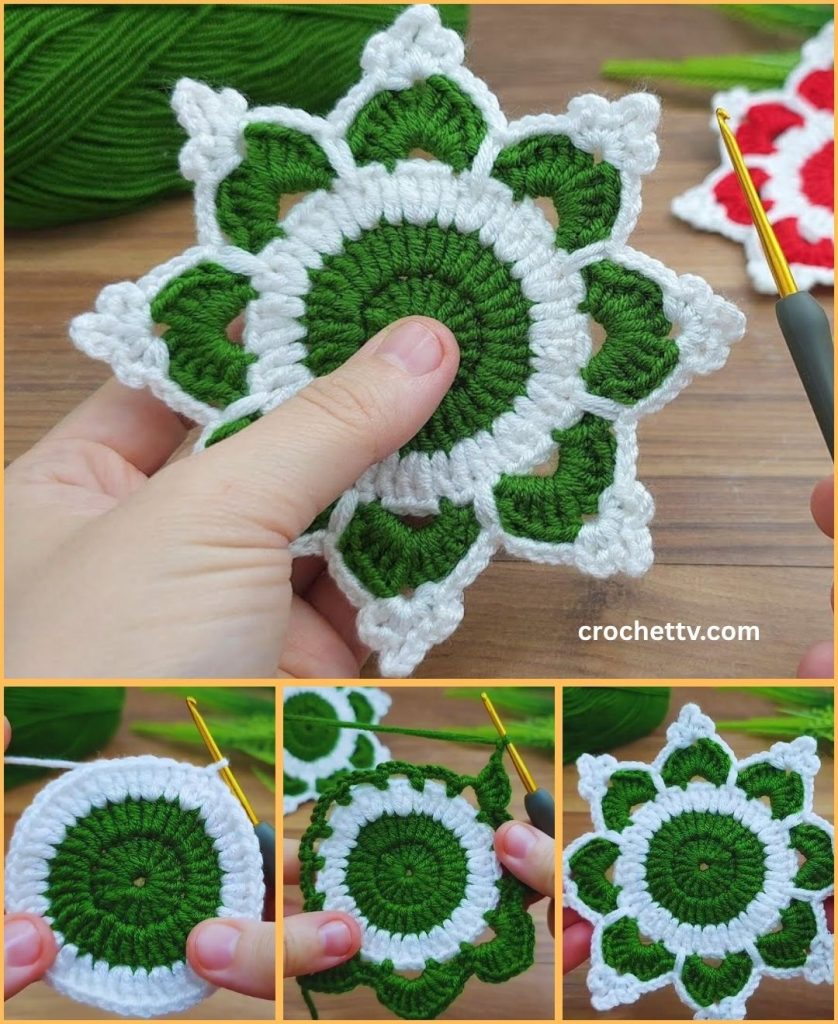
Part 2: Forming the Snowflake Points (Basic Structure)
This section creates the foundation for the arms and gaps of your snowflake.
- Round 2:
- Chain 3 (ch 3 – counts as your first double crochet (dc)).
- Work 1 dc into the same stitch.
- Chain 2 (ch 2).
- *Work 2 dc into the next stitch.
- Chain 2.*
- Repeat from * to * around the entire round.
- Slip stitch (sl st) into the top of the beginning ch 3 to join the round. (You should have 12 dc stitches in 6 pairs, and 6 ch-2 spaces).
- Round 3:
- Chain 1.
- Work 1 sc into the space between the first two dc stitches of the previous round (the space directly above the joining sl st).
- Chain 3 (ch 3).
- *Work 1 sc into the next chain-2 space.
- Chain 3.*
- Repeat from * to * around the entire round.
- Slip stitch (sl st) into the first sc to join the round. (You should have 6 sc stitches and 6 ch-3 spaces).
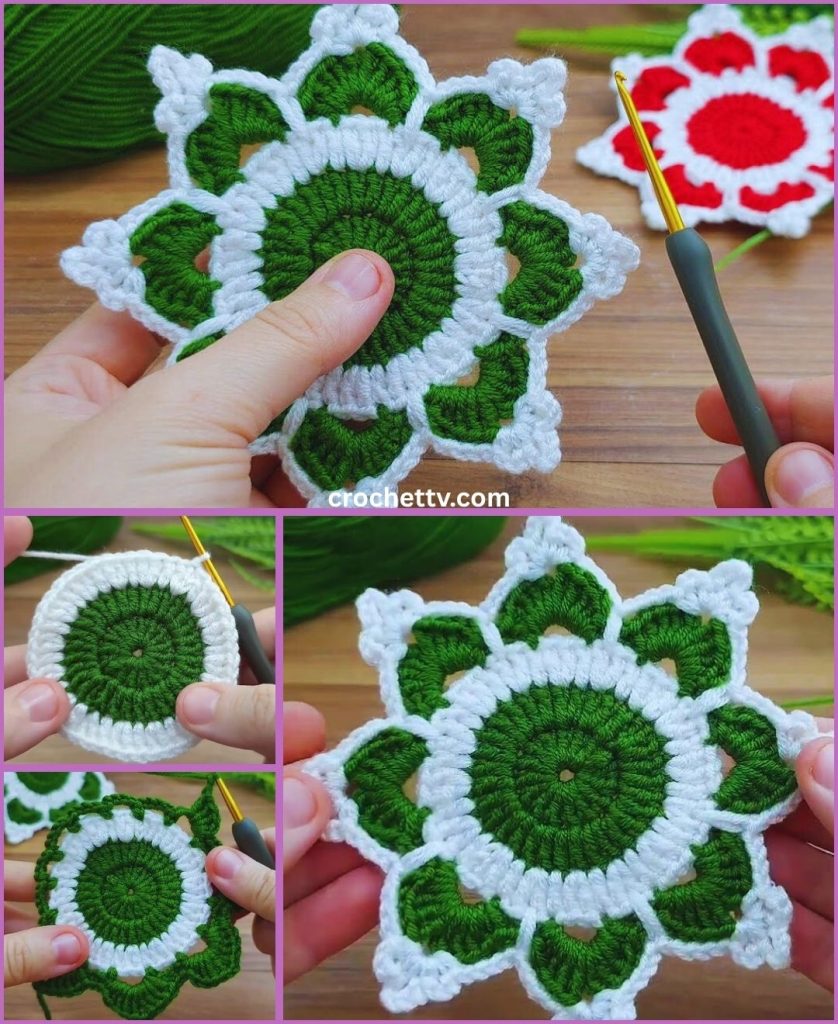
Part 3: Adding the “Spikes” and Outer Detail
This is where your snowflake really starts to take shape!
- Round 4:
- Slip stitch (sl st) into the first chain-3 space.
- Chain 3 (ch 3 – counts as 1 dc).
- Work (2 dc, ch 3, 3 dc) into the same chain-3 space. (This creates your first “point”).
- *Chain 1 (ch 1).
- Work (3 dc, ch 3, 3 dc) into the next chain-3 space.*
- Repeat from * to * around the entire round.
- Chain 1.
- Slip stitch (sl st) into the top of the beginning ch 3 to join the round. (You should have 6 large points separated by ch-1 spaces).
- Round 5 (Final Layer of Detail):
- Slip stitch (sl st) into the next 2 dc stitches until you reach the chain-3 space from the previous round (the center of your point).
- Chain 1.
- Work 1 sc into the chain-3 space.
- Chain 5 (ch 5).
- Work 1 sc into the 3rd chain from your hook (this creates a picot point).
- Chain 2 (ch 2).
- Work 1 sc into the same chain-3 space. (This completes one outer point).
- *Chain 3 (ch 3).
- Work 1 sc into the next chain-1 space.
- Chain 3.
- Work 1 sc into the next chain-3 space.
- Chain 5.
- Work 1 sc into the 3rd chain from your hook (picot).
- Chain 2.
- Work 1 sc into the same chain-3 space.*
- Repeat from * to * around the entire round.
- Chain 3.
- Work 1 sc into the last chain-1 space.
- Chain 3.
- Slip stitch (sl st) into the first sc of this round to join.
- Fasten Off:
- Cut your yarn, leaving a 4-6 inch (10-15 cm) tail.
- Yarn over with your hook, pull the cut tail completely through the loop left on your hook, and gently tug to secure the knot.
Part 4: Finishing and Stiffening Your Snowflake (Highly Recommended)
This step makes your snowflake crisp, flat, and durable, truly giving it that iconic snowflake appearance.
- Weave in All Ends:
- Use your yarn needle to meticulously weave in every loose yarn tail. Weave into the stitches, changing direction once or twice to secure, then trim neatly. This is especially important before stiffening, as loose ends will become permanently visible.
- Stiffening/Blocking:
- Prepare your stiffener:
- Spray Starch: The easiest method. Lay your snowflake flat.
- Liquid Fabric Stiffener: Dilute according to package directions (often 1:1 with water for Mod Podge). Submerge your snowflake in the solution, making sure it’s fully saturated. Squeeze out excess liquid gently.
- Sugar Water (Traditional): Dissolve 1/2 cup sugar in 1/2 cup boiling water. Let cool completely. Submerge snowflake.
- Shape and Pin:
- Lay your damp (or starched) snowflake flat on your blocking mat or a foam board.
- Using rust-proof pins, carefully stretch and pin out each point and curve of your snowflake, ensuring it’s symmetrical and the edges are straight. Pin through the picot points and any other distinct features.
- Dry Completely:
- Allow the snowflake to air dry completely and thoroughly. This can take 12-48 hours, depending on humidity and the stiffener used. Do not remove pins until it’s bone dry and stiff.
- Prepare your stiffener:
Using Your Crocheted Snowflakes:
- Coasters: Perfect for holiday drinks.
- Christmas Ornaments: Add a loop of yarn or fishing line to the top point and hang them on your tree.
- Gift Toppers: Tie one onto a wrapped present for a handmade touch.
- Garlands: String several together for festive decor.
- Appliques: Sew them onto hats, sweaters, or blankets.
- Window Decorations: Hang them from windows for a winter wonderland effect.
Enjoy making your beautiful crocheted snowflakes and adding a touch of handmade charm to your holiday season!