 by
by Creating a multicolor crochet baby blanket is a wonderful project that allows for endless creativity with color combinations and can be surprisingly easy, even for beginners. The key is to choose a simple, repetitive stitch pattern and let the yarn colors do most of the work!
This detailed guide will walk you through the process, from selecting your materials and colors to crocheting the blanket and adding a finishing border.

Skill Level: Easy (Perfect for Beginners!)
This project is fantastic if you’re comfortable with or ready to learn:
- Chain (ch): The foundation of most crochet projects.
- Slip Stitch (sl st): For joining stitches and rounds neatly.
- Single Crochet (sc): A dense, sturdy stitch.
- Half Double Crochet (hdc): A versatile, medium-height stitch.
- Double Crochet (dc): A taller stitch, which works up quickly.
- Working in rows: Crocheting back and forth.
- Changing colors: A simple technique to create stripes or color blocks.
- Fastening off: Securing your yarn ends.
- Weaving in ends: The essential final step for a polished look.
Finished Blanket Dimensions (Approximate):
A common size for a baby blanket is approximately 30 x 40 inches (75 x 100 cm). However, this pattern is easily adjustable! You can make it wider by chaining more stitches at the start (keeping the stitch multiple in mind) and longer by adding more rows.
Materials You’ll Need:
Choosing the right yarn is crucial for a soft, durable, and baby-safe blanket.
- Yarn:Worsted Weight (Medium #4) yarn is highly recommended. It’s easy to work with, provides good warmth, and is readily available in many colors.
- Fiber Content: Opt for 100% acrylic, cotton, or superwash merino wool. These are soft, machine-washable, and often hypoallergenic, making them ideal for babies. Avoid yarns that shed excessively or are prone to pilling.
- Colors: This is where the “multicolor” comes in! You can choose:
- A Rainbow Palette: Classic and cheerful (red, orange, yellow, green, blue, indigo, violet).
- Pastel Shades: Soft and calming (baby pink, mint green, pale blue, lavender, cream).
- Coordinating Colors: Pick 3-5 colors that complement each other well. You can use a color wheel (colors next to each other for harmony, or opposite for contrast) or look at inspiration online. Don’t be afraid to include a neutral like white, cream, or gray to break up the colors.
- Self-Striping Yarn: For an even easier multicolor blanket, choose a self-striping yarn that changes colors on its own. This eliminates the need for frequent color changes and weaving in many ends.
- Quantity: For a 30×40 inch blanket, you’ll generally need 800-1,200 yards (730-1,100 meters) of worsted weight yarn. If using multiple colors, aim for roughly equal amounts of each color, or more of a neutral if it’s your main contrasting color.
- Crochet Hook: Size H/5.0mm or I/5.5mm. The exact size depends on your tension. A slightly larger hook will give you a softer, drapier fabric, while a smaller one will result in a denser fabric. Do a swatch (see tip below) to check your gauge and fabric feel.
- Yarn Needle (Tapestry Needle): Essential for weaving in all those colorful yarn tails.
- Scissors: For cutting yarn.
Choosing Your Stitch Pattern (Beginner-Friendly Options):
For a multicolor blanket, simple stitch patterns allow your chosen colors to shine without being too overwhelming or complicated. Here are a few great options:
- Single Crochet (sc) Stripes: The simplest. Each row is just single crochet.
- Pros: Very easy, dense fabric, minimal gaps.
- Cons: Can be a bit stiff if tension is too tight, takes longer to grow.
- Half Double Crochet (hdc) Stripes: A great middle-ground stitch.
- Pros: Faster than sc, still dense but with more drape.
- Cons: Slightly more yarn usage than sc.
- Double Crochet (dc) Stripes: Works up quickly.
- Pros: Very fast to make, good drape.
- Cons: Can have more gaps, might need a denser stitch for warmth in cold climates.
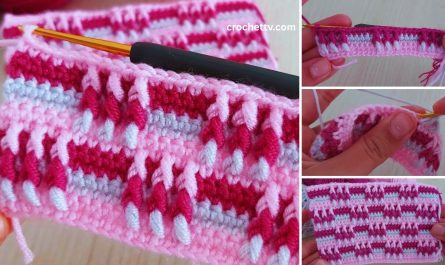
- Lemon Peel Stitch: Alternating single and double crochet stitches.
- Pros: Creates a lovely texture, easy 1-row repeat.
- Cons: Requires attention to alternating stitches.
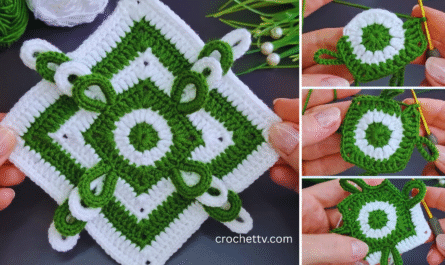
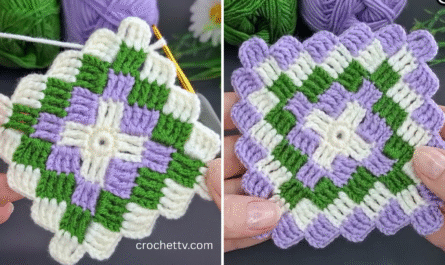
- Granny Stripe Stitch: Made with clusters of 3 double crochets.
- Pros: Very popular, creates a classic “granny square” look in rows, works up quickly.
- Cons: More open fabric, might use slightly more yarn.
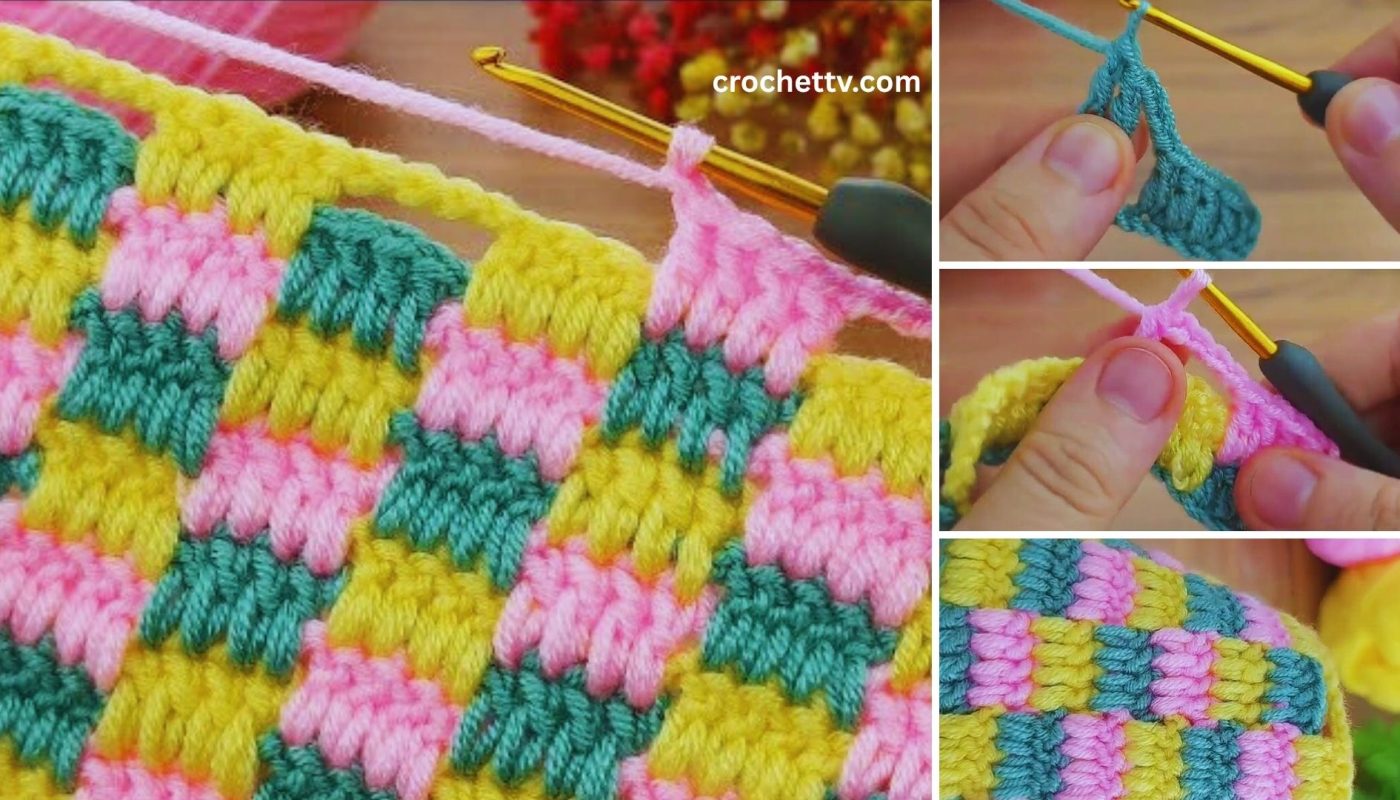
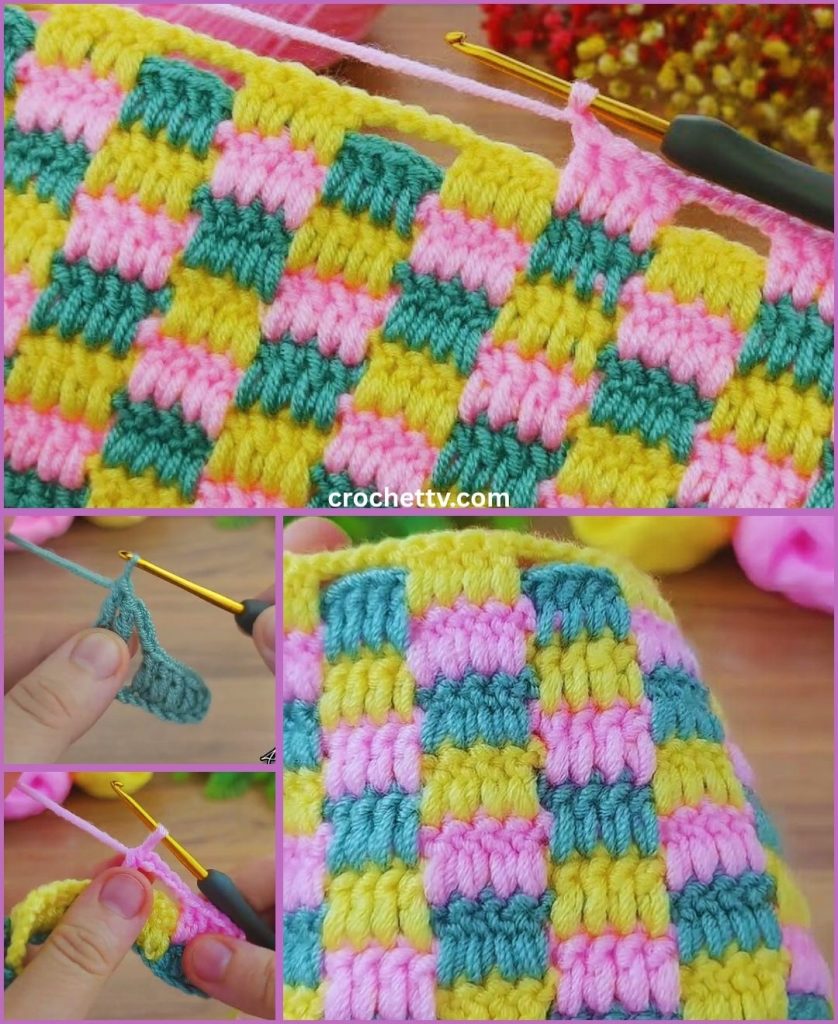
For this tutorial, we will use a Double Crochet (dc) Stripe pattern as it’s quick, easy, and shows off colors beautifully.
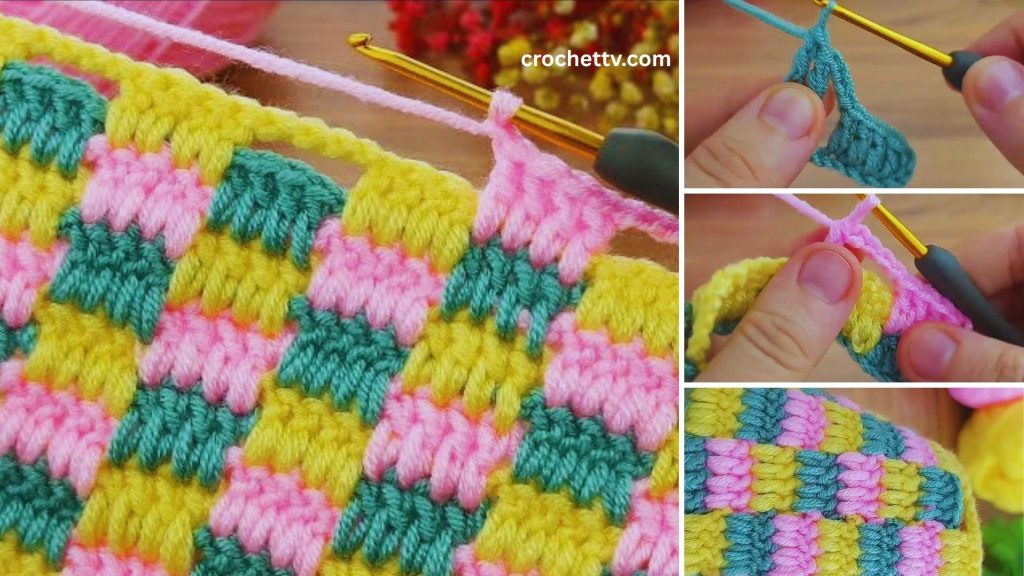
Let’s Crochet Your Multicolor Baby Blanket!
Step 1: Create a Gauge Swatch (Recommended!)
Before starting, make a small sample swatch to check your tension and ensure your blanket will be the desired size.
- With your chosen hook and one of your yarns, chain about 20 stitches.
- Work several rows of your chosen stitch (e.g., double crochet).
- Measure a 4×4 inch (10×10 cm) square within your swatch. Count how many stitches and rows you have. If you have too many stitches/rows, use a larger hook. Too few, use a smaller hook.
Step 2: Calculate Your Starting Chain
For a 30-inch wide blanket using double crochet (with a 5.0mm hook, assuming 13 dc stitches = 4 inches):
- Desired width: 30 inches
- Stitches per inch: 13 stitches / 4 inches = 3.25 stitches per inch
- Starting chain: 30 inches * 3.25 stitches/inch = 97.5 stitches. Round to the nearest even number or a multiple of your stitch pattern (for dc, it’s usually (any number of stitches) + 2 for the turning chain). Let’s aim for a chain of around 100-120 stitches, plus 2 or 3 for the turning chain.
- For a dc pattern, it’s often best to chain a multiple of 1, plus 2 or 3 for the turning chain. Let’s start with chain 102. (100 stitches + ch 2 for turning chain). This will give us 100 actual double crochets across the first row.
Main Pattern: Double Crochet (dc) Stripes
Abbreviations Used:
- ch: chain
- dc: double crochet
- st(s): stitch(es)
- FO: Fasten off
Starting with Color 1:
- Foundation Chain: With Color 1, chain 102.
- Row 1: Work 1 dc into the 3rd chain from your hook (this counts as your first dc). Work 1 dc into each remaining chain across. You should have 100 dc stitches.
- To change color at the end of the row: When you work the last dc of the row, work it until you have two loops left on your hook. Drop Color 1, pick up Color 2, yarn over with Color 2 and pull through the last two loops on your hook. This completes the stitch in the new color.
- Row 2 (with Color 2): Chain 2 (counts as first dc). Turn your work. Work 1 dc into the next stitch and into each stitch across. You should have 100 dc stitches.
- Change to Color 3 at the end of this row using the same method as above.
- Row 3 (with Color 3): Chain 2 (counts as first dc). Turn your work. Work 1 dc into the next stitch and into each stitch across. You should have 100 dc stitches.
- Change to Color 4 at the end of this row.
Continue in this pattern, changing colors every 1, 2, or 3 rows (your choice!).
- For thin stripes: Change color every 1 row. This creates many narrow stripes.
- For medium stripes: Change color every 2 rows. This is a popular option.
- For wider stripes/color blocks: Change color every 3 or more rows.
Tips for Changing Colors:
- Carry the yarn: If you’re using only a few colors and they appear in a repeating sequence, you can “carry” the inactive yarn loosely along the edge of your work. This means laying the inactive yarn along the top of your stitches and crocheting over it as you work the next row. This saves on weaving in ends. However, don’t pull it too tight, or it will pucker your work. This is most effective if you change colors every 1-2 rows.
- Cut and rejoin: If you have many colors or a non-repeating sequence, simply cut the old color (leaving a 6-inch tail) and join the new color as described above. You’ll weave in these ends later.
Continue crocheting rows until your blanket reaches the desired length (e.g., 40 inches). End with a row of your final color.
Adding a Border:
A border gives your blanket a finished, polished look and adds extra stability. You can use one of your existing colors or introduce a new contrasting color.
Border Round 1 (Single Crochet):
- Attach your chosen border color with a slip stitch (sl st) into any corner stitch.
- Chain 1 (does not count as a stitch).
- Work 3 single crochet (sc) into the same corner stitch.
- Work 1 sc into each stitch along the top and bottom edges of the blanket.
- When you reach the sides of the blanket (where you worked the ends of your rows), work 2 sc into the side of each dc row. This will give you a neat edge.
- When you reach a corner, work 3 sc into the corner stitch.
- Join with a sl st to the first sc of the round.
Border Round 2 (Optional – Double Crochet):
- Chain 3 (counts as first dc).
- Work 1 dc into each stitch around the blanket.
- In each corner, work 3 dc into the center sc of the 3-sc corner from the previous round.
- Join with a sl st to the top of the beginning ch 3.
You can add more border rounds of single crochet or double crochet, or explore other simple border patterns (like a shell stitch or picot border) for a more decorative edge. Just remember to work 3 stitches in each corner to keep the border flat.
Final Finishing Touches:
- Weave in All Ends (Meticulously!): This is the most important step for a professional-looking and durable blanket. With a multicolor blanket, you’ll have many ends from all your color changes.
- Thread each yarn tail onto your yarn needle.
- Weave the tail into stitches of the same color for at least 3-4 inches (7.5-10 cm). Try to follow the path of existing stitches to make it invisible. Weave in different directions (e.g., along a stitch, then turn and weave back through some of the same stitches) to “lock” the tail in place and prevent unraveling.
- Trim any excess yarn close to the fabric, being careful not to cut any of your actual crocheted stitches.
- Blocking (Highly Recommended!): Blocking helps to even out your stitches, straighten your edges, and give the blanket a beautiful, professional drape.
- For Acrylic Yarn (Steam Blocking): Lay your finished blanket flat on a heat-safe surface (like an ironing board or a blocking mat). Hold a steam iron just above the blanket (do NOT touch the iron to the yarn, as acrylic can melt). Allow the steam to penetrate the fibers. Gently pat or shape the blanket into its desired rectangular shape. Let it cool and dry completely.
- For Cotton or Wool (Wet Blocking): Submerge the blanket in cool water for about 20 minutes (with a bit of gentle soap if desired). Gently squeeze out excess water (do not wring). Lay it flat on towels or blocking mats, gently stretching and pinning the blanket into its final dimensions. Allow it to air dry completely.
Congratulations! You’ve created a beautiful, soft, and unique Multicolor Crochet Baby Blanket! This handmade gift will be cherished for years to come.
What colors are you excited to use for your next blanket?