 by
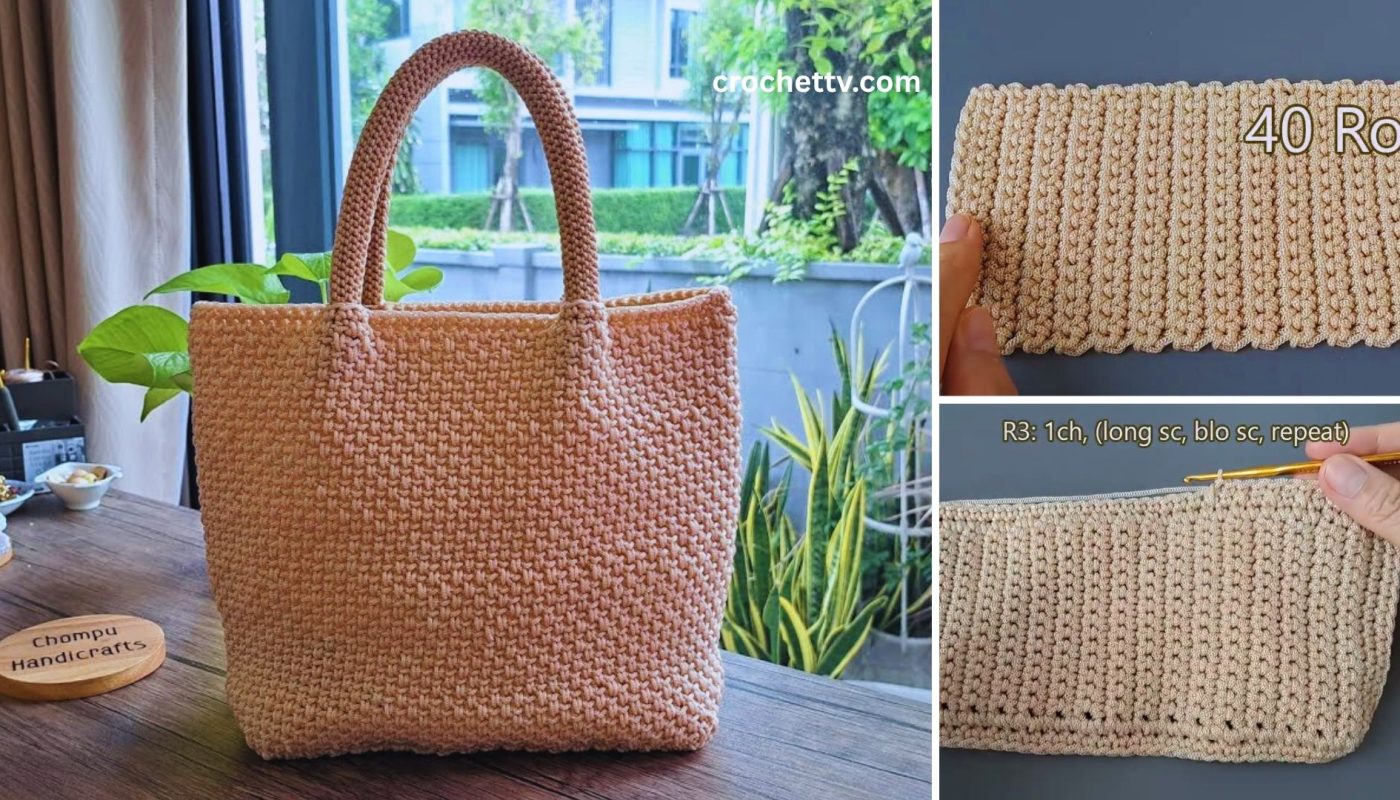
by Crocheting your own handbag is a wonderfully rewarding project! It’s practical, stylish, and a fantastic way to showcase your creativity. For beginners, the key is to choose a simple stitch and a straightforward construction method. This guide will walk you through making a sturdy, functional handbag using basic stitches, perfect for everyday use.
Skill Level: Easy (Great for Beginners!)
This project is ideal if you’re comfortable with or ready to learn:
- Chain (ch): The foundation of most crochet projects.
- Slip Stitch (sl st): For joining stitches neatly.
- Single Crochet (sc): A dense, sturdy stitch, perfect for bags.
- Half Double Crochet (hdc): A slightly taller stitch that works up faster.
- Working in rounds: Crocheting in a continuous spiral or joined rounds.
- Increasing: Making your work wider for the base.
- Fastening off: Securing your yarn.
- Weaving in ends: The essential final step for a polished look.
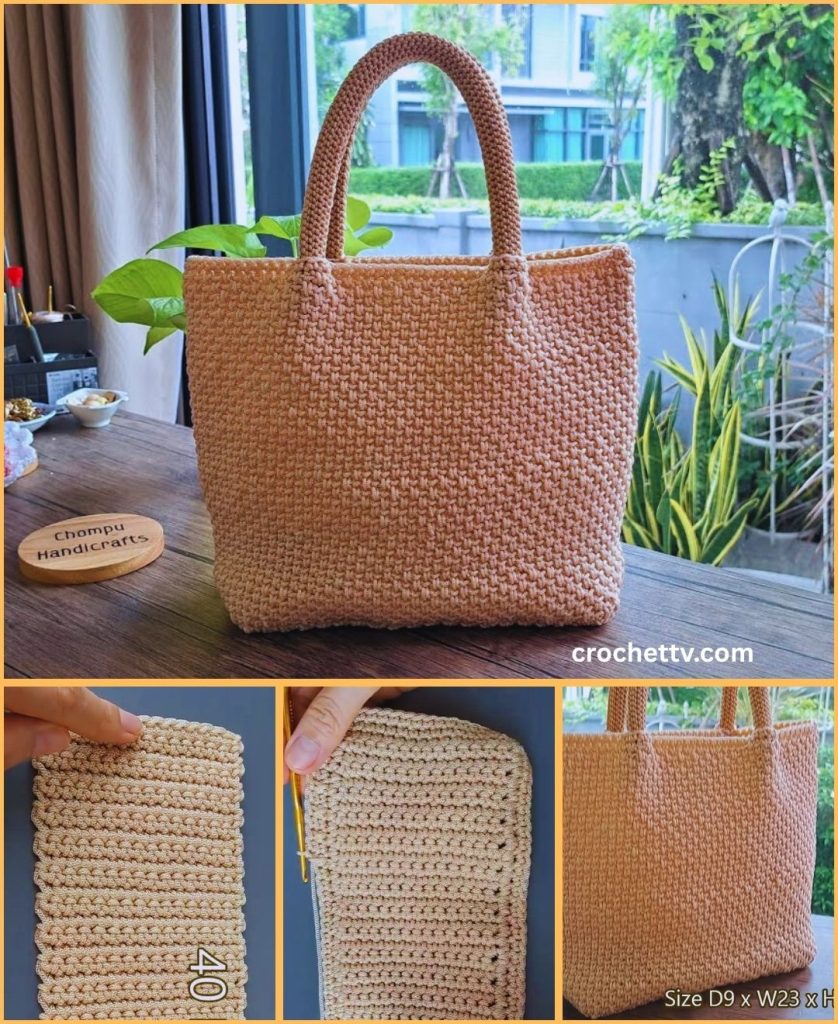
Finished Handbag Dimensions (Approximate):
Using worsted weight yarn and the suggested hook, your finished handbag will typically be:
- Base: 10-12 inches (25-30 cm) wide by 3-4 inches (7.5-10 cm) deep (oval shape)
- Height: 8-10 inches (20-25 cm) (excluding handles)
- Handles: 8-10 inches (20-25 cm) tall loop (from bag edge to top of handle)
These dimensions are easily adjustable. Want a bigger bag? Start with a longer chain for the base. For a taller bag, simply add more rounds to the body.
Materials You’ll Need:
Gathering your supplies before you begin ensures a smooth and enjoyable crocheting session!
- Yarn: Approximately 300-400 yards (275-365 meters) of Worsted Weight (Medium #4) Cotton or Cotton Blend Yarn.
- Why Cotton? Cotton yarn is highly recommended for bags because it’s strong, durable, and holds its shape well, even when you fill your bag with items. It’s also less likely to stretch out over time compared to pure acrylic. Choose any color you love!
- Crochet Hook: Size H/5.0mm or I/5.5mm. This hook size is a great match for worsted weight yarn, helping you create a dense, firm fabric that will allow your handbag to stand up nicely on its own. A slightly larger hook might give more drape, a smaller hook more stiffness.
- Yarn Needle (Tapestry Needle): This specialized needle has a blunt tip and a large eye, making it easy to thread yarn through. It’s essential for seamlessly weaving in all your loose yarn tails at the end of the project.
- Scissors: Any sharp pair for cutting your yarn.
- Stitch Marker (Optional but Recommended): This small plastic or metal clip is incredibly helpful for marking the first stitch of each round, especially when you’re working the base in a continuous spiral. It prevents you from losing your place!
Let’s Crochet Your Easy Handbag!
We’ll build this handbag from the bottom up: creating a sturdy oval base, then building the main body of the bag upwards, and finally adding comfortable, integrated handles.
Part 1: The Oval Base
You’ll begin by creating a flat, sturdy oval shape that forms the bottom of your handbag. This is achieved by working single crochet stitches around a starting chain, which helps prevent a visible seam and creates a robust foundation.
- Starting Chain:
- Make a slip knot with your yarn.
- Chain (ch) 31. (This chain length determines the initial length/width of your bag’s base. For a wider base, chain more stitches; for a narrower one, chain fewer. An odd number of chains generally works well for this oval base method.)
- Round 1 (Working Around the Chain):
- Work 2 single crochet (sc) stitches into the 2nd chain from your hook.
- To make an
sc: Insert your hook into the designated chain, yarn over, pull up a loop (you’ll have 2 loops on your hook), yarn over, pull through both loops on your hook.
- To make an
- (Optional: Place your stitch marker in the first sc you just made. This will be the first stitch of your round for easy tracking.)
- Work 1 sc into each of the next 28 chains.
- In the last chain (which is the 31st chain from your hook): Work 4 sc stitches into this single chain. This helps you smoothly turn the corner around the end of your chain.
- Now, you’ll work back down the other side of your starting chain. Crochet into the bottom loops (the unworked loops) of each chain.
- Work 1 sc into each of the next 28 stitches.
- In the last stitch (this will be the same chain where you placed your very first 2 sc): Work 2 sc stitches into this chain. This finishes turning the other corner and brings you back to where you started the round.
- You should now have a total of 64 sc stitches (2 + 28 + 4 + 28 + 2 = 64). Important: Do NOT join with a slip stitch yet. For the base, you’ll work in continuous rounds (like a spiral) to avoid a visible seam and create a sturdier foundation.
- Work 2 single crochet (sc) stitches into the 2nd chain from your hook.
- Round 2 (Continuing the Oval Shape):
- Work 2 sc into the very first stitch of the round (this is the stitch marked by your stitch marker).
- (If using, move your stitch marker to this new first sc of the round.)
- Work 1 sc into the next stitch.
- Work 1 sc into each of the next 28 stitches.
- Work 2 sc into each of the next 3 stitches. (These are the increases on one of the rounded ends).
- Work 1 sc into each of the next 28 stitches.
- Work 2 sc into each of the next 2 stitches. (These are the increases on the other rounded end).
- You should now have 70 sc stitches. Continue working in continuous rounds.
- Round 3 (Final Base Round):
- Work 2 sc into the first stitch of the round (where your stitch marker is).
- (If using, move your stitch marker to this new first sc of the round.)
- Work 1 sc into the next 2 stitches.
- Work 1 sc into each of the next 28 stitches.
- Work 2 sc into each of the next 3 stitches.
- Work 1 sc into each of the next 2 stitches.
- Work 1 sc into each of the next 28 stitches.
- Work 2 sc into each of the next 2 stitches.
- You should now have 76 sc stitches.
- Stop here! When you finish the last sc of this round, remove your stitch marker.
- Slip stitch (sl st) into the first sc of this round to join. This completes your oval base neatly and prepares you for working straight up the sides of the bag.

Part 2: Building the Body of the Handbag
Now, you’ll work straight up from the finished base to create the main walls of your handbag. We’ll use a single crochet for the first body round to define a crisp edge, then half double crochet for the rest of the body to make it work up a bit faster. You’ll work in joined rounds to keep a neat, vertical seam.
- Round 4 (First Side Round – Defining the Edge):
- Chain 1 (ch 1 – this does NOT count as a stitch; it just gives height).
- Work 1 single crochet (sc) into the back loop only (BLO) of each stitch around the entire round. (76 sc)
- Why BLO? Working into the back loop creates a distinct, visible ridge on the outside of the bag. This ridge helps the bag’s sides stand up straight from the base, giving it a crisp, defined bottom, rather than a rounded one.
- Slip stitch (sl st) into the first sc of the round to join.
- Rounds Onwards (Body Height – Half Double Crochet):
- Chain 2 (ch 2 – this counts as your first half double crochet (hdc) of the round).
- To make an
hdc: Yarn over, insert hook into stitch, yarn over, pull up a loop (3 loops on hook), yarn over, pull through all 3 loops on hook.
- To make an
- Work 1 hdc into each stitch around the round. (Your stitch count remains the same as the previous round: 76 hdc).
- Slip stitch (sl st) into the top of the beginning ch 2 to join.
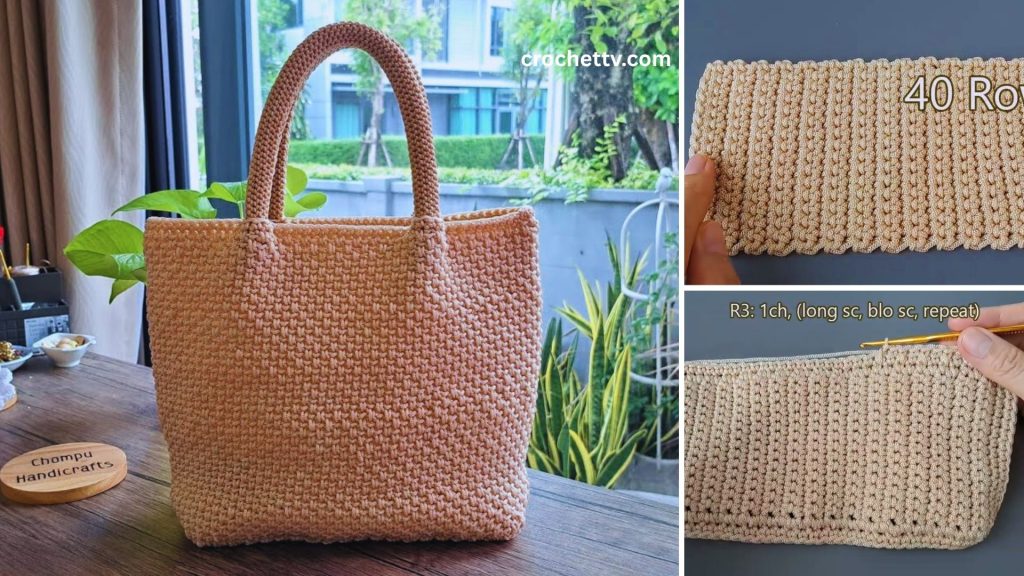
- Repeat this round (working 1 hdc in each stitch around) until your handbag reaches your desired height. For the approximate dimensions given, you’ll want to do about 18-22 more rounds (for a total of 22-26 rounds for the body, including Round 4).
- The height is entirely a personal preference. Hold it up as you go and see if you like the look and feel. The hdc stitch works up faster than sc, which is great for building the main body of the bag!
- Chain 2 (ch 2 – this counts as your first half double crochet (hdc) of the round).
Part 3: Creating the Handles
Now you’ll create sturdy, integrated handles that extend directly from the top of your bag. We’ll continue using hdc for consistency.
- Handle Placement Round (Setting up the openings):
- After your last body round, make sure you’ve joined with a slip stitch.
- Chain 2 (ch 2 – this counts as your first hdc).
- Work 1 hdc into the next 16 stitches. (This creates the front section of the bag opening).
- Chain 40 (ch 40 – this creates the length of your first handle. Adjust this number for a longer shoulder strap or a shorter hand-carry handle. More chains = longer handle).
- Skip the next 20 stitches on the bag’s top edge (this creates the open space for the bag’s main opening, where your arm will go).
- Work 1 hdc into the next 20 stitches. (This section bridges the gap across the top of the bag between your two handles).
- Chain 40 (ch 40 – this creates the length of your second handle, matching the first).
- Skip the next 20 stitches.
- Work 1 hdc into the next 4 stitches. (This should bring you back to the start of the round, completing the other front section).
- Slip stitch (sl st) into the top of the beginning ch 2 to join.
- Handle Strengthening Rounds (Make them sturdy!):
- Chain 2 (ch 2 – counts as first hdc).
- Work 1 hdc into each hdc stitch along the top edge of the bag (these are the 17 hdc, 20 hdc, and 4 hdc sections).
- When you reach a chain-handle loop, you’ll work half double crochets directly into each chain of the loop. Work 1 hdc into each of the 40 chains of the loop. This creates a very sturdy and comfortable handle.
- Continue working hdc stitches into the bag top and then around the second chain-40 handle loop (40 hdc into those chains).
- Slip stitch (sl st) into the top of the beginning ch 2 to join.
- Repeat this entire round (starting with ch 2, then hdc all around the bag top and into the previous round’s handle stitches) one or two more times (for a total of 2 or 3 handle strengthening rounds). This makes the handles even stronger, more comfortable, and less likely to stretch with use.
- Fasten Off:
- After completing your final handle strengthening round and joining with a slip stitch, cut your yarn, leaving a tail of about 6 inches (15 cm).
- Yarn over with your hook, pull the cut tail completely through the loop left on your hook, and gently tug to secure the knot.
Part 4: Final Finishing Touches (The Secret to a Professional Look!)
This stage is crucial for making your handbag look polished, clean, and durable.
- Weave in All Ends (Meticulously!):
- You’ll have several yarn tails: one from your starting chain on the base, and one from where you fastened off at the handles.
- Thread each yarn tail onto your yarn needle.
- How to Weave Neatly: Insert the needle into existing stitches on the inside of your bag. Weave the tail into existing stitches for at least 3-4 inches (7.5-10 cm). Try to follow the path of existing stitches to make it invisible. To make it extra secure and prevent unraveling, subtly change direction (e.g., weave along a stitch, then turn and weave back through some of the same stitches diagonally or perpendicularly) to “lock” the tail in place.
- Once secured, trim any excess yarn close to the fabric, being careful not to cut any of your actual crocheted stitches.
- Blocking (Optional but Recommended):
- Blocking is a simple process that can significantly improve the shape of your bag, even out any minor tension inconsistencies, and give it a more polished, professional appearance. It helps the bag stand up nicely on its own.
- Method for Cotton Yarn:
- Gently mist the entire bag evenly with cool water using a spray bottle until it’s damp, but not soaking wet.
- Stuff the bag lightly with clean towels, old t-shirts, or even plastic bags to help it hold its intended shape (paying attention to the corners and the handles).
- Allow the bag to air dry completely and thoroughly in a well-ventilated area. This might take a day or two, depending on humidity. Do not move or use the bag until it’s bone dry.
- Optional: Add a Fabric Lining or Magnetic Snap:
- For extra durability, to prevent small items from slipping through stitches, and to add a pop of contrasting pattern, consider adding a fabric lining. This involves basic sewing skills.
- A magnetic snap or a large button can also be sewn to the top opening of the bag for closure, if desired.
Congratulations! You’ve successfully crocheted your very own Easy Handbag! This is a fantastic accomplishment for any beginner, and you now have a sturdy, handmade accessory that’s both functional and stylish.
What color will your next handmade handbag be?