by
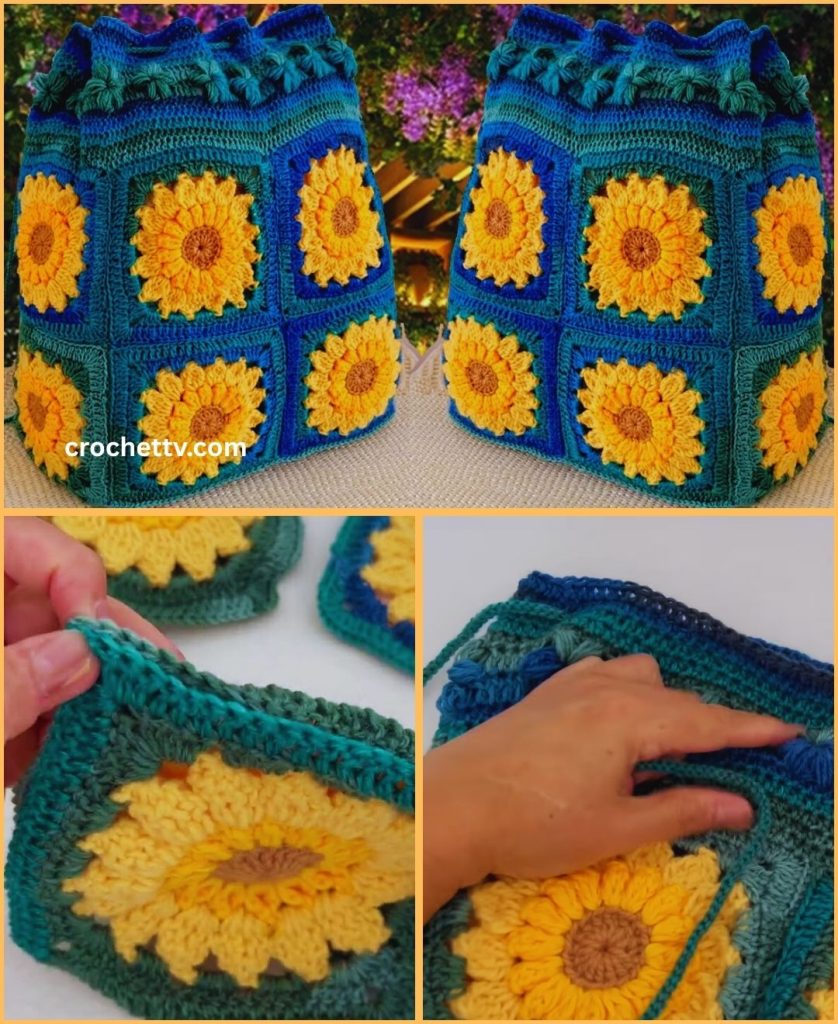
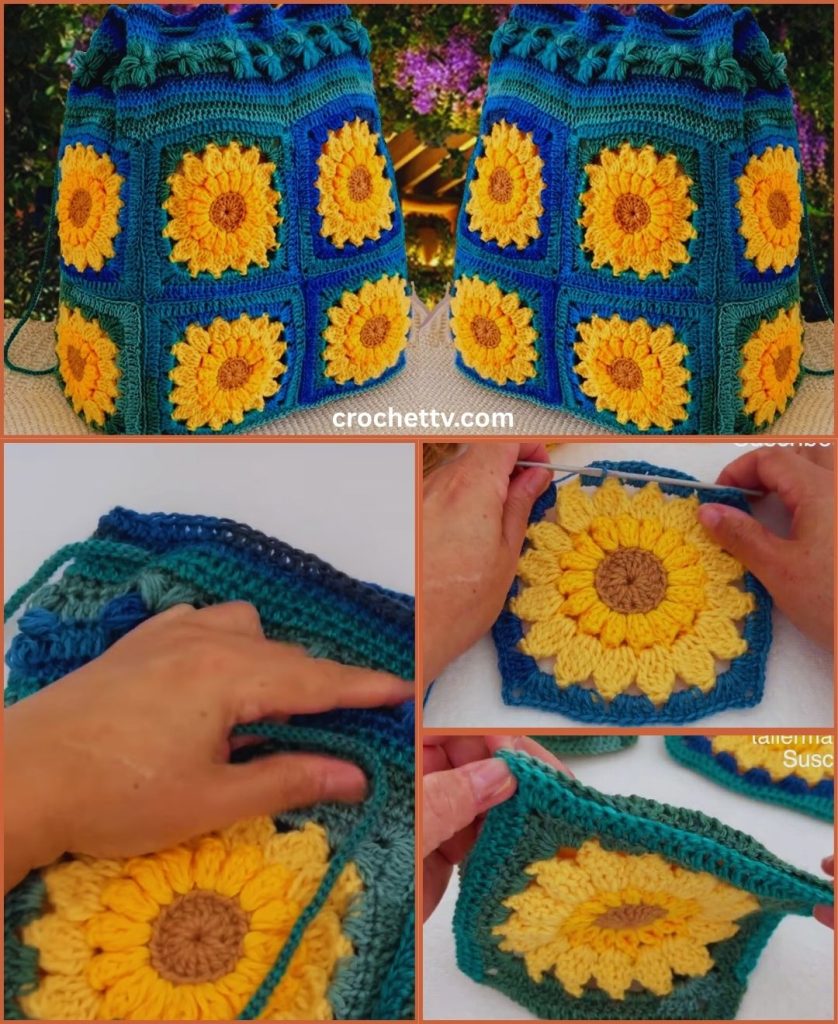
by Crocheting a backpack is a fantastic project that combines practicality with personal style. A Square Flower Backpack offers a unique and eye-catching design, integrating beautiful floral motifs into a functional accessory. This detailed guide will walk you through the process, from understanding the stitches to assembling your finished backpack.
Understanding the Concept: Motif-Based Construction
Unlike a traditional backpack worked in continuous rounds, a “Square Flower Backpack” is typically constructed by crocheting individual square motifs that feature a flower design. These motifs are then joined together to form the front, back, sides, and bottom of the backpack. This modular approach allows for endless creativity in color combinations and motif arrangements.
Materials You’ll Need 🧶
Gathering the right materials is crucial for a successful project:
- Yarn:
- Main Color (for backpack structure and joining): Approximately 200-300 grams of durable yarn like worsted weight cotton or a cotton blend. Cotton provides good structure and is less prone to stretching for a bag.
- Flower Colors (for motifs): Various smaller skeins or scraps of worsted weight cotton in your chosen flower and background colors for each square. You’ll need at least 2-3 colors per flower motif for a visually appealing design.
- Crochet Hook: A hook size appropriate for your chosen yarn, usually a 4.0mm (G) or 5.0mm (H) for worsted weight. Check your yarn label for recommendations.
- Scissors: For cutting yarn.
- Yarn Needle (Tapestry Needle): Essential for weaving in ends and seaming the motifs together.
- Stitch Markers: Helpful for marking corners or the beginning of rounds.
- Optional for Straps & Closure:
- D-rings or Rectangle Rings: For strap attachment.
- Buckles or Drawstring Cord: For the main opening.
- Fabric Lining: For added durability and to prevent items from falling through stitches (highly recommended for backpacks).
- Sewing Machine and Thread (if lining): For attaching the fabric lining.
Essential Crochet Stitches 🧵
This project will primarily use the following basic stitches. Practice them if you’re not familiar:
- Ch (Chain): The foundation stitch.
- Sl St (Slip Stitch): Used to join stitches and move across stitches without adding height.
- Sc (Single Crochet): A dense, short stitch.
- Hdc (Half Double Crochet): A stitch taller than sc but shorter than dc.
- Dc (Double Crochet): A common, versatile stitch used for height.
- Tr (Treble Crochet): A taller stitch, often used for petals.
Part 1: Crocheting the Square Flower Motifs 🌸
The heart of your backpack is the beautiful square flower motif. You will need to make multiple identical squares (typically 6-10 depending on the desired backpack size: 1 for the front, 1 for the back, and 4-8 for the sides/bottom).
Let’s break down a common and visually appealing square flower motif pattern (often a variation of the “African Flower Square” or similar floral granny square):
Example Motif Pattern (using Color A for center, Color B for petals, Color C for petal outline/background, Color D for final square border)
- Round 1: Center (Color A)
- Start with a Magic Ring (or Ch 4 and join with sl st to form a ring).
- Ch 2 (counts as first Hdc). Hdc 9 into the ring. (10 Hdc total)
- Join with a sl st to the top of the initial Ch 2. Fasten off Color A. This forms the small center of your flower.
- Round 2: First Petal Layer (Color B)
- Attach Color B in any Hdc from Round 1 with a sl st.
- Ch 3 (counts as first Dc). Dc 1 in the same stitch.
- Ch 1.
- (2 Dc in the next Hdc, Ch 1) Repeat 8 more times around.
- Join with a sl st to the top of the initial Ch 3. Fasten off Color B. You’ll have 10 sets of (2 Dc, Ch 1).
- Round 3: Second Petal Layer (Color C)
- Attach Color C into any Ch 1 space from Round 2 with a sl st.
- Ch 3 (counts as first Dc). (Dc 1, Ch 2, Dc 2) into the same Ch 1 space. This creates the first “petal” cluster.
- (Dc 2, Ch 2, Dc 2) into the next Ch 1 space. Repeat 8 more times around.
- Join with a sl st to the top of the initial Ch 3. Fasten off Color C. You’ll have 10 larger petal clusters. This round uses the “puff stitch” or similar techniques in many flower squares; here, we’re using dc groups for simplicity.
- Round 4: Squaring the Circle (Color D)
- Attach Color D into any Ch 2 space (the top of a petal) from Round 3 with a sl st.
- Ch 3 (counts as first Dc). (Dc 2, Ch 2, Dc 3) into the same Ch 2 space. This forms the first corner.
- Dc 3 into the next space between petals (the space where two petal “bases” meet).
- (Dc 3, Ch 2, Dc 3) into the next Ch 2 space (corner).
- (Dc 3 into the next space between petals). Repeat steps 4 and 5 around. You’ll have 4 corners and 4 side groups.
- Join with a sl st to the top of the initial Ch 3. This round transforms the circular flower into a square shape.
- Round 5: Final Square Border (Color D or Main Color)
- Ch 3 (counts as first Dc). Dc in each stitch along the side until you reach the corner.
- (Dc 2, Ch 2, Dc 2) in the corner Ch 2 space.
- Dc in each stitch along the next side.
- Repeat steps 2 and 3 around the square.
- Join with a sl st to the top of the initial Ch 3. Fasten off, leaving a long tail for seaming if desired, or weave in all ends if you plan to seam separately. You now have one completed square flower motif!
Repeat this process to create the required number of squares for your backpack (e.g., 2 for front/back, 4 for a basic side/bottom strip, or more for larger side panels). Weave in all ends on each square as you complete it. This is tedious but essential for a neat finish.

Part 2: Assembling the Backpack 🔗
Once all your square motifs are complete and ends woven in, it’s time to assemble your backpack.
1. Plan Your Layout 🗺️
Before seaming, lay out your squares to visualize the backpack shape. A common layout for a rectangular backpack would be:
- Front Panel: 1 square
- Back Panel: 1 square
- Side/Bottom Strip: 2-4 squares joined in a line.
- Optional Top Flap: 1 square (or a rectangular piece crocheted separately).
2. Seaming the Motifs 🧵
There are several methods for joining crochet squares. The most common for bags are:
- Slip Stitch Join (Right Sides Facing): Place two squares with their right sides facing each other. Insert your hook through both loops of the outer edges of both squares and slip stitch them together. This creates a neat, flat seam on the inside.
- Single Crochet Join (Right Sides Facing): Similar to sl st join, but use single crochet stitches. This creates a slightly more pronounced, but still neat, seam.
- Whip Stitch (Yarn Needle): Place squares with right sides facing up. Using a yarn needle and a long strand of yarn (your main color or a contrasting one), stitch through the corresponding loops of both squares. This creates a strong, invisible seam if done carefully.
- Mattress Stitch (Yarn Needle): This is excellent for creating an almost invisible seam. You work from the right side of the fabric, picking up loops from just below the edge on each piece and drawing the yarn through.
Recommended Seaming for Backpacks: Whip Stitch or Mattress Stitch. They create strong, flat seams that are less bulky and more durable for a bag.
Steps for Assembly:
- Create the Side/Bottom Strip: Join 2-4 squares in a straight line to form the strip that will go around the sides and bottom.
- Attach Front Panel: Seam one long edge of your side/bottom strip to the bottom edge of your front square. Then, continue seaming up the sides of the front square to the side edges of the strip.
- Attach Back Panel: Now, seam the remaining long edge of the side/bottom strip to the bottom edge of your back square. Continue seaming up the sides of the back square to the remaining side edges of the strip. You should now have a basic box shape for your backpack.
Part 3: Adding the Top, Straps, and Finishing Touches 🌟
1. The Top Opening and Closure 🎒
You have a few options for the backpack’s opening:
- Drawstring Top:
- Work a few rounds of sc or hdc directly around the top opening of your assembled backpack, using your main color.
- In the final round, create eyelets for the drawstring: (Ch 2, skip 1 stitch, sc in next 2 stitches) around, or (Dc 1, Ch 1, skip 1 stitch) around.
- Weave a crocheted chain, i-cord, or commercial drawstring cord through these eyelets.
- Flap Closure:
- If you planned for a flap, you can either:
- Crochet a new rectangular flap: Ch the width of your backpack top, then work in rows of Dc or Hdc until it’s the desired length to cover the opening.
- Use another Square Flower Motif: If you want a perfectly matching flap, use another square.
- Attach the flap to the back of the backpack’s top opening using a strong seam (sc join or whip stitch).
- Add a button and loop, a buckle, or a magnetic snap to secure the flap.
- If you planned for a flap, you can either:
2. Creating and Attaching Straps 💪
Backpack straps need to be sturdy and comfortable.
- Crocheted Straps:
- Ch a long chain (e.g., 60-80 inches, depending on desired length and adjustability).
- Work rows of Sc or Hdc into the chain, making a strip that is 2-3 inches wide.
- Fold the strip in half lengthwise and sc or sl st the edges together to create a thick, strong strap. Make two.
- Webbing Straps: For maximum durability and adjustable straps, consider using nylon webbing and hardware (D-rings, buckles). You can crochet covers for these if you prefer a softer feel.
Attaching Straps:
- Top Attachment: Securely sew the top ends of the straps to the top back corners of the backpack. Reinforce with multiple stitches.
- Bottom Attachment: Attach the bottom ends of the straps to the bottom back corners or the bottom edge of the backpack. If using D-rings, crochet small loops to attach the D-rings to the bottom of the backpack, then thread the straps through.
3. Adding a Lining (Highly Recommended!) 🧵
A fabric lining significantly improves the durability and functionality of your crocheted backpack. It prevents items from poking through stitches and adds structure.
- Measure and Cut Fabric: Measure the dimensions of your finished crocheted backpack (front, back, sides, bottom). Cut fabric pieces with a seam allowance (e.g., 1/2 inch) that match these dimensions.
- Sew Fabric Liner: Stitch the fabric pieces together on a sewing machine (or by hand) to create a fabric “bag” that perfectly fits inside your crocheted backpack.
- Insert and Sew: Insert the fabric liner into the crocheted backpack. Fold over the raw edges of the fabric at the top opening and hand-sew them neatly to the inside edge of the crocheted opening.

Finishing Your Backpack ✨
- Weave in any remaining loose ends meticulously. Double-knotting and weaving deeply into the stitches prevents unraveling.
- Add any desired embellishments: Keychains, tassels, or extra crocheted flowers.
- Block (if necessary): If your squares warped slightly during assembly, a light blocking can help even out the shape of the finished backpack.
Tips for Success & Customization 💡
- Swatch First: Always crochet a small swatch with your chosen yarn and hook to check your gauge. This ensures your squares will be the correct size.
- Consistent Tension: Maintain even tension throughout your crocheting for uniform squares and a professional-looking finished product.
- Color Planning: Experiment with different color combinations for your flower motifs. Use a color wheel to find harmonious or contrasting palettes. Consider how the motif colors will interact with the main backpack color.
- Size Adjustments: To make a larger or smaller backpack, simply adjust the number of squares you make. For a deeper backpack, make your side/bottom strip wider (more rows of stitches) or use more squares joined side-by-side.
- Practice Seaming: If you’re new to seaming, practice on a few scrap squares before joining your main pieces.
- Reinforce Stress Points: For areas like strap attachments or heavy-use sections, add extra stitches or even a small piece of felt or fabric on the inside for reinforcement.
Crocheting a Square Flower Backpack is a rewarding project that results in a beautiful and unique accessory. Take your time, enjoy the process of creating each motif, and you’ll soon have a stunning handmade backpack to show off!