by
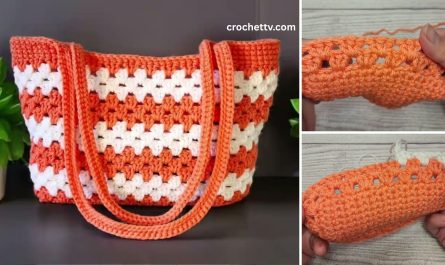
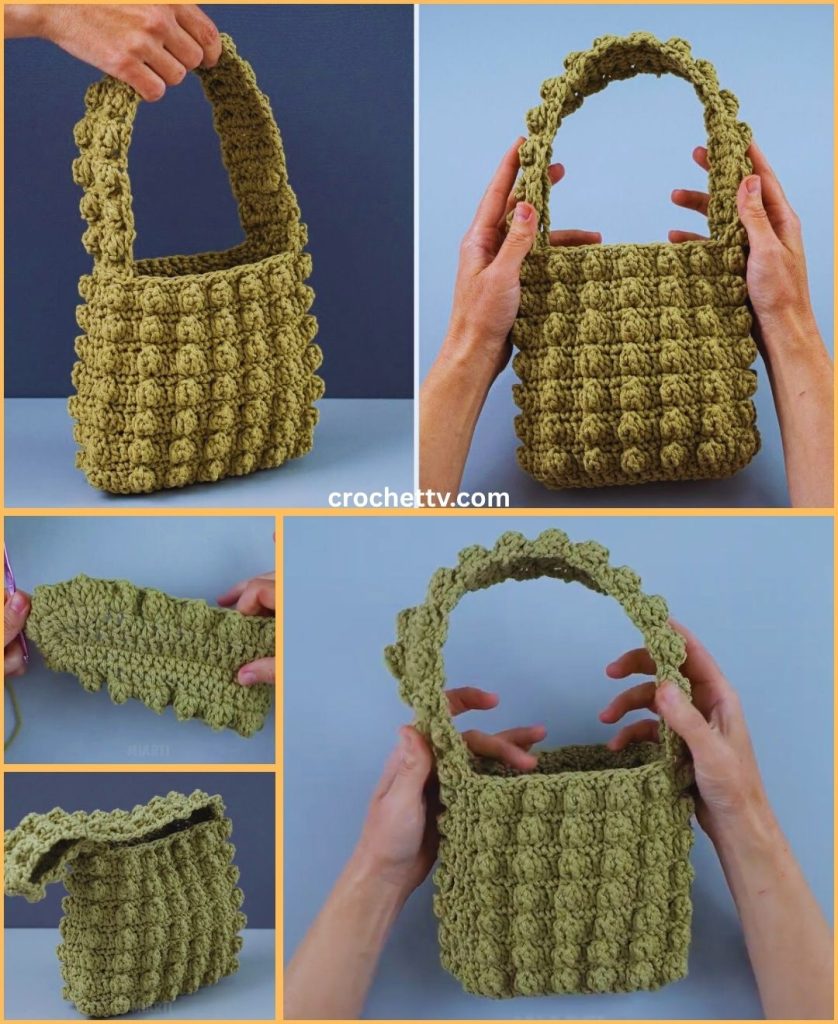
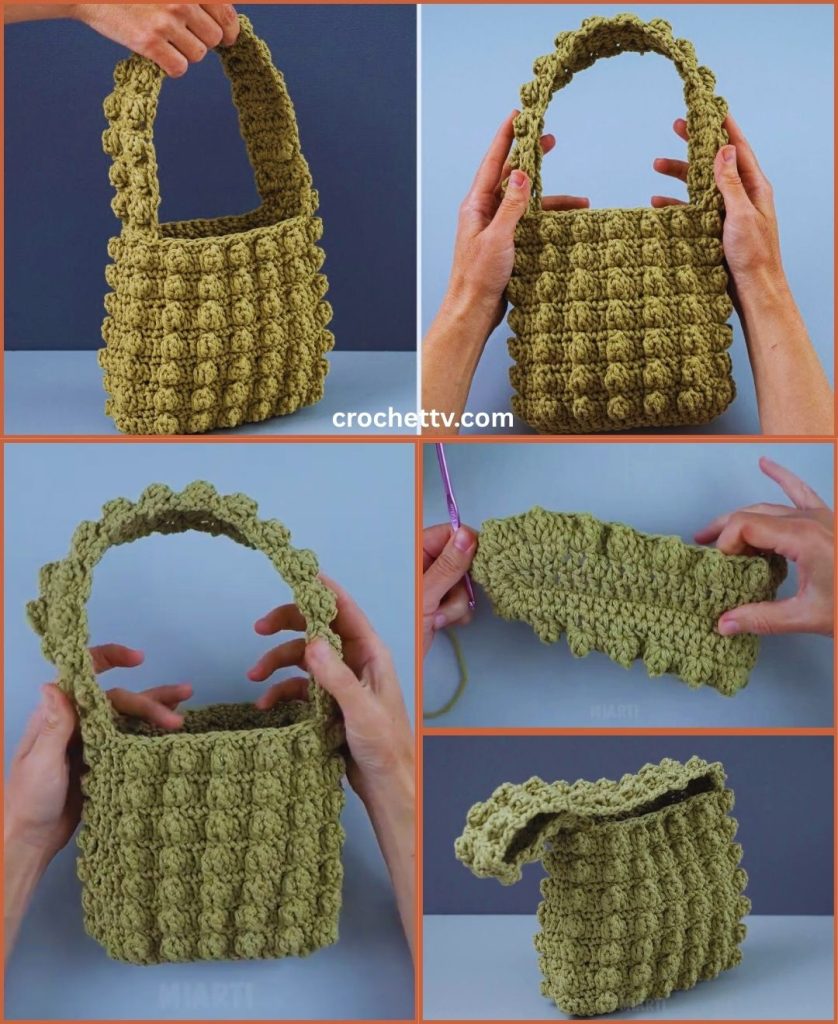
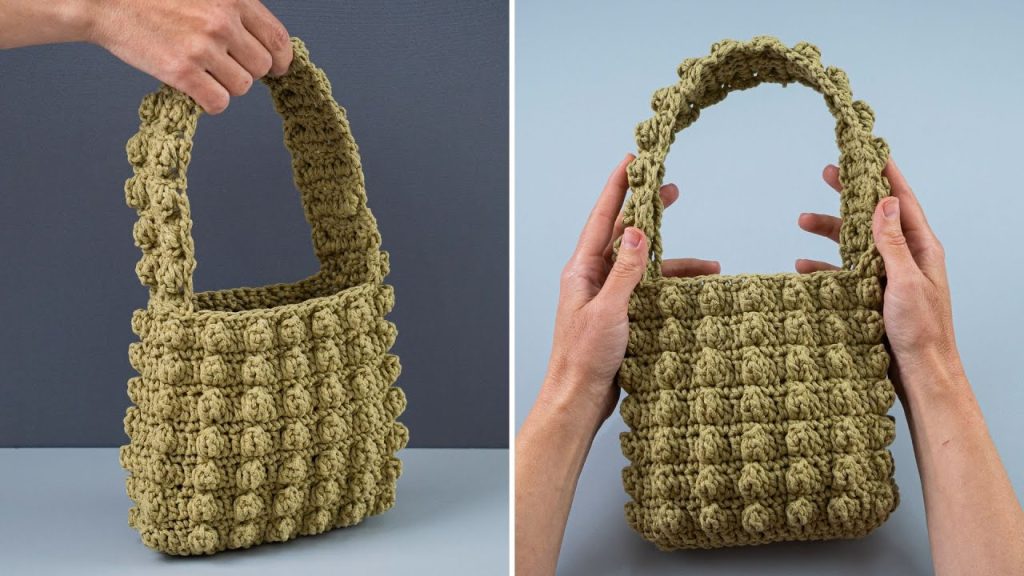
by Get ready to create an irresistibly soft and squishy accessory! This tutorial will show you how to crochet a cute puff cloud bag using the wonderfully textured popcorn stitch. Despite its intricate appearance, the popcorn stitch is straightforward, making this project surprisingly achievable for beginners looking to level up their skills. We’ll build this bag from the bottom up, creating a delightful, cloud-like texture that’s perfect for carrying your essentials.
Skill Level: Confident Beginner to Intermediate
This project is fantastic if you’re comfortable with basic stitches and ready to learn a special stitch. You’ll practice:
- Magic Ring (MR) / Adjustable Ring: For a neat, closed base.
- Chain (ch): The fundamental foundation and spacing stitch.
- Slip Stitch (sl st): For joining rounds neatly.
- Single Crochet (sc): A dense, sturdy stitch (used for the base and between popcorns).
- Half Double Crochet (hdc): A versatile, medium-height stitch (optional for handle/drawstring).
- Double Crochet (dc): A taller stitch, the foundation for the popcorn stitch.
- Popcorn Stitch (PC): The star of the show, creating the “puff” texture!
- Working in Rounds: Crocheting in continuous or joined circles.
- Increasing: Making your work wider for the base.
- Fastening Off: Securely ending your yarn.
- Weaving in Ends: The essential final step for a polished and durable bag.
Finished Puff Cloud Bag Dimensions (Approximate):
Using worsted weight yarn (Medium #4) and the suggested hook, your finished bag will typically be:
- Base Diameter: 5-6 inches (12.5-15 cm)
- Height: 6-8 inches (15-20 cm) (excluding drawstring closure)
These dimensions are easily adjustable! Want a larger bag? Increase the number of stitches in your base rounds and add more body rounds. For a smaller one, do the opposite.
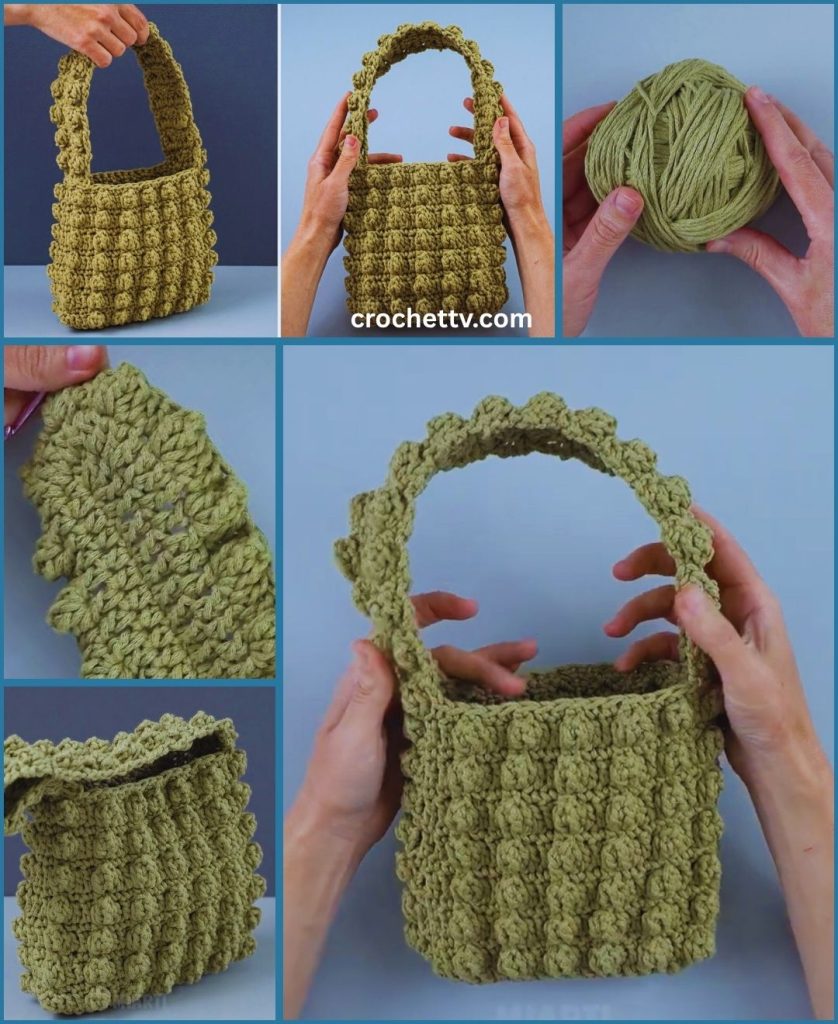
Materials You’ll Need:
Gathering your supplies beforehand ensures a smooth and enjoyable crocheting session!
- Yarn: Approximately 150-250 yards (135-230 meters) of Worsted Weight (Medium #4) Yarn.
- Why this weight? Worsted weight yarn makes for a quick project and creates a lovely, plump popcorn stitch.
- Fiber: Acrylic, Cotton, or a Soft Blend are great choices. Acrylic or soft blends will give you a very “cloud-like” squish. Cotton will be more structured and durable, which is also a good option.
- Color: For a “cloud” look, shades of white, cream, light blue, or pastel pink/purple are perfect. You could also choose a vibrant color to make a “fluffy” statement bag!
- Crochet Hook: Size I/5.5mm or J/6.0mm. A slightly larger hook than typically recommended for worsted weight (like 5.5mm or 6.0mm) will help your popcorn stitches really “pop” and give the bag a softer, more cloud-like feel. If you crochet loosely, use the 5.5mm; if tightly, try the 6.0mm.
- Yarn Needle (Tapestry Needle): Essential for weaving in all your loose yarn tails and for threading the drawstring.
- Scissors: Any sharp pair for cutting your yarn.
- Stitch Marker (Optional but Recommended): Very helpful for marking the first stitch of each round, especially when working the base and body in continuous spirals.
Understanding the Popcorn Stitch (PC)
Let’s quickly review the star of our bag! The popcorn stitch is a cluster of double crochet stitches that are then joined together to create a raised, bumpy texture.
How to make a Popcorn Stitch (PC):
- Work 5 double crochet (dc) stitches into the same stitch or space.
- Remove your hook from the loop on your hook. Let the loop hang.
- Insert your hook into the first dc of the 5-dc cluster (the very first dc you made).
- Reinsert your hook into the loop you just removed (the one that was hanging).
- Yarn over and pull that loop through the first dc. This action pulls all five dc stitches together, causing them to “pop” out from your work.
- Chain 1 (ch 1) to secure the popcorn stitch. This chain is an integral part of the stitch and helps it maintain its prominent texture.
- Note: In this pattern, the ch-1 that secures the popcorn does not count as a stitch for the stitch count of the row. It simply locks the popcorn in place.
[Image: A sequence of photos or clear diagram showing steps of making a popcorn stitch: 1) 5 dc in one stitch, 2) hook removed, 3) hook inserted into first dc, 4) loop re-inserted, 5) loop pulled through, 6) ch 1 to secure.]
Let’s Crochet Your Cute Puff Cloud Bag!
We’ll construct this bag from the bottom up:
- Round Base: Creating a flat, sturdy circle.
- Bag Body: Working straight up with the popcorn stitch pattern.
- Top Edge & Drawstring: Finishing the opening.
Part 1: The Round Base (Single Crochet)
We’ll begin with a standard circular base using single crochet. This creates a solid, flat foundation for your bag.
Use your chosen yarn color (e.g., White, Light Blue)
- Round 1 (Magic Ring):
- Create a Magic Ring (MR).
- Chain 1 (ch 1) (does NOT count as a stitch).
- Work 8 single crochet (sc) stitches into the Magic Ring.
- Pull the Magic Ring tail tightly to close the hole in the center.
- Join with a slip stitch (sl st) to the first sc you made. (8 sc)
- Alternative Start (if MR is tricky): Chain 3, sl st to first ch to form a ring. Ch 1, work 8 sc into the ring. Sl st to first sc.
- Round 2 (Increase Round):
- Chain 1 (ch 1) (does NOT count as a stitch).
- Work 2 sc into each stitch around the round. (16 sc)
- Join with a sl st to the first sc.
- Round 3 (Increase Round):
- Chain 1 (ch 1).
- *Work 1 sc into the first stitch. Work 2 sc into the next stitch.*
- Repeat from * to * around the round. (24 sc)
- Join with a sl st to the first sc.
- Round 4 (Increase Round):
- Chain 1 (ch 1).
- *Work 1 sc into each of the first 2 stitches. Work 2 sc into the next stitch.*
- Repeat from * to * around the round. (32 sc)
- Join with a sl st to the first sc.
- Round 5 (Increase Round):
- Chain 1 (ch 1).
- *Work 1 sc into each of the first 3 stitches. Work 2 sc into the next stitch.*
- Repeat from * to * around the round. (40 sc)
- Join with a sl st to the first sc.
- Round 6 (Increase Round – Final Base Size):
- Chain 1 (ch 1).
- *Work 1 sc into each of the first 4 stitches. Work 2 sc into the next stitch.*
- Repeat from * to * around the round. (48 sc)
- Join with a sl st to the first sc.
- Do NOT Fasten Off yet, as we will transition straight into the body.
- Self-Correction Tip: Your base should lay flat. If it’s ruffling, you have too many increases; if it’s cupping, you have too few. Adjust the number of stitches in your increase rounds accordingly, keeping the increases evenly spaced.
Part 2: The Bag Body (Popcorn Stitch Pattern)
Now for the fun part – creating that wonderful “puff cloud” texture! We’ll alternate between rows of single crochet (to provide a base) and rows of popcorn stitches.
- Round 7 (Defining the Side Wall):
- Chain 1 (ch 1) (does NOT count as a stitch).
- Work 1 single crochet (sc) into the back loop only (BLO) of each stitch around the entire round. (48 sc)
- Why BLO? This creates a distinct ridge on the outside of your bag, where the base transitions to the side wall. It helps the bag stand up straight and gives it a crisp bottom edge.
- Join with a sl st to the first sc.
- Round 8 (Popcorn Stitch Round):
- Chain 1 (ch 1) (does NOT count as a stitch).
- Work 1 sc into the first stitch.
- Work 1 Popcorn Stitch (PC) into the next stitch.
- *Work 1 sc into the next stitch. Work 1 PC into the next stitch.*
- Repeat from * to * around the round. You should have 24 sc stitches and 24 popcorn stitches.
- Join with a sl st to the first sc.
- Self-Correction Tip: The popcorns will pop out towards you if you work them on the “right side” of your fabric. If they’re popping inward, you might be twisting your work or working from the wrong side; simply ensure your work is always facing the same direction as you begin each round.
- Round 9 (Single Crochet Round – Connecting):
- Chain 1 (ch 1) (does NOT count as a stitch).
- Work 1 sc into the top of the first sc stitch.
- Work 1 sc into the top of the Popcorn Stitch (work into the ch-1 that secured the popcorn, or into the actual bobble if it’s easier).
- *Work 1 sc into the top of the next sc stitch. Work 1 sc into the top of the next Popcorn Stitch.*
- Repeat from * to * around the round. (48 sc)
- Join with a sl st to the first sc. This round lays flat and prepares for the next popcorn row.
- Continuing the Pattern (Body Height):
- Repeat Rounds 8 and 9 until your bag reaches your desired height. For the approximate dimensions given, you’ll want to repeat these two rounds approximately 5-7 more times (which means you’ll have 5-7 more rows of popcorns).
- Always end on a Round 9 (a single crochet connecting round) for a neat top edge before starting the drawstring casing.
- After your last body round, join with a sl st to the first sc.
Part 3: Top Edge & Drawstring
This section creates a neat top border and a functional casing for your drawstring closure.
- Round (Drawstring Holes):
- Chain 2 (ch 2) (counts as your first hdc for this round).
- Work 1 hdc into the next 2 stitches.
- * Chain 1 (ch 1) (this creates a hole for the drawstring). Skip 1 stitch.
- Work 1 hdc into each of the next 3 stitches.*
- Repeat from * to * around the round.
- Join with a sl st to the top of the beginning ch 2. (You should have 12 ch-1 spaces for your drawstring).
- Round (Drawstring Casing – Optional Sturdy Edge):
- Chain 1 (ch 1).
- Work 1 sc into each hdc stitch and 1 sc into each ch-1 space around the round. (48 sc)
- Join with a sl st to the first sc.
- Round (Final Top Border – Optional):
- Chain 1 (ch 1).
- Work 1 sc into each stitch around the round. (48 sc)
- Join with a sl st to the first sc.
- Fasten Off (FO), leaving a 6-inch tail.
Part 4: The Drawstring
This simple chain forms the closure of your bag.
- Making the Drawstring:
- Chain approximately 100-120 stitches. This length will allow you to thread it through the casing and tie a nice bow or knot. Adjust as desired.
- Fasten Off (FO), leaving short tails (about 2-3 inches).
- Optional: For a thicker drawstring, you can make two chains of this length and twist them together, or make a very thin row of single crochet instead of just a chain.
- Inserting the Drawstring:
- Using your yarn needle, thread the long drawstring chain through the chain-1 spaces created in the Drawstring Holes Round (Round X, from Part 3).
- Start from the middle of the front of the bag, weave it in and out of the holes, go all the way around, and come out the middle of the front again. Ensure both ends of the drawstring emerge from the front for easy tying.
- Tie the two ends of the drawstring together in a secure knot. You can add beads to the ends for decoration if you like.
Part 5: Final Finishing Touches (The Polishing Touches!)
These last steps are crucial for making your puff cloud bag look professional, neat, and durable.
- Weave in All Ends (Meticulously!):
- You’ll have yarn tails from your starting Magic Ring, from fastening off, and from your drawstring.
- Thread each yarn tail onto your yarn needle.
- How to Weave Neatly: On the inside of your bag, insert the needle into existing stitches of the same color as the tail. Weave the tail through the fabric for at least 3-4 inches (7.5-10 cm). To make it extra secure and prevent unraveling, subtly change direction within the stitches (e.g., weave along a stitch, then turn and weave back through some of the same stitches diagonally or perpendicularly) to “lock” the tail in place.
- Once secured, trim any excess yarn very close to the fabric, being careful not to snip any of your actual crocheted stitches.
- Blocking (Optional but Recommended):
- Blocking can significantly improve the shape, evenness of stitches, and overall appearance of your finished bag. It helps to define the popcorn stitches and makes the bag stand up better.
- Method for Acrylic/Cotton Yarn (Wet or Steam Blocking):
- Wet Blocking: Gently mist your entire bag evenly with cool water using a spray bottle until it’s damp, but not soaking wet.
- Carefully stuff the bag lightly with clean towels, tissue paper, or even a small balloon to help it hold its intended shape and to really make those popcorns pop!
- Allow the bag to air dry completely and thoroughly in a well-ventilated area. This might take a day or two, depending on humidity. Do not move or use the bag until it’s bone dry.
- Steam Blocking (for acrylic): Gently hover a steam iron over the garment (do NOT touch the iron to acrylic yarn, as it can melt or scorch). The steam will relax the fibers. Gently pat and shape the bag. Allow it to cool and dry completely.
Congratulations! You’ve successfully crocheted a super cute and wonderfully textured Puff Cloud Bag! This is a fantastic accomplishment for a beginner, and you now have a unique, handmade accessory that’s both functional and stylish.
What will be the first soft item you store in your new puff cloud bag?