by
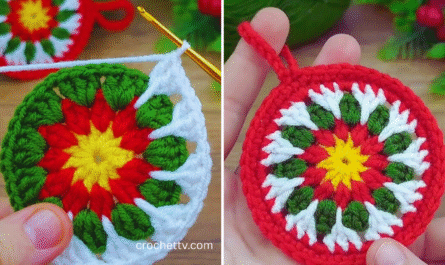
by Let’s crochet an adorable and practical flower coaster! These little beauties are quick to make, beginner-friendly, and perfect for adding a pop of handmade charm to your home while protecting your surfaces from condensation and heat. They also make wonderful last-minute gifts, allowing you to personalize them with a rainbow of colors to match any decor.
How to Crochet a Flower Coaster: Step-by-Step Tutorial (A Detailed Guide for Beginners)
This comprehensive tutorial will guide you through creating a charming flower-shaped coaster, using simple, repetitive stitches that work up surprisingly fast. You’ll learn essential techniques that can be applied to many other crochet projects.
Skill Level: Beginner
This tutorial is ideal if you’re comfortable with the absolute basics of crochet or are eager to learn them. Specifically, you’ll be using:
- Chain (ch): The fundamental starting stitch.
- Slip Stitch (sl st): Used for joining rounds and creating a neat finish.
- Single Crochet (sc): A short, dense stitch that forms a sturdy fabric.
- Half Double Crochet (hdc): A stitch of medium height, offering good coverage.
- Double Crochet (dc): A taller stitch that works up quickly.
- Magic Ring (MR) / Chain-2 Start: For creating a tight, neat center for your coaster without a hole.
- Working in rounds: Crocheting in a continuous spiral or joined circles.
- Fastening off: The technique to secure your yarn and prevent unraveling.
- Weaving in ends: The essential final step for a polished, professional look.
Finished Coaster Dimensions (Approximate):
Using worsted weight yarn and the suggested hook, your finished flower coaster will typically measure about 4-5 inches (10-12.5 cm) in diameter. The exact size can vary slightly based on your chosen yarn brand, your specific hook, and your individual tension (how tightly or loosely you crochet).
Materials You’ll Need:
Having all your supplies ready before you begin will make your crocheting experience much smoother and more enjoyable!
- Yarn: A small amount, approximately 20-30 yards (18-27 meters), of Worsted Weight (Medium #4) Cotton or Cotton Blend Yarn.
- Why Cotton? Cotton yarn is highly recommended for coasters. It’s naturally absorbent, which is perfect for catching condensation from drinks. It’s also durable, withstands heat better than synthetic fibers like acrylic, and creates a firm fabric that won’t stretch out of shape easily. Choose two colors: one for the flower center (e.g., yellow, brown, or white) and a contrasting, brighter color for the petals (e.g., pink, blue, purple, or red).
- Crochet Hook: Size H/5.0mm. This hook size is a good balance for worsted weight yarn, helping you create a solid, protective fabric for your coaster without being too stiff or too open.
- Yarn Needle (also called a Tapestry Needle or Darning Needle): This specialized needle has a blunt tip and a large eye, making it easy to thread yarn through and perfect for seamlessly weaving in your loose yarn tails at the end of your project.
- Scissors: Any sharp pair for cutting your yarn.
Let’s Crochet Your Flower Coaster!
We’ll break this project down into three main sections: starting with the central part of the flower, then building out the petals, and finally adding those all-important finishing touches.
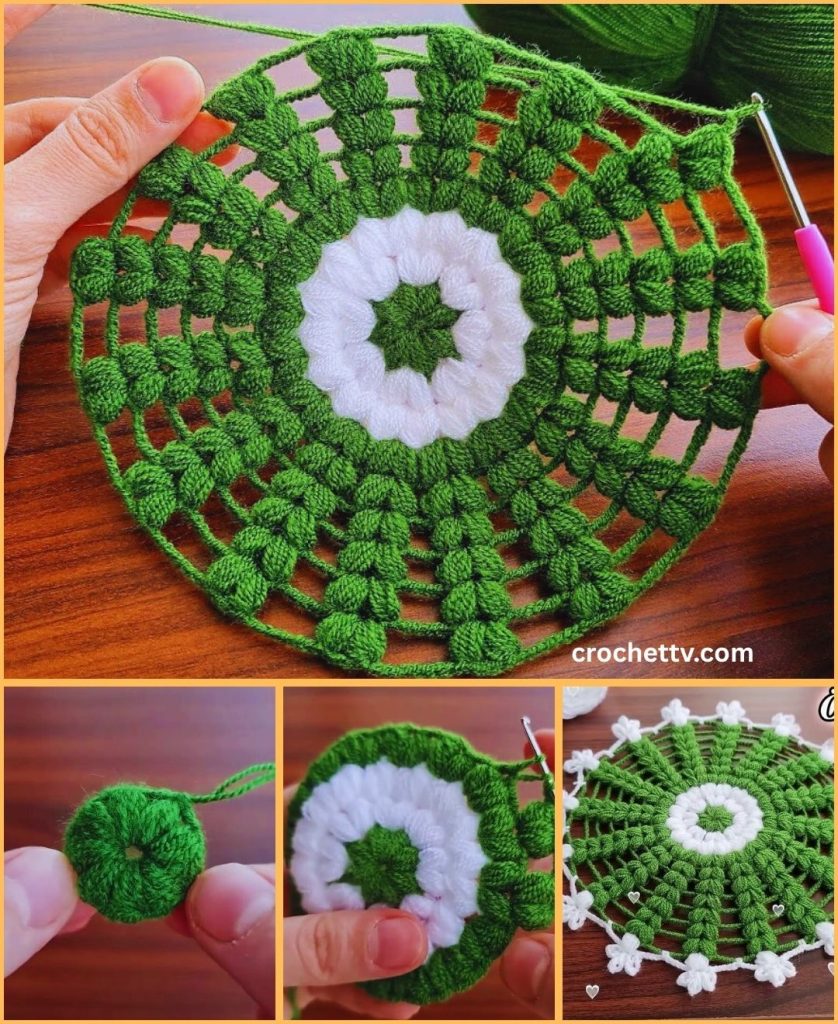
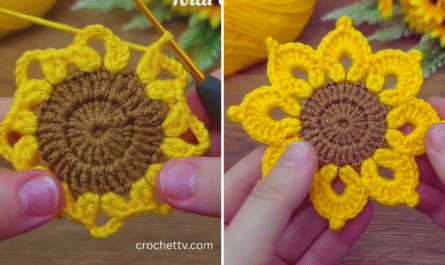
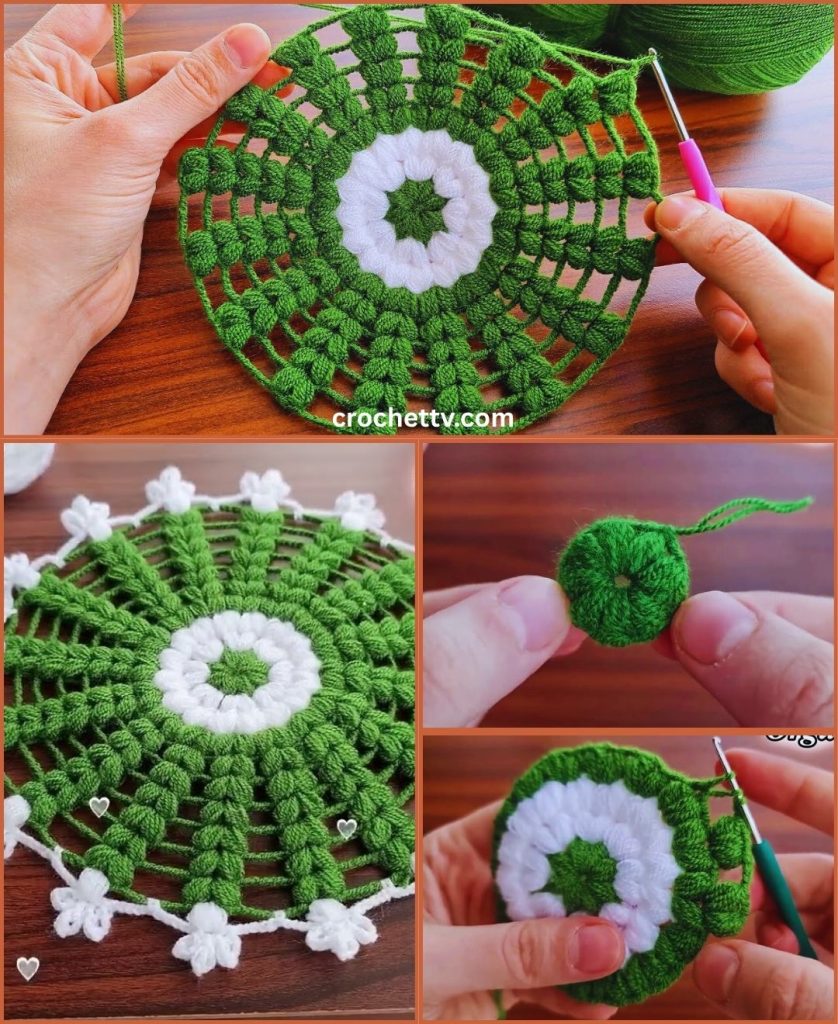
Part 1: The Flower Center (Inner Circle)
You’ll begin by creating a small, solid circle that will form the very middle of your flower coaster. This part is usually crocheted in a contrasting color to the petals.
- Starting Ring (Using Your Center Color Yarn):
- Option A: The Magic Ring (Recommended for a tight center):
- Take your center color yarn (e.g., yellow or brown).
- Wrap the yarn around your non-dominant hand’s fingers (typically index and middle finger) to form a loop. The tail end should be hanging down.
- Insert your crochet hook into the center of this loop.
- Yarn over (wrap the yarn from your working ball around your hook) and pull up a loop.
- Chain 1 (ch 1). This chain doesn’t count as a stitch; it just secures the ring.
- You now have a “magic ring” (or magic circle) ready for your first round of stitches.
- Option B: Chain-2 Start (Good alternative for beginners):
- Make a slip knot with your center color yarn and place it on your hook.
- Chain (ch) 2.
- You will now work all the stitches for Round 1 into the first chain you made (the one furthest from your hook). This forms a small loop to work into.
- Option A: The Magic Ring (Recommended for a tight center):
- Round 1 (Single Crochet into the Ring):
- Work 10 single crochet (sc) stitches into the center of your magic ring (or into the 2nd chain from your hook if using the Chain-2 start).
- To make an
sc: Insert your hook into the ring/chain, yarn over, pull up a loop (you’ll have 2 loops on your hook), yarn over, pull through both loops on your hook.
- To make an
- If you used the Magic Ring method, gently pull the starting tail of the magic ring tight. You’ll see the hole in the center close up, creating a neat, compact circle.
- To finish the round, slip stitch (sl st) into the first single crochet you made.
- To make an
sl st: Insert your hook into the top of the first sc, yarn over, pull up a loop, and pull that same loop directly through the loop already on your hook. This joins the circle neatly.
- To make an
- Fasten off your center color yarn. To do this, cut your yarn, leaving a tail of about 4-6 inches (10-15 cm). Yarn over your hook, pull the cut tail completely through the loop remaining on your hook, and gently tug to tighten the knot. This secures your work.
- Work 10 single crochet (sc) stitches into the center of your magic ring (or into the 2nd chain from your hook if using the Chain-2 start).
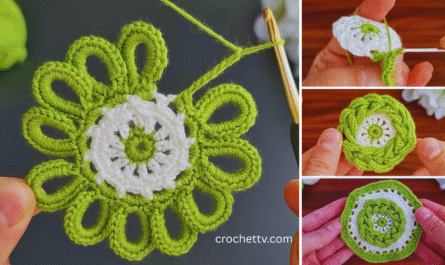
Part 2: The Petals (The Main Flower Shape)
Now, you’ll add the vibrant petals around your central circle. This part uses a combination of stitches to create the distinct petal shape.
- Joining Petal Color Yarn:
- Take your petal color yarn (e.g., pink, blue, etc.).
- Locate any of the 10 single crochet stitches from Round 1 of your center.
- Join your new yarn by inserting your hook into the top of one of these sc stitches, yarn over, and pull up a loop. Then, make a slip stitch (sl st) to secure the new yarn.
- Round 2 (Creating the Petal Clusters):
- Chain 2 (ch 2). This chain 2 acts as the first half double crochet (hdc) of your first petal.
- Work 2 double crochet (dc) stitches into the exact same stitch where you joined and made your ch 2.
- To make a
dc: Yarn over, insert hook into stitch, yarn over, pull up a loop (3 loops on hook), yarn over, pull through 2 loops (2 loops on hook), yarn over, pull through last 2 loops.
- To make a
- Work 1 half double crochet (hdc) into the same stitch where you’ve been working. This completes the first “petal cluster” of stitches.
- To secure this petal and move to the next, slip stitch (sl st) into the next single crochet stitch from Round 1 of the center. This anchors the petal and prepares you for the next one.
- *Now, you’ll repeat the petal cluster for the next petal:
- Chain 2 (ch 2). (Counts as your first hdc).
- Work 2 dc into the same stitch where you just slip stitched.
- Work 1 hdc into the same stitch.
- Slip stitch (sl st) into the next single crochet stitch from Round 1.*
- Repeat the sequence from * to * around the entire circle. You will create a total of 10 distinct petals, as you have 10 single crochet stitches in your center round.
- After your 10th petal is complete (after the final hdc of the cluster), slip stitch (sl st) into the top of the very first Chain 2 (the beginning hdc) of the round to neatly join and close the circle of petals.
- Fasten off your petal color yarn. Cut your yarn, leaving a tail of about 6 inches (15 cm). Yarn over your hook, pull the cut tail completely through the loop remaining on your hook, and gently tug to secure the knot.
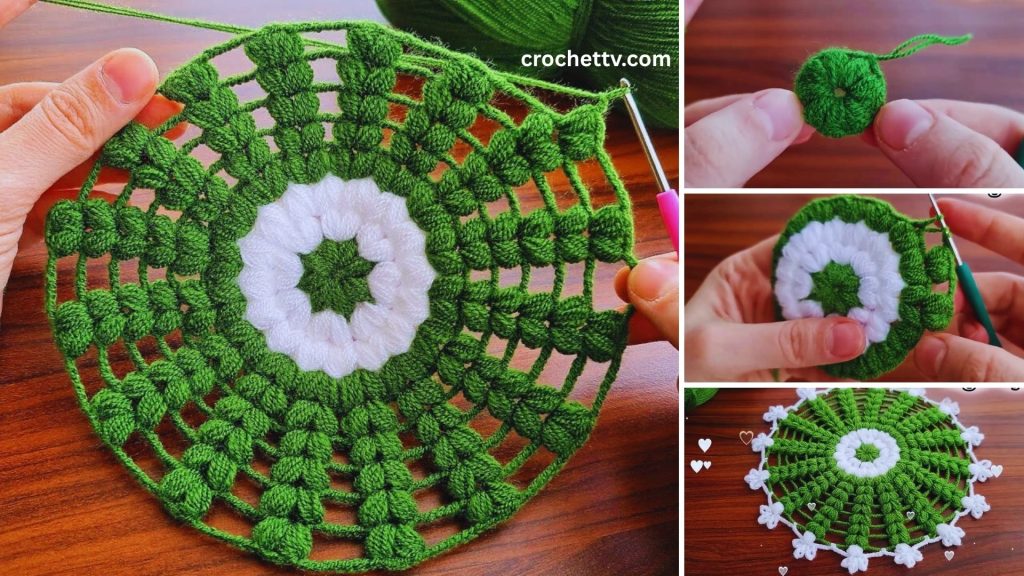
Part 3: Finishing Touches (The Secret to a Professional Look)
This final stage is crucial for making your coaster look polished and preventing it from unraveling.
- Weave in All Ends (Meticulously!):
- You’ll have at least two yarn tails from your color changes (one from the center and one from the petals), plus the magic ring tail if you used that starting method.
- Thread one of your yarn tails onto your yarn needle.
- How to Weave Neatly: Insert the needle into the stitches on the back side of your coaster. Weave the tail into stitches of the same color for at least 1-2 inches (2.5-5 cm), trying to follow the path of existing stitches to make it invisible. To secure it extra well, subtly change direction and weave back through a few stitches in a different direction (e.g., diagonally or perpendicularly) to “lock” the tail in place. Be careful not to pull too tightly, or your fabric might pucker. Once secured, trim any excess yarn close to the fabric, ensuring you don’t accidentally cut any of your actual crocheted stitches.
- Repeat this process for all remaining yarn tails. Taking the time here makes a huge difference in the final appearance and durability of your coaster.
- Blocking (Optional but Highly Recommended):
- Blocking is a simple process that can truly transform your crocheted item, helping it lie perfectly flat, evening out any minor tension inconsistencies, and giving it a more polished, professional appearance. It’s especially useful if your petals curl up slightly.
- Method for Cotton Yarn:
- Gently mist your finished coaster evenly with cool water using a spray bottle until it’s damp, but not soaking wet.
- Place the damp coaster on a flat, clean, and absorbent surface (like a foam blocking mat, a clean towel, or even a cork board).
- Gently stretch and shape the coaster with your fingers into a perfect flower or circular shape. Pay attention to the petals, gently pulling them into place. If you have rust-proof pins, you can use them to pin the points of the petals and the outer edge of the coaster to your blocking surface to hold the shape while it dries.
- Allow the coaster to air dry completely and thoroughly. This might take several hours or even a full day, depending on humidity. Do not move or use the coaster until it’s bone dry.
Congratulations! You’ve successfully crocheted a lovely Flower Coaster! This quick and easy project is a fantastic way to practice your basic crochet skills and create something beautiful and functional for your home or as a thoughtful handmade gift.
Now that you’ve mastered this, what beautiful color combinations will you try for your next set of flower coasters?